My last post was well over a month ago, while we were still traveling overseas. When we arrived home, I spent the first few weeks working on projects that I shared at a Paper Angels team day.
After 10 weeks of traveling, and a long way from my craft room, I was very keen to spend my time creating. It was great to be back in my happy place.

… set up and ready to share.
The next few days of posts will be the projects I created using the Country Woods Suite Collection.

This is such an extensive collection of stamps, dies, Designer Series Paper, embellishments and an embossing folder.
My first few projects were designed to introduce newer crafters to stamping, colouring and some techniques. They were designed to be made using only minimal supplies.
These projects were made using both the Country Birdhouse and Country Flowers Stamp Sets. Because they are both photopolymer stamp sets, stamping the images is a little easier to place images where they are wanted.

Along with the stamp sets, I used the Tuxedo Black Memento ink pad and Basic White Notecards and Envelopes. I added a pack of Watercolour Pencils, a Blending Pen, Paper Snips, Multipurpose Glue and Masking Paper to the table.

The first card used direct to card stamping. The birdhouse and sentiment were stamped before using some of the Watercolour Pencils to add colour. The Blender Pen smooths out the pencil colouring.
I stamped the bird on a scrap of Basic White cardstock and then coloured it. The bird was then fussy cut – using a ‘new’, sharp pair of snips is easy enough and does not require a Mini Stampin’ Cut & Emboss Machine.

Seven birds were stamped, coloured and fussy cut. I used Grid Paper to help me align the three rows of birds evenly across the front of the card.
The sentiment was stamped directly onto the card front.
Extra birds were prepared for the inside of the card and the back of the envelope.

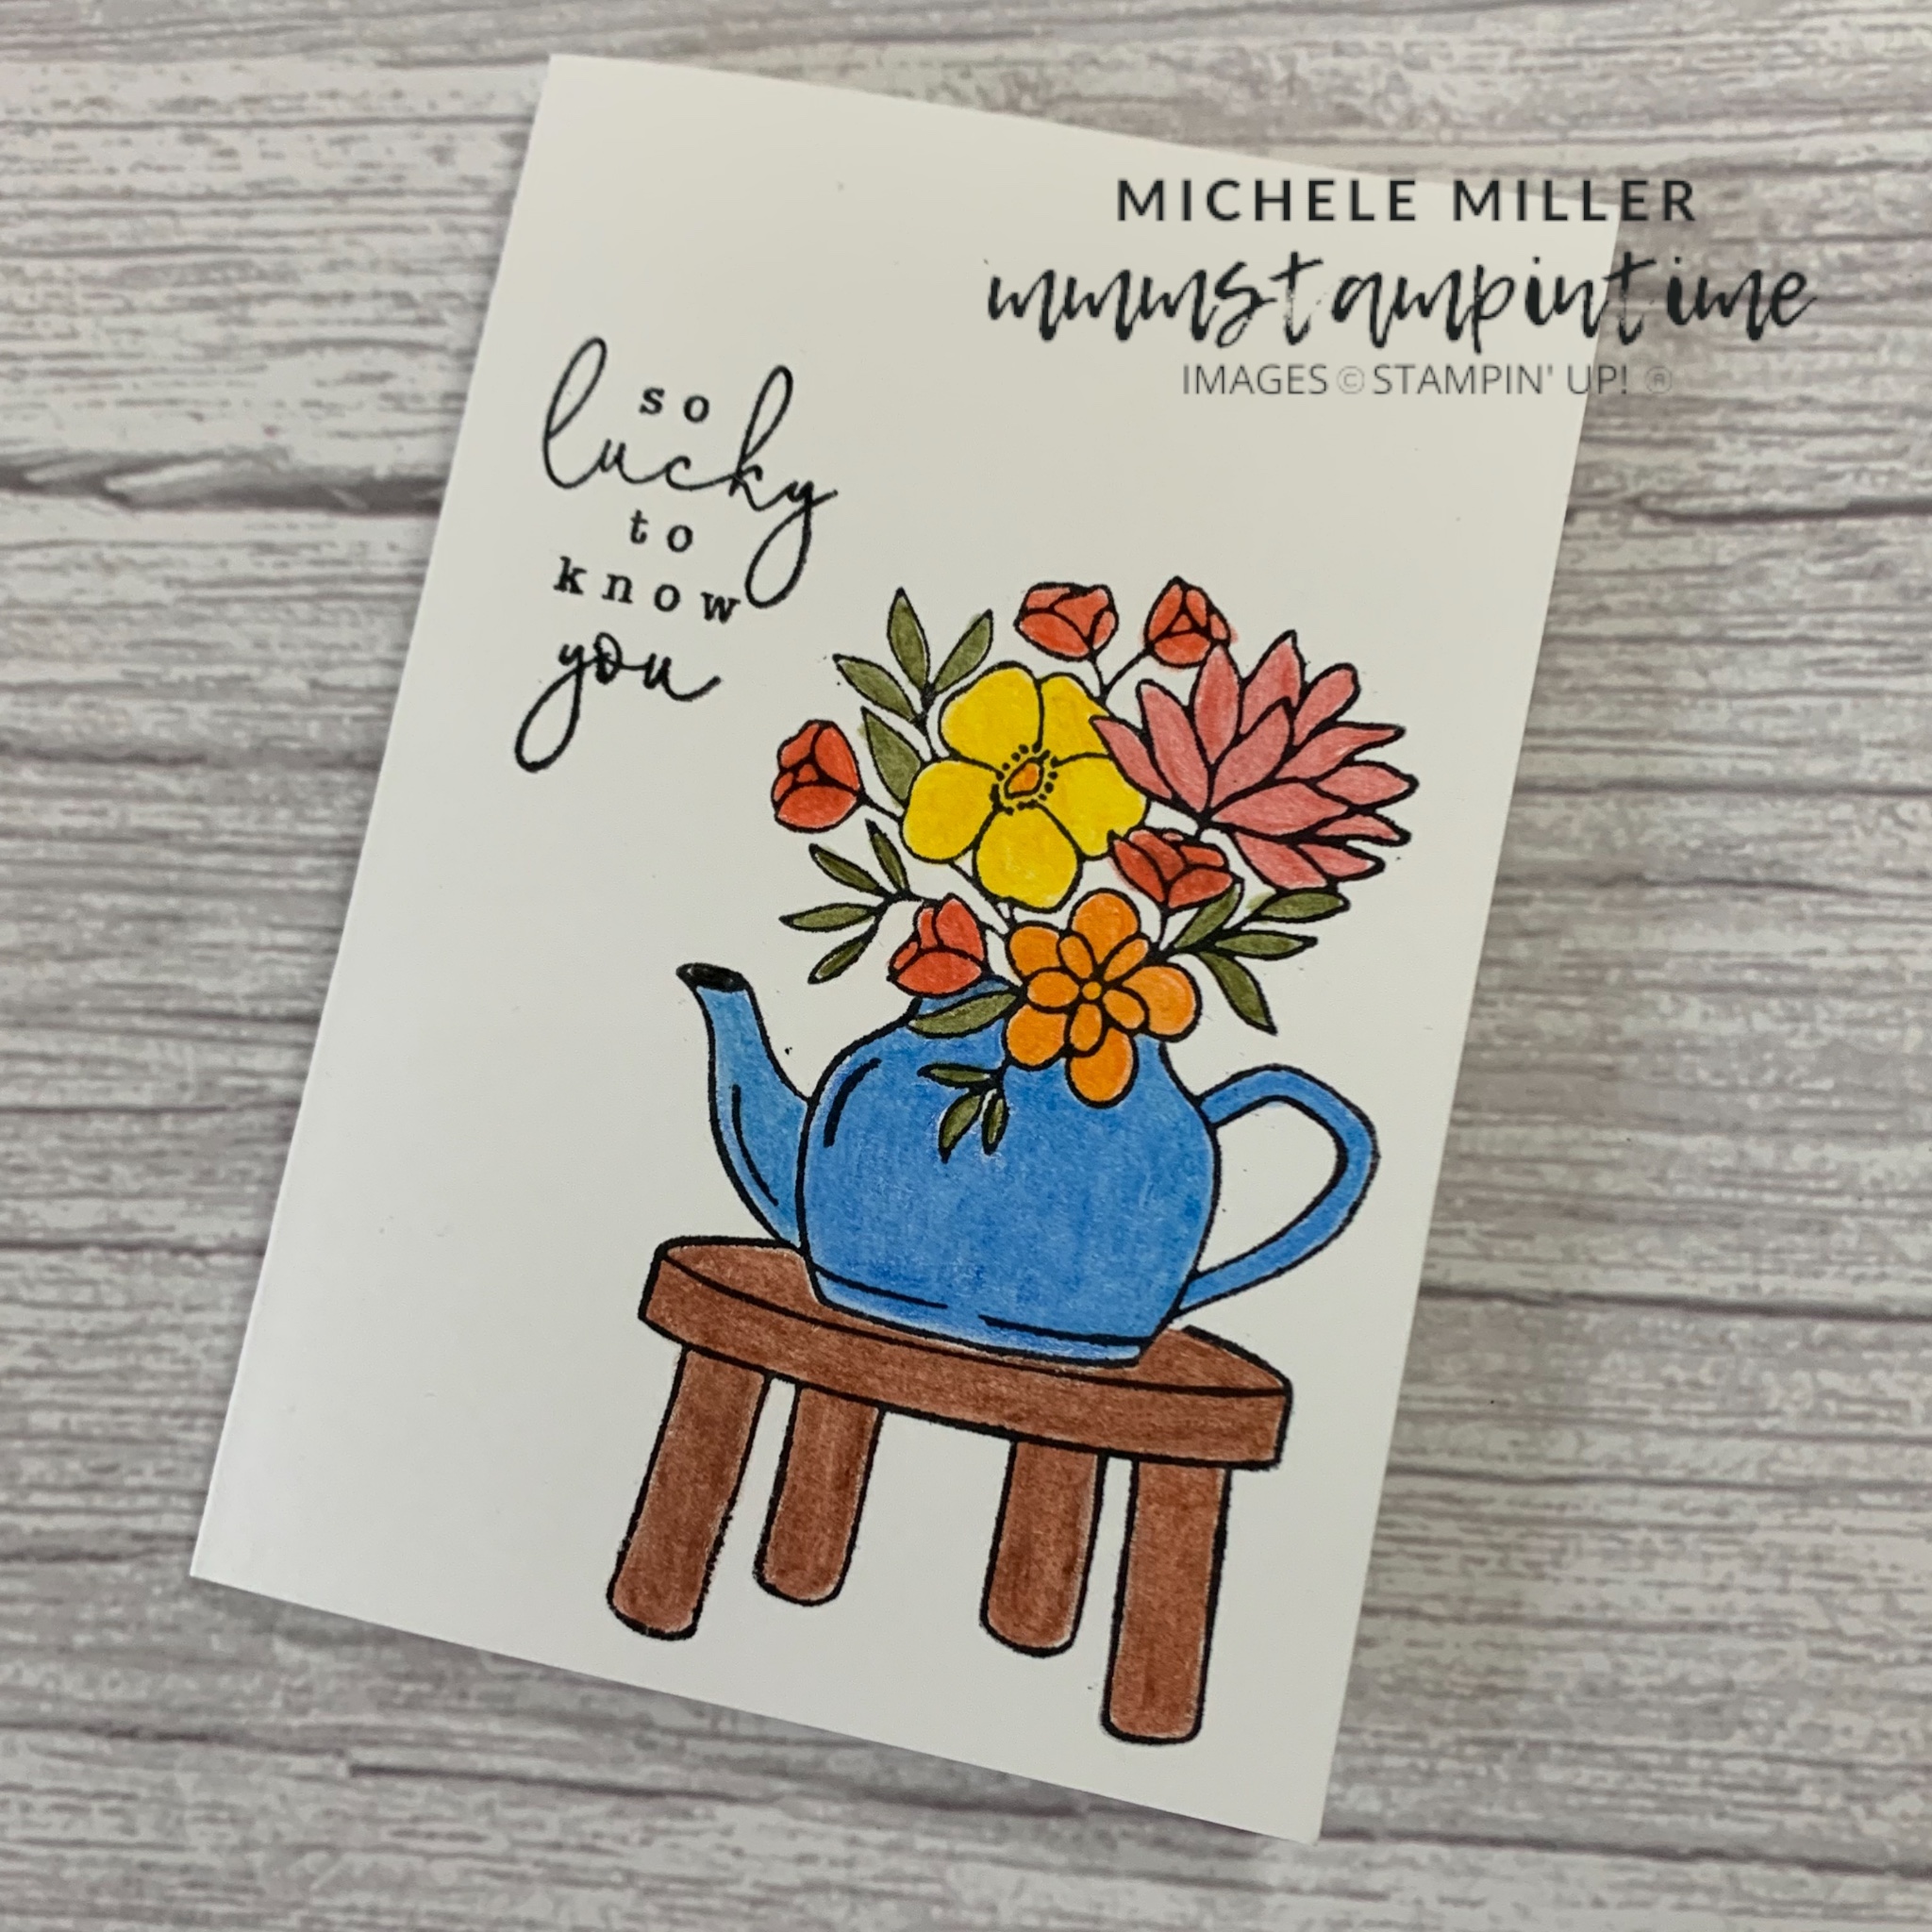
For this card, I stamped the teapot image on the card front. The same image was stamped onto a piece of masking paper. After peeling away the backing, the image was covered with the masking paper. Then I was able to stamp both the stool and flowers images.
After removing the masking paper, the images were coloured.

Again, the sentiment was stamped directly on the front of the card.

The back of the envelope was also stamped and coloured.
Tomorrow I will start to share the projects made using cardstock and more products from the suite collection.
Until then, happy stamping.

If you live in Australia, you can order any of the products I used to make this card by going to my online store. Just click on any of the images below.

 |  |  | ||
 |  |  |  |
")
")


