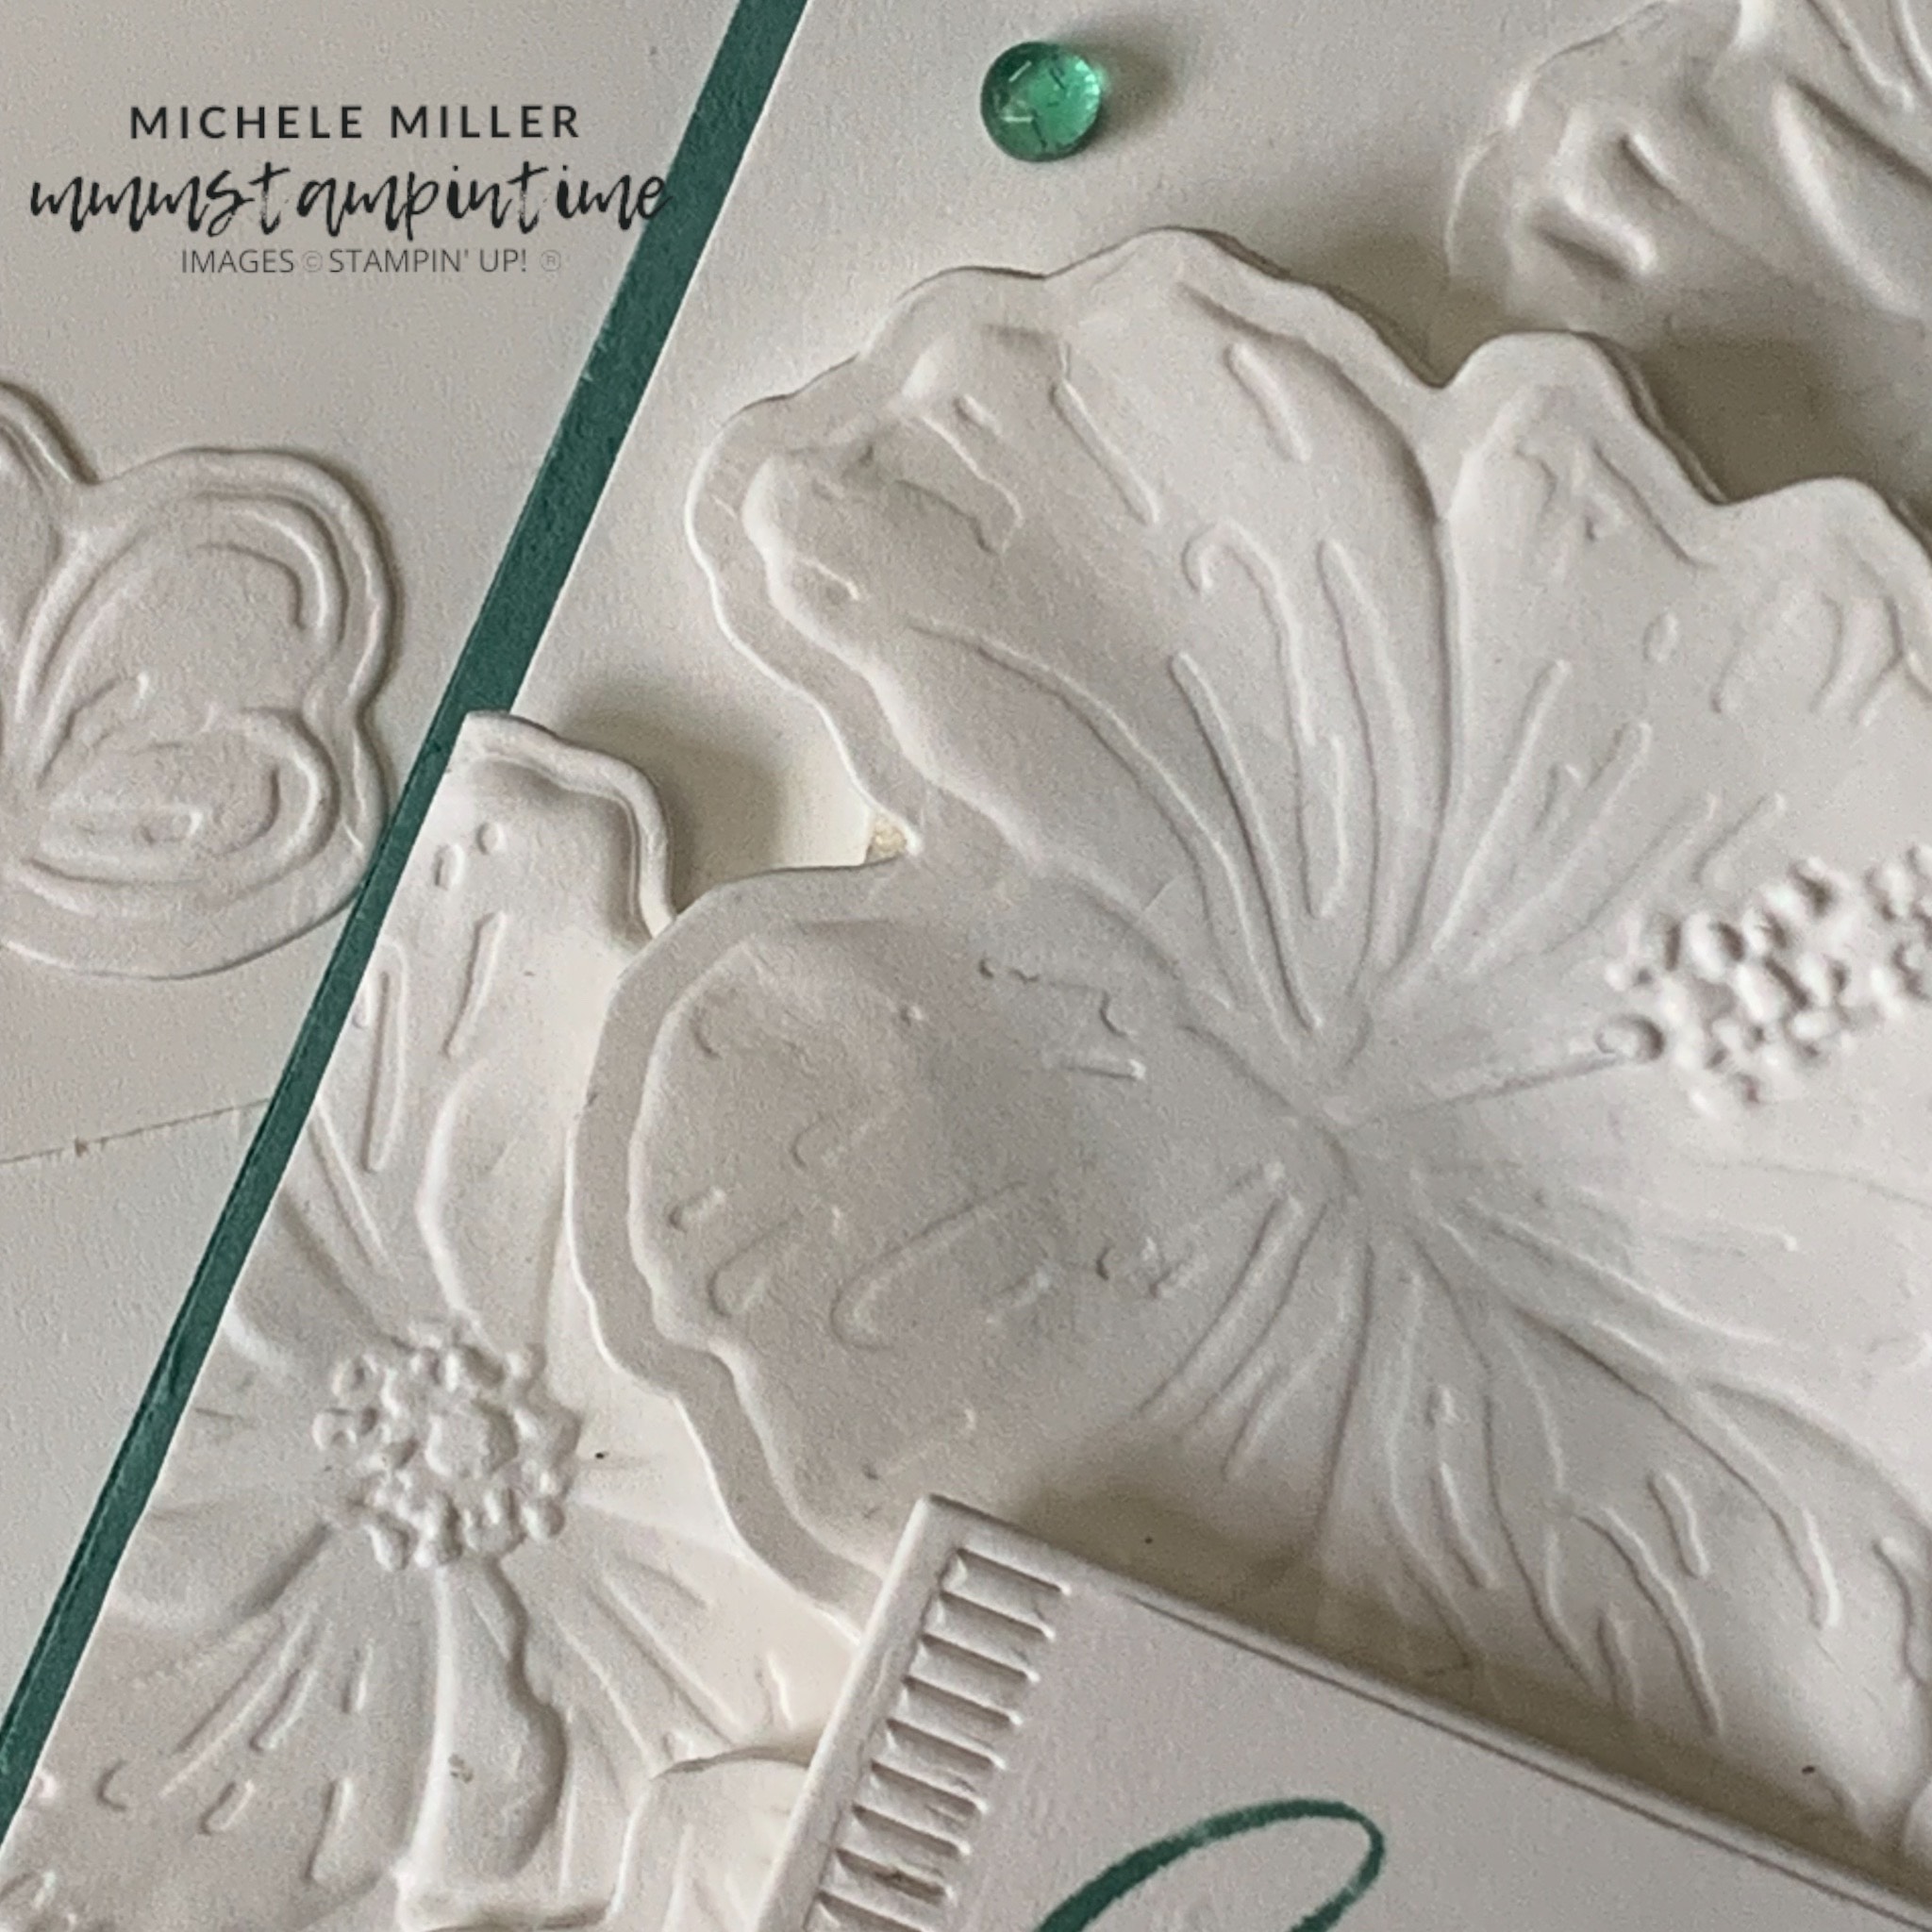
When I first used the Happy Hibiscus Hybrid Embossing Folder I knew that I wanted to create a white on white card.
I started with a Lost Lagoon cardbase and then added a trio of score lines down and across a thick white panel.
The card insert was also scored in the same way.

Then I wrapped two lengths of Lost Lagoon Soft Cording around the bottom section of the card.
After embossing and cutting out the hibiscus flowers I overlapped and layered them across the front of the card, using Stampin’ Dimensionals.

The greeting was stamped and die cut before adding it to the card.
To finish the card, I added a bow and some Lost Lagoon gems from the Tinsel Gems 3 Pack.
I added one of the small white embossed and cut flowers to the back of the envelope.

Tomorrow I will have a 3D project to share with you.
Until then, happy stamping.

If you live in Australia, you can order any of the products I used to make this card by going to my online store. Just click on any of the images below.

") |  |  | ||
 |  |  |  |  |
 |  |  |  |  |
")


