Posted on Leave a comment

LOVE, SANTA TAG KIT – MORE ALTERNATIVE PROJECTS

I had so much fun making the easel cards I shared with you yesterday. Today I have three more projects to show you – two cards and a gift bag/box.

These projects all started after I made the four Christmas gift tags designed for the Love Santa Tag Kit. I wanted to create alternative projects to show you what is possible.

The last card I shared yesterday was an easel card with Santa and a pile of gifts. I commented that I had trimmed the gift boxes from the top of the taxi tag. This is how I used the remaining taxi. The yellow taxis remind me of New York.

This Night of Navy gatefold card is a great background for the Christmas tree carrying yello taxi.

The tree has been fussy cut from a piece of Gingerbread & Peppermint 6″x 6″ Designer Series Paper. I placed the tree on top of the taxi then added the stamped panels and red strip.

The scalloped rectangles are cut using two of the Stitched So Sweetly Dies. These elements were layered together and attached the left half od the card front. TIP: If you use your bone folder and burnish the left hand fold very firmly that side will sit flat.

The gift box image was stamped on the card insert and envelope.

I thought the Red Rhinestone Basic Jewels was the perfect way to finish this card.

For this card I took a Basic White card base and teamed it with a panel of Polished Pink paper from the Whimsy &Wonder 12″x 12″ Specialty Designer Series Paper. Before attaching it to the card base I wrapped a length of the Basic White and Polished Pink Baker’s Twine around the DSP and tied a bow.

By adding Stampin’ Dimensionals I was able to lift the Christmas tree up adding height to the card.

The greeting is from the Tidings & Trimmings Stamp Set and was stamped using Polished Pink ink. I trimmed the stamped greeting down to this small rectangle.

A second greeting was stamped on the inside of the card and a gift box stamped on the envelope.

What is the last thing I usually comment on? You guessed it – I added some embellishments to the card to finish it off. These gems are supplied in the Love, Santa Tag Kit.

For this 3D project I used the last two tag shapes.

I created the Bumblebee box base to attach the two tag to each of the 3″ sides.

On this side I attached one of branches from the kit.

I stamped the greeting using the Love, Santa Stamp Set using the Night of Navy ink spot that is supplied in the kit, as well as Poppy Parade from my own Classic Stampin’ Pad collection. It was cut out using one the Tailor Made Tags Dies and tied it to gift box using a length of Bumble Gingham Ribbon.

With one Santa remaining it seemed a perfect way to finish off this Christmas gift box.

Another product that is available with the Tag Kit are the Love, Santa Treat Bags. There are four designs in this collection of food safe treat bags. I chose the one with the leaves that match this kit. When the bag is filled with Christmas treats it can also be tied using the same Bumblebee ribbon.

One tag kit – so many possibilities – tags, cards, gift bags/boxes and even scrapbooking is possible. You are only limited by your imagination.

Until next time, happy stamping.

If you live in Australia, you can order any of the products I used to make this card by going to my online store. Just click on any of the images below.

Product List
Paper Snips
[103579]
$17.00
Posted on Leave a comment

DELIVERING CHRISTMAS CHEER

Hello and welcome to another project I want to share with you.

I made this card during my Facebook Live yesterday. Here is the link – https://www.facebook.com/mmmstampintime/videos/2599057596906237

It is another curtain fold card featuring the Delivering Cheer Stamp Set and Whimsy & Wonder 12″x 12″ Designer Series Paper.

I started by cutting, scoring and folding the DSP layer. Some Multipurpose Glue was used to glue the top end of the folds in place. As soon as it was dry I attached it to the front of the Polished Pink card base.

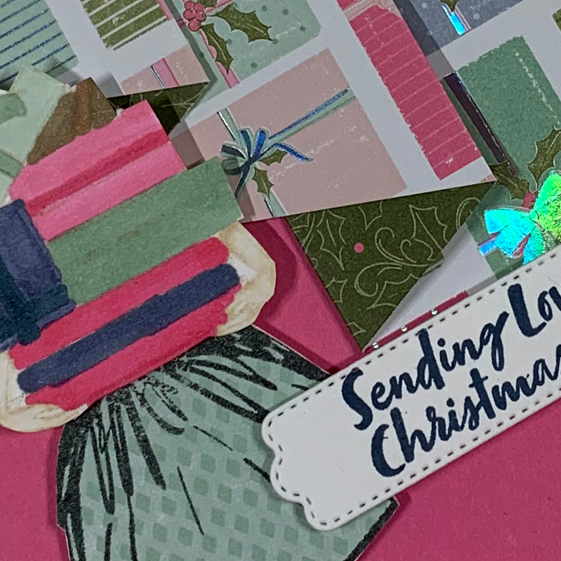
Then I stamped the skirt and legs image twice. For one of them I used Crumb Cake ink and stamped off twice before stamping on to a piece of Basic White card. The second was stamped, in Memento Tuxedo Black, on to a piece of the Soft Succulent DSP.

The gift boxes and arms were stamped, using Crumb Cake ink, that had been stamped off twice. I used Stampin’ Blends to colour the boxes. For the legs and arms I used the Ivory Stampin’ Blend and then used the Colour Lifter to lighten the colour slightly.

The greeting is from the Delivering Cheer Stamp Set and was cut using one of the Pretty Pillow Box Dies.

I stamped the gift boxes images on the card insert and envelope. The final step was to colour some Clear poxy Essentials using Stampin’ Blends.

As you can see, I used quite a few of the Stampin’ Blends colours for this card.

Until next time, happy stamping.

If you live in Australia, you can order any of the products I used to make this card by going to my online store. Just click on any of the images below.

Product List
Paper Snips
[103579]
$17.00
Posted on Leave a comment

OOPS … I MISSED A DAY!

Hello and welcome to today’s post. I am delighted that you’re here.

I missed posting yesterday because I spent the day crafting with the Paper Angels team. Although I am not a member of the team, I have been invited to their events for the last 18 months. It is such a fun and creative day.

I made two swaps to share and received many swaps in return.

The first is one that I shared on my blog a little while ago. I thought this would be a great card to make to share in a swap.

The second swap I made was a 3D project. I was out doing grocery shopping when I found 3D cupcake gummies in the confectionery aisle and I knew they would be perfect to pop inside the Mini Jam Jars.

No photo description available.

The cupcake from the Sweets & Treats Stamp Set was perfect for the lid of the jar. I stamped, coloured and cut the cupcake label using the Layering Circles Dies. I also used one of the scalloped circles from the set to cut a Bermuda Bay layer.

I wrapped a Bermuda Bay belly band around the jar and then added another label with the stamped sentiment.

I used Stampin’ Blends to colour some Clear Epoxy Essentials. The cupcake was also painted with Clear Wink of Stella.

May be an image of 6 people, including Peta Armstrong and Michele Miller and jewelry

Here I am with the amazing ladies I crafted with Peta, Caroline, me, Jenny, Danielle and Nicole (left to right).

As you can see, there was also an amzing display of projects shared by five team members.

One of things we do for the event is to make a name tag that reflects the training day theme – Treat Yourself/Gingerbread & Peppermint.

No photo description available.

To Bec, Anna and Liz – thank you for inviting me and allowing me to be an adoptee of your teams. It was an amazing day and I met such amazing ladies.

Until next time, happy stamping.