After a busy year, Rob and I are about to travel to Tasmania for a wonderful holiday before heading to Noosa for a family Christmas. So I have decided to take a break during December to enjoy travel, family and a milestone birthday.
One of the activities we are looking forward to is a Gordon River Cruise to see this World Heritage listed wilderness.
I will share our adventures and discoveries on Facebook but will rest my blog during December.
There are many exciting things planned for 2022 and I look forward to sharing them with you very soon.
Wishing you and your family a festive holiday season.
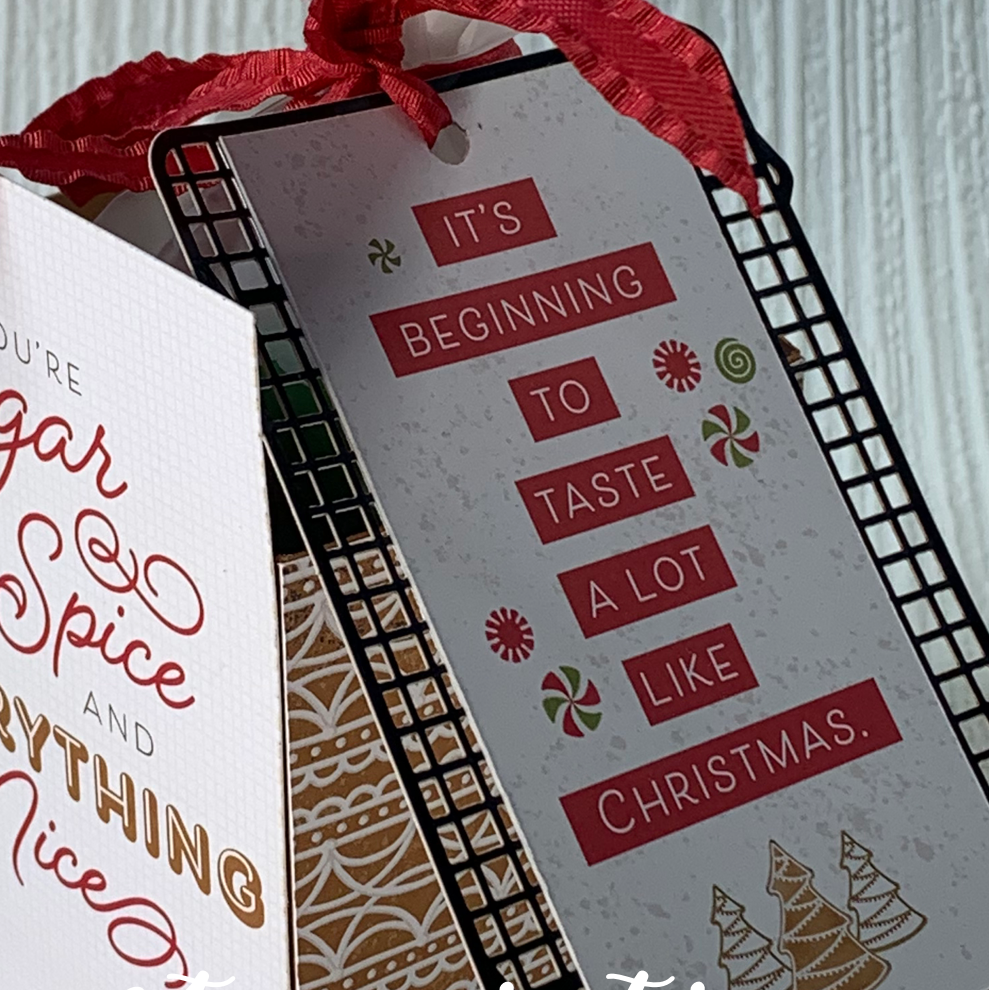
During my Facebook Live yesterday I made a gift box using the Gingerbread & Peppermint emories & More Card Pack.
I have been looking for some Christmas gingerbreads over the past couple of weeks and found a container of white and green iced gingerbread Christmas trees on Wednesday – perfect timing for my Thursday Facebook Live.
I started by making a 3″x 2-1/2″ box base using Cinnamon Cider card stock. Then I adhered the 4″x 3″ “Sugar and Spice” Memories & More card to the front.
The other three sides of the box were covered with the same iced gingerbread looking panels that were trimmed down to fit each side.
The gift tag was made by trimming down the “It’s beginning to taste a lot like Christmas” card to 3-3/4″x 2″. A piece of Basic White card stock was cut down to the same size and was stamped with the “to” and “from” from the Delivering Cheer Stamp Set.
These two pieces were then glued on either side of the black cooling rack. I punched a small hole in the top so that it could have the Real Red ribbon threaded through it.
I used tongs to transfer some of the gingerbread Christmas trees into one of the food safe Love, Santa Treat Bags. The bag was tied off with a length of Real Red Mini Ruffled Ribbon.
The Treat Bags have four designs – Christmas trees, spots, plaid and leaves. The Christmas tree bag was perfect for this project.
There are 12 bags in each package – three each of the four designs.
Oops – I used Real Red not Poppy Parade ink!
The Gingerbread & Pepperming Memoreis & More Cards have so many great inclusions. I absolutley love the cooling racks, oven gloves and spatulas. They are so cute.
I have enough gingerbread trees left to make a couple more gift boxes. These will make a great Christmas gift for teachers or neighbours or … What do you think? Who would you give this to?
Until next time, happy stamping.
If you live in Australia, you can order any of the products I used to make this card by going to my online store. Just click on any of the images below.
My youngest daughter asked me to make a card for her partner. He will be celebrating his 30th birthday on October 30. The celebration will be an Oktoberfest costume themed event.
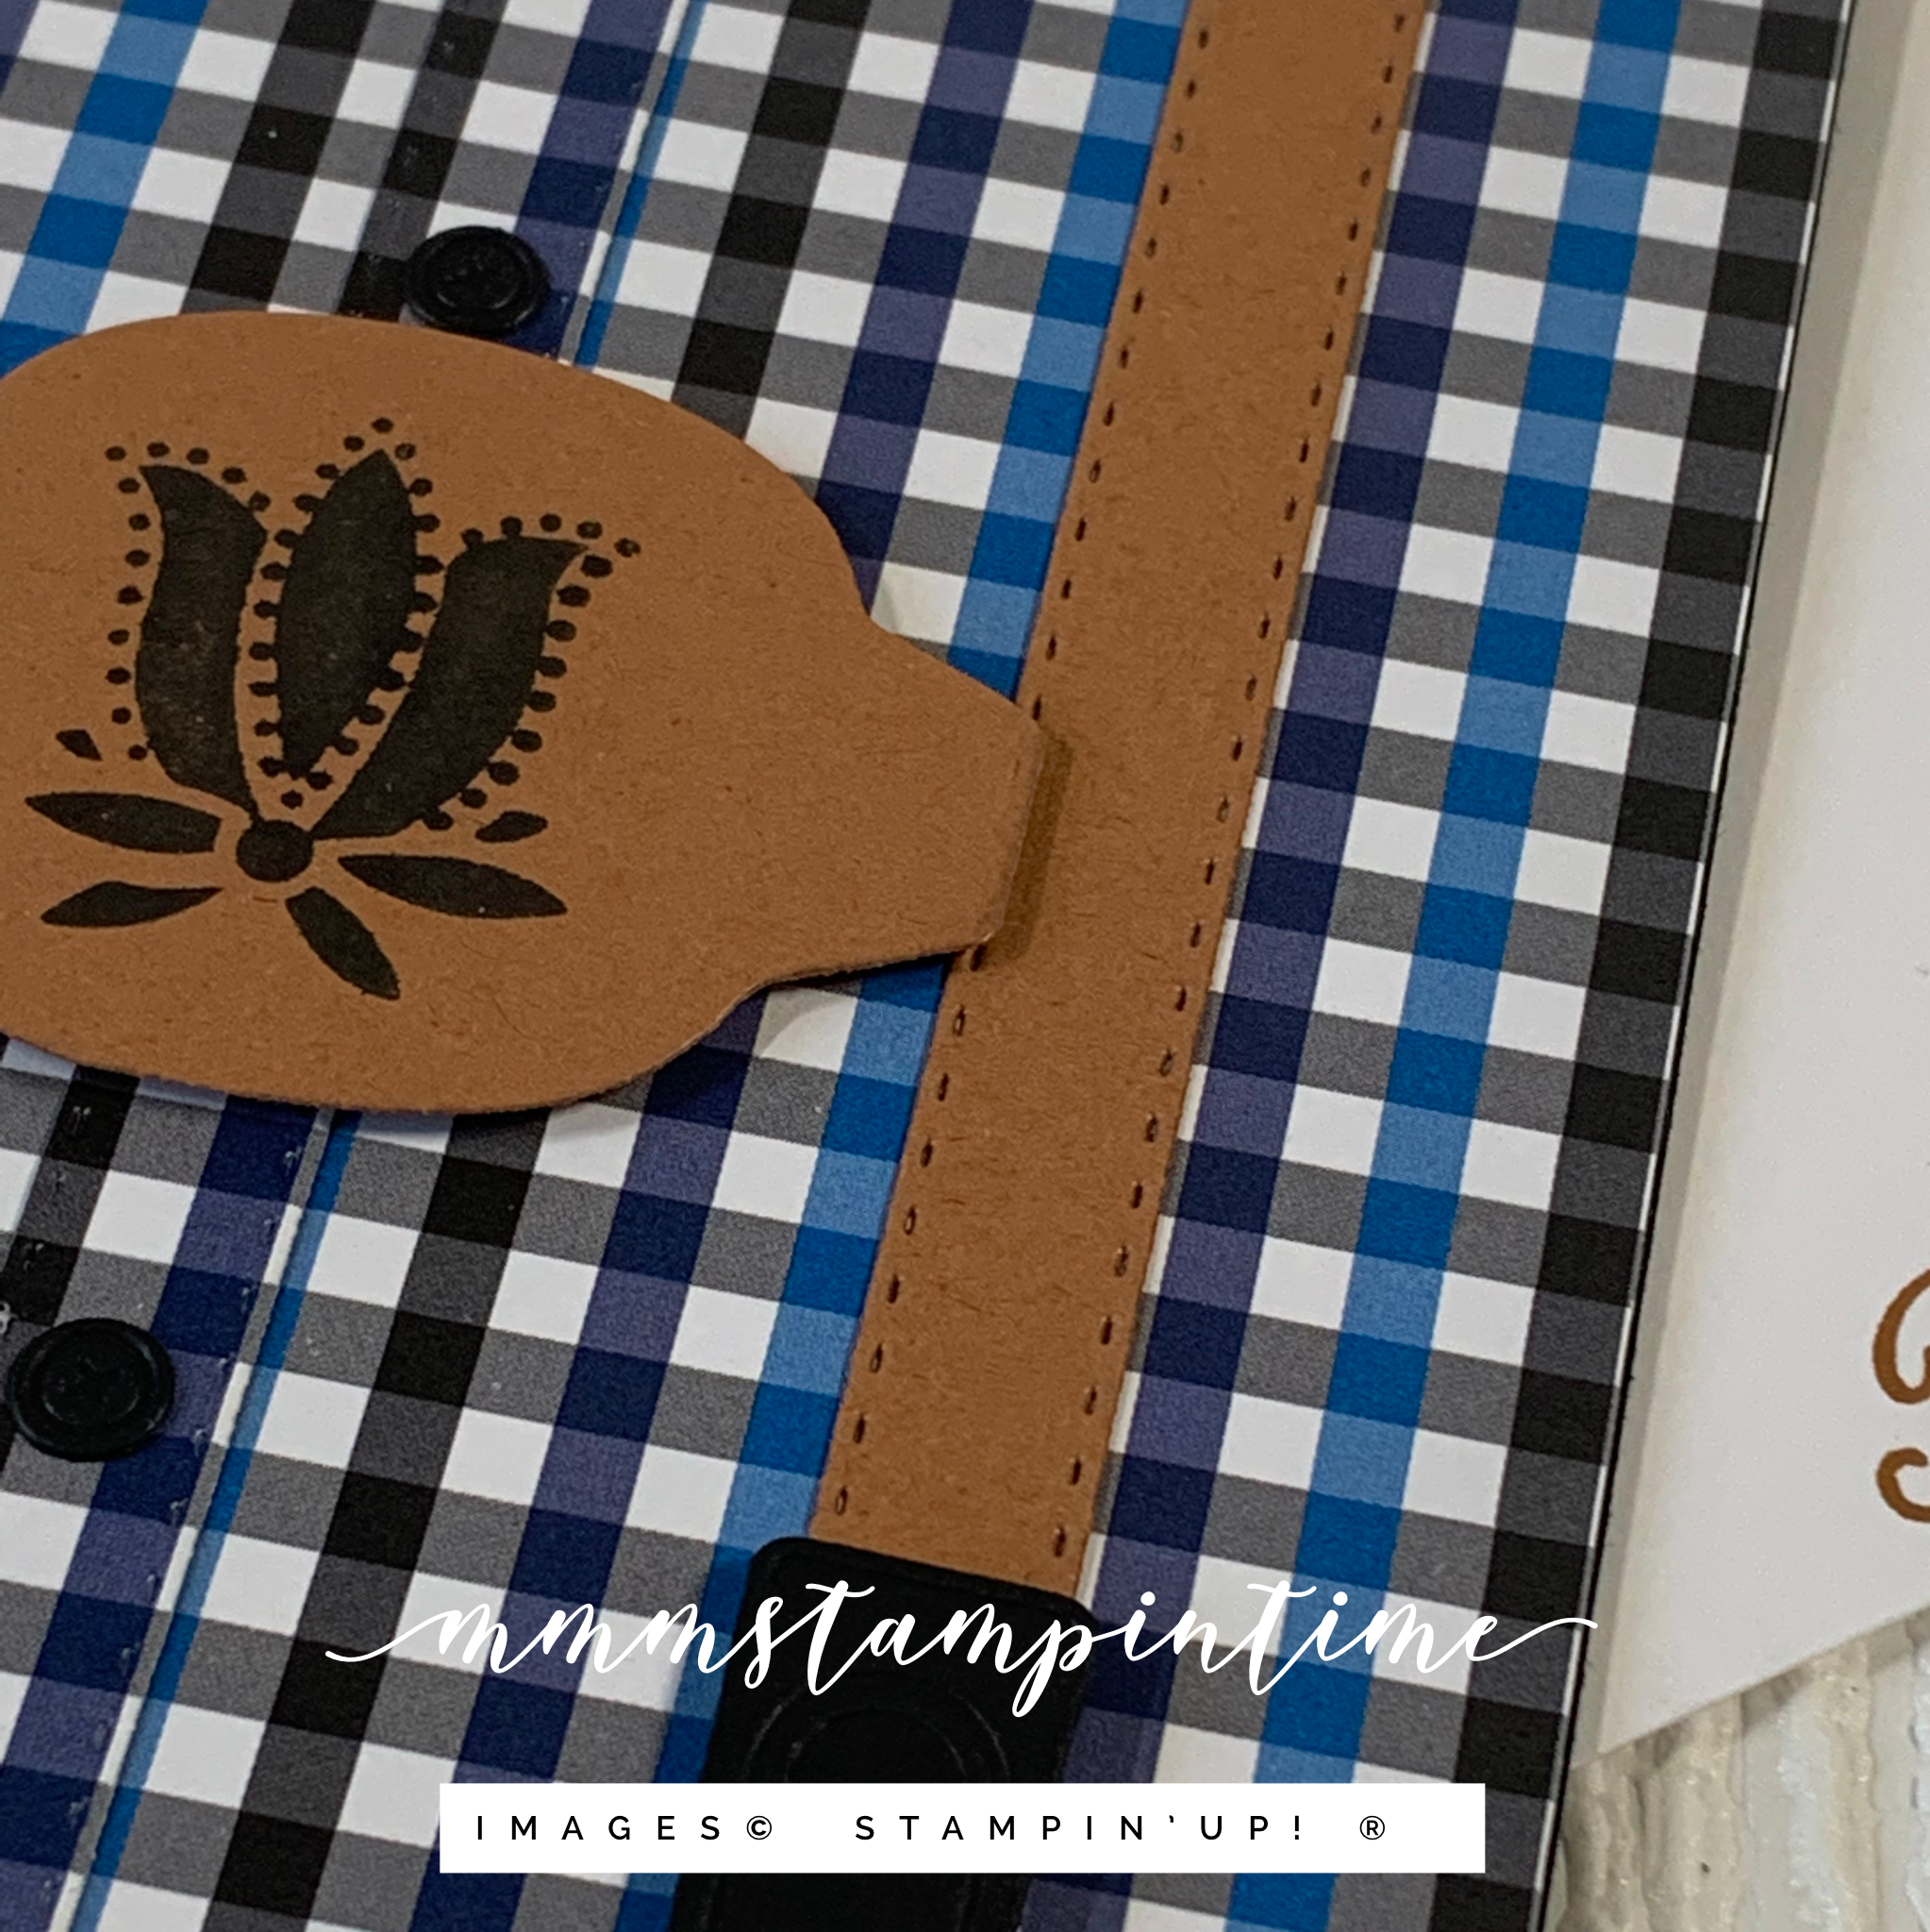
For this request I knew that I wanted to make a lederhosen inspired card. The Suit & Ties Dies would be perfect.
Althought the Well Suited Designer Series Paper is retired, I chose one design to use for the ‘shirt’.
The ‘shirt’ was so easy to create. I cut a piece of the DSP and trimmed away a triangle at the centre top to accommodate the collar.The collar had Stampin’ Dimensionals placed on the underside so that it would sit up from the ‘shirt front’. I also popped a small piece of Basic White card behind the triangle.
I small strip of the same DSP was cut using one of the Suit & Ties Dies and glued down the centre to appear to be the placket for buttonholes and buttons. The buttons were die cut from Basic Black card that has Adhesive Sheet attached.
For the lederhosen suspenders and front panel, I thought Cinnamon Cider card would be the perfect colour. The suspenders were cut using the same die I used for the placket.
The suspender buckles were also cut using the Suit & Ties Dies.
I created the centre panel of the lederhosen suspenders using the Seasonal Layers Dies. This piece was then recut to make the shape smaller and more authentic looking.
An image from the Batik Boutique Stamp Set was used to add the floral flourish to the centre panel. It was stamped in Tuxedo BLack Memento ink.
Inside the card, I stamped a birthday greeting on the insert and also created a calendar panel to mark the date of his birthday – turning 30 on the 30th.
I sent photos of the card to my daughter and she is very happy with what I have made for her. And I am very pleased with the end result.
Although, I must confess, I’m reallt sure that I want to go in costume.
Until next time, happy stamping.
If you live in Australia, you can order any of the products I used to make this card by going to my online store. Just click on any of the images below.
Please contact me if there is anything Stampin' Up!® that I can help you with ... leave a comment on my page, send me an email [mmmstampintime@gmail.com] or phone me on 0419727836.
Looking forward to hearing from you!


 Mini Ruffled Ribbon")


")

 Designer Series Paper")


