Posted on Leave a comment

WHAT’S NEW on WEDNESDAY

Today I want to share the latest that’s happening from Stampin’ Up!© and me.

The 2022 January to June Mini Catalogue is now LIVE! I have linked an online PDF version of this catalogue on the sidebar for you to have a peek at. It is filled with amazing new products.

Here is where to shop this month – https://www.stampinup.com.au?hostcode=F2BUZNVA

That also means it is time for Sale-a-bration. From January 4 to February 28, you can earn free products from the Sale-a-bration brochure with each $90 spent.

And, that is not all that is on offer. If you join during the two months of Sale-a-bration, you can also choose two additional, current stamp sets.If you live in Australia, I look forward to talking to you about the benefits of joining Stampin’ Up! and my team.

I want to share some new product videos, created by Stampin’ Up!, to inspire you. Simply click on the images to see the video.

FLOWERING FIELDS

NEW HORIZONS

HEART & HOME

For my NEW project today I am going to use a pair of new 3D Embossing Folders with the Sweet Talk Suite products I have featuring this week.

STRIPES & SPLATTERS 3D EMBOSSING FOLDERS
SWEET CONVERSATIONS BUNDLE (ENGLISH)
SWEET CONVERSATION BUNDLE
SWEET TALK 12" X 12" (30.5 X 30.5 CM) DESIGNER SERIES PAPER
SWEET TALK 12″x 12″ DESIGNER SERIES PAPER

After preparing the Highland Heather cardbase, I adhered a piece of the striped DSP along its righthand side. As I did this, I positioned the hearts that were cut from the DSP and Granny Apple Green cardstock using the Sweet Hearts Dies.

I really like the DSP with the smaller candy hearts. It is perfect for die cutting the heart shapes for this card.

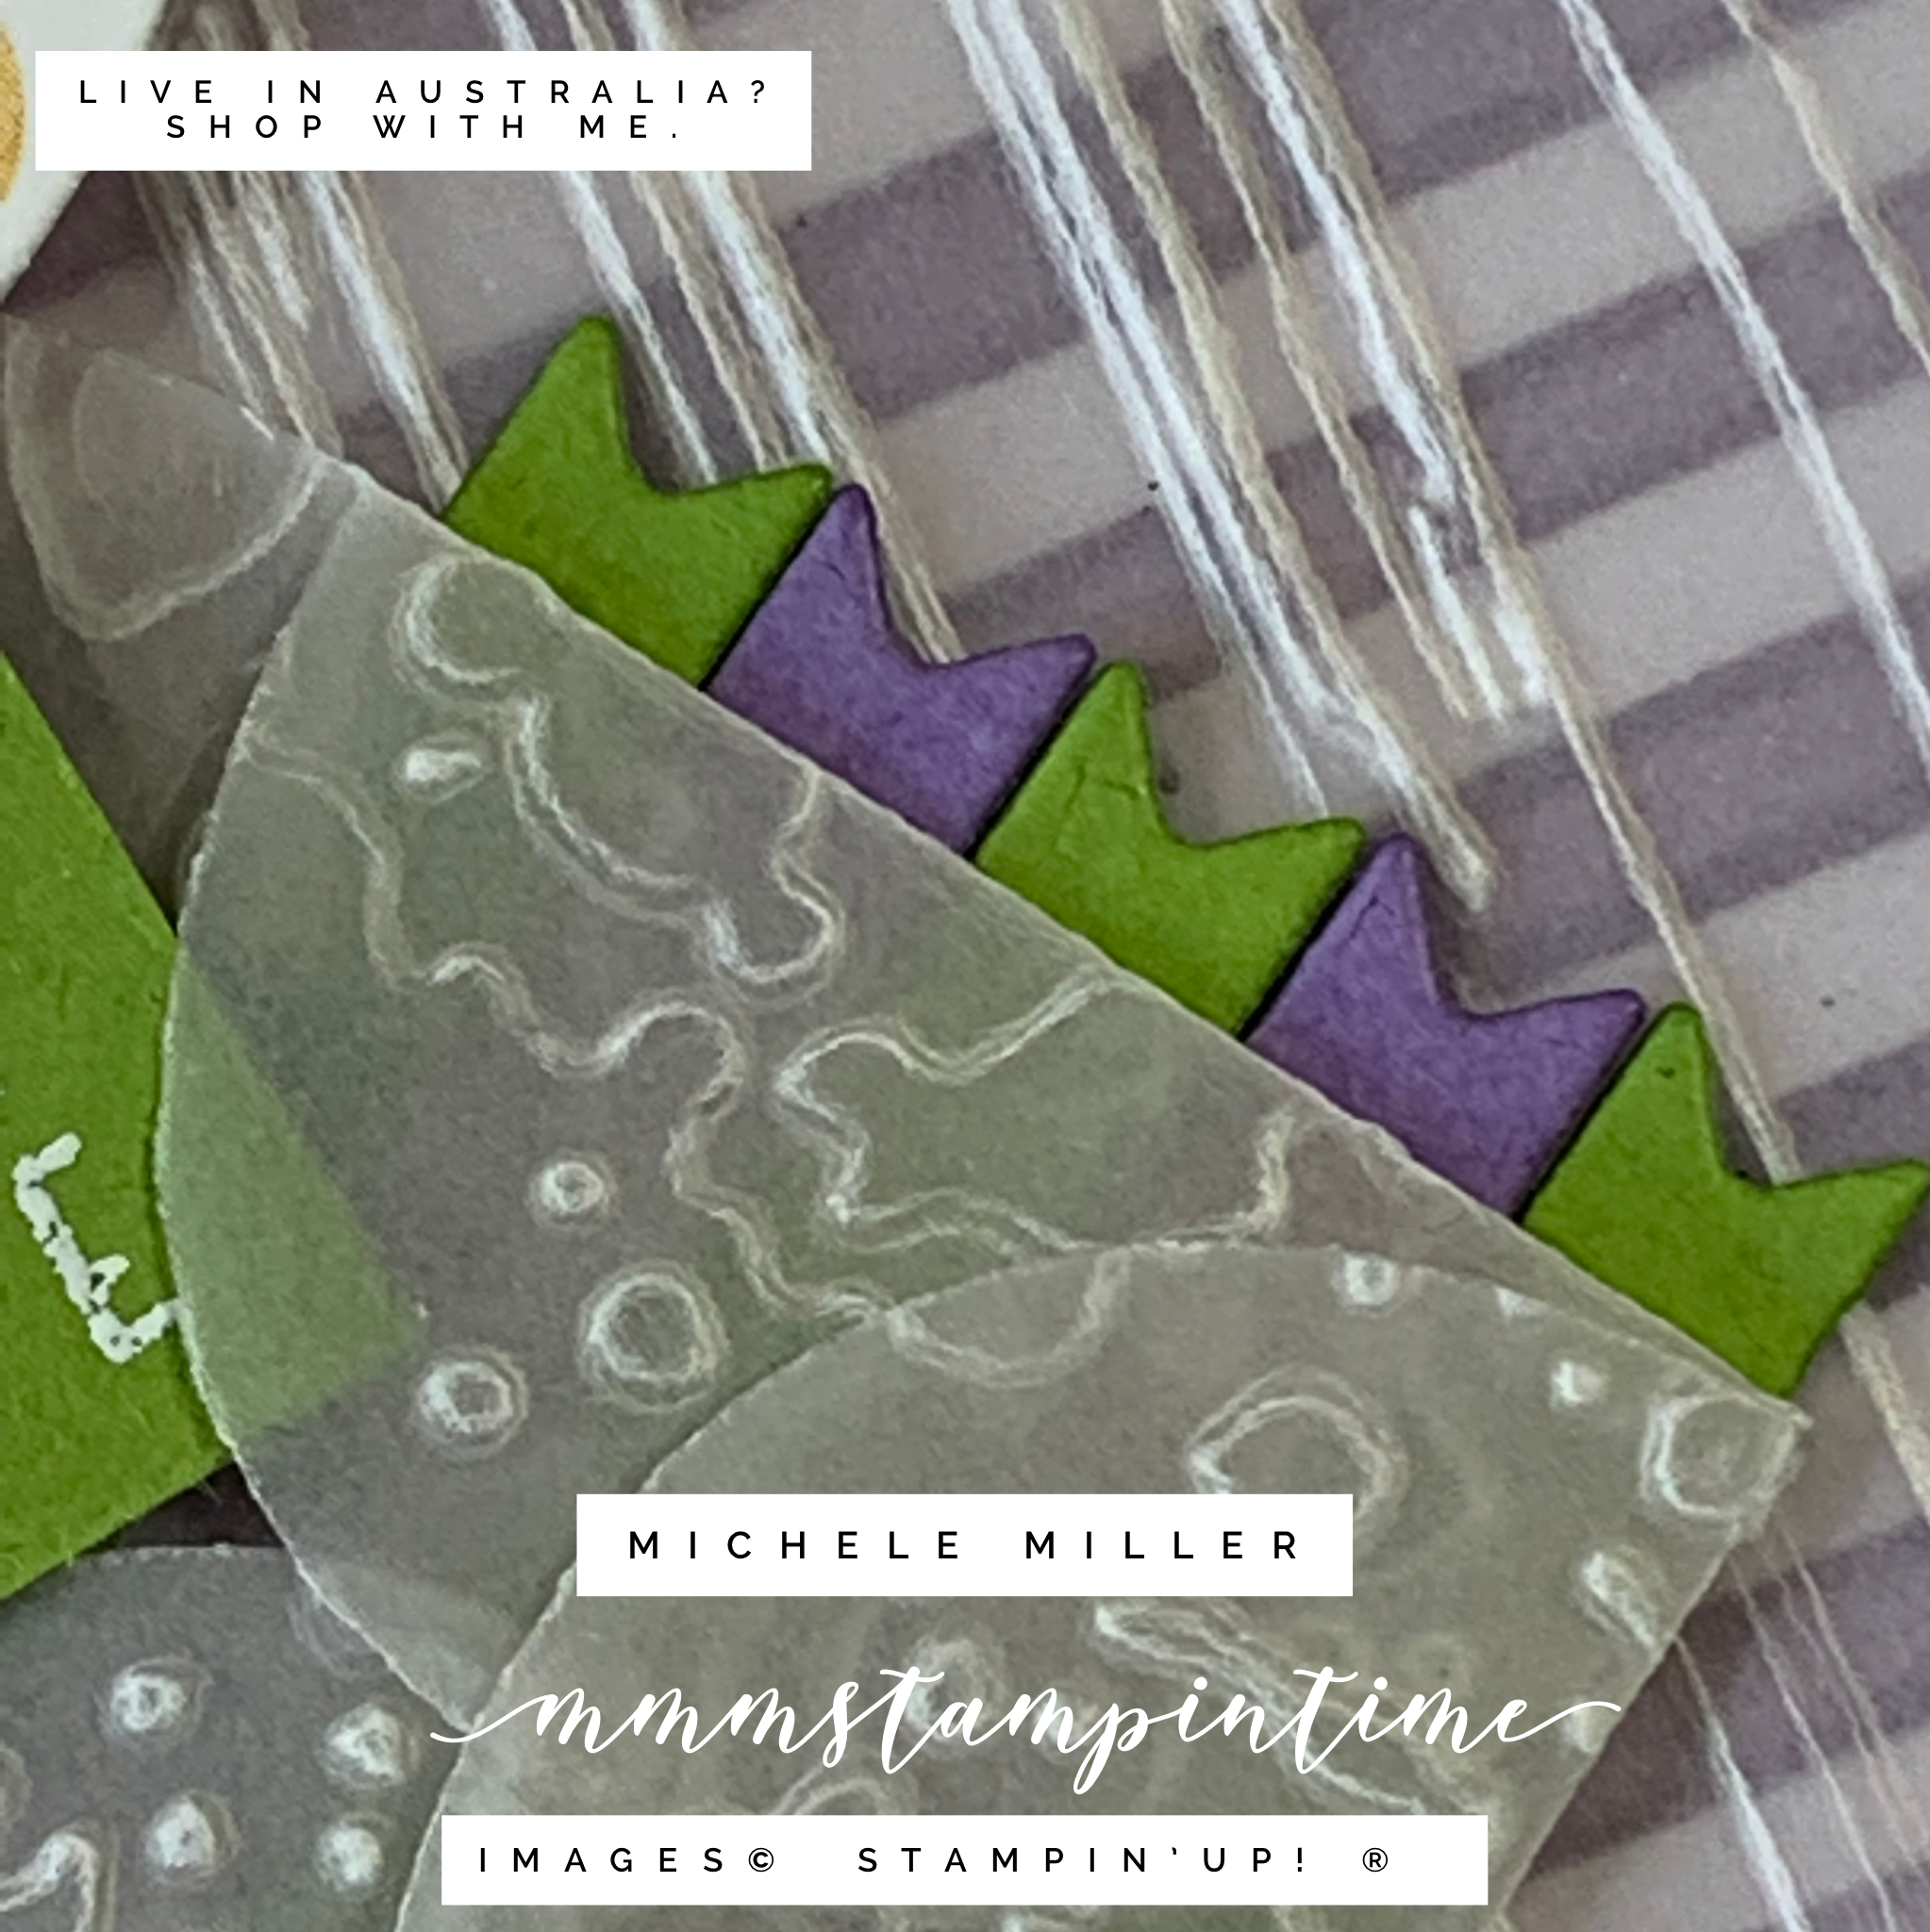
The piece of Whilte Vellum was embossed using the Stripes folder from the Stripes & Splatters 3D Embossing Folders.

Another smaller piece of vellum was cut into the envelope shape before being passed through the Mini Stampin’ Cut & Emboss Machine using the Splatters folder. The envelope was assembled using one Mini Glue Dot to hold it in place. The tiny banner die was used to card the five pieces of cardstock before they were placed on the card front using Stampin’ Seal +. The envelope was then adhered over the top of the banners.

The sentiment was stamped and heat embossed. An extra heart was attached to the back of the greeting. This message was placed just inside the envelope and secired with Stampin’ Dimensionals.

I placed Granny Apple Green hearts on the card insert and envelope.

I also added some Polished Dots to the front of the card.

I hope that you have enjoyed today’s What’s New on Wednesday. Tomorrow is all about 3D projects.

Until then, happy stamping.

If you live in Australia, you can order any of the products I used to make this card by going to my online store. Just click on any of the images below.

Product List
Heat Tool
[129056]
$50.00
Paper Snips
[103579]
$17.00
Posted on Leave a comment

TECHNIQUE TUESDAY

My new 2022 weekly schedule features Technuqie Tuesday. Each Tuesday I will share a project or two using featuring a specific technique – there are so many paper cratfing techniques, it may take me a year or two to showcase all of them.

Today I want to share how to make your own mask and then apply embossing paste to a card front.

I am still featuring the Sweet Talk Suite.

The mask was made using a piece of Thick Basic White cardstock and one of the Sweet Heart Dies. I created a pencil drawn frame around the outside of the card before positoning the 4 heart die and cutting out each layer, moving the die across one space to achieve this design.

After I finished the die cutting, I used an eraser to clean up the cardstock and managed to add these creases in the card. Fortunately, it did not have a negative effect on the next stage of the project.

I selected two of the Highland Heather pieces of Sweet Talk 12″x 12″ Designer Series Paper. The first of these was placed on my Stamparatus and the stencil placed over the top.

I used the Stamparatus to ensure the stencil stayed firmly on the DSP while I used a spatula to spread the Shimmery White Embossing Paste.

After I removed the mask layer I went on ot create the card.

The Shimmery Embossing Paste hearts dried very well. Then I added some die cut Highland Heather hearts and a silver Simply Elegant bow to the front of the card.

The Valentine’s Day sentiment was stamped onto a piece of Basic White cardstock and was trimmed down before popping it up using Stampin’ Dimensionals.

I stamped the ‘Luv U’ heart image on the card insert and envelope.

Then I added several Iridescent Rhinestone Basic Jewels to the DSP layer. These are going to quickly become some of my favourite embellishments.

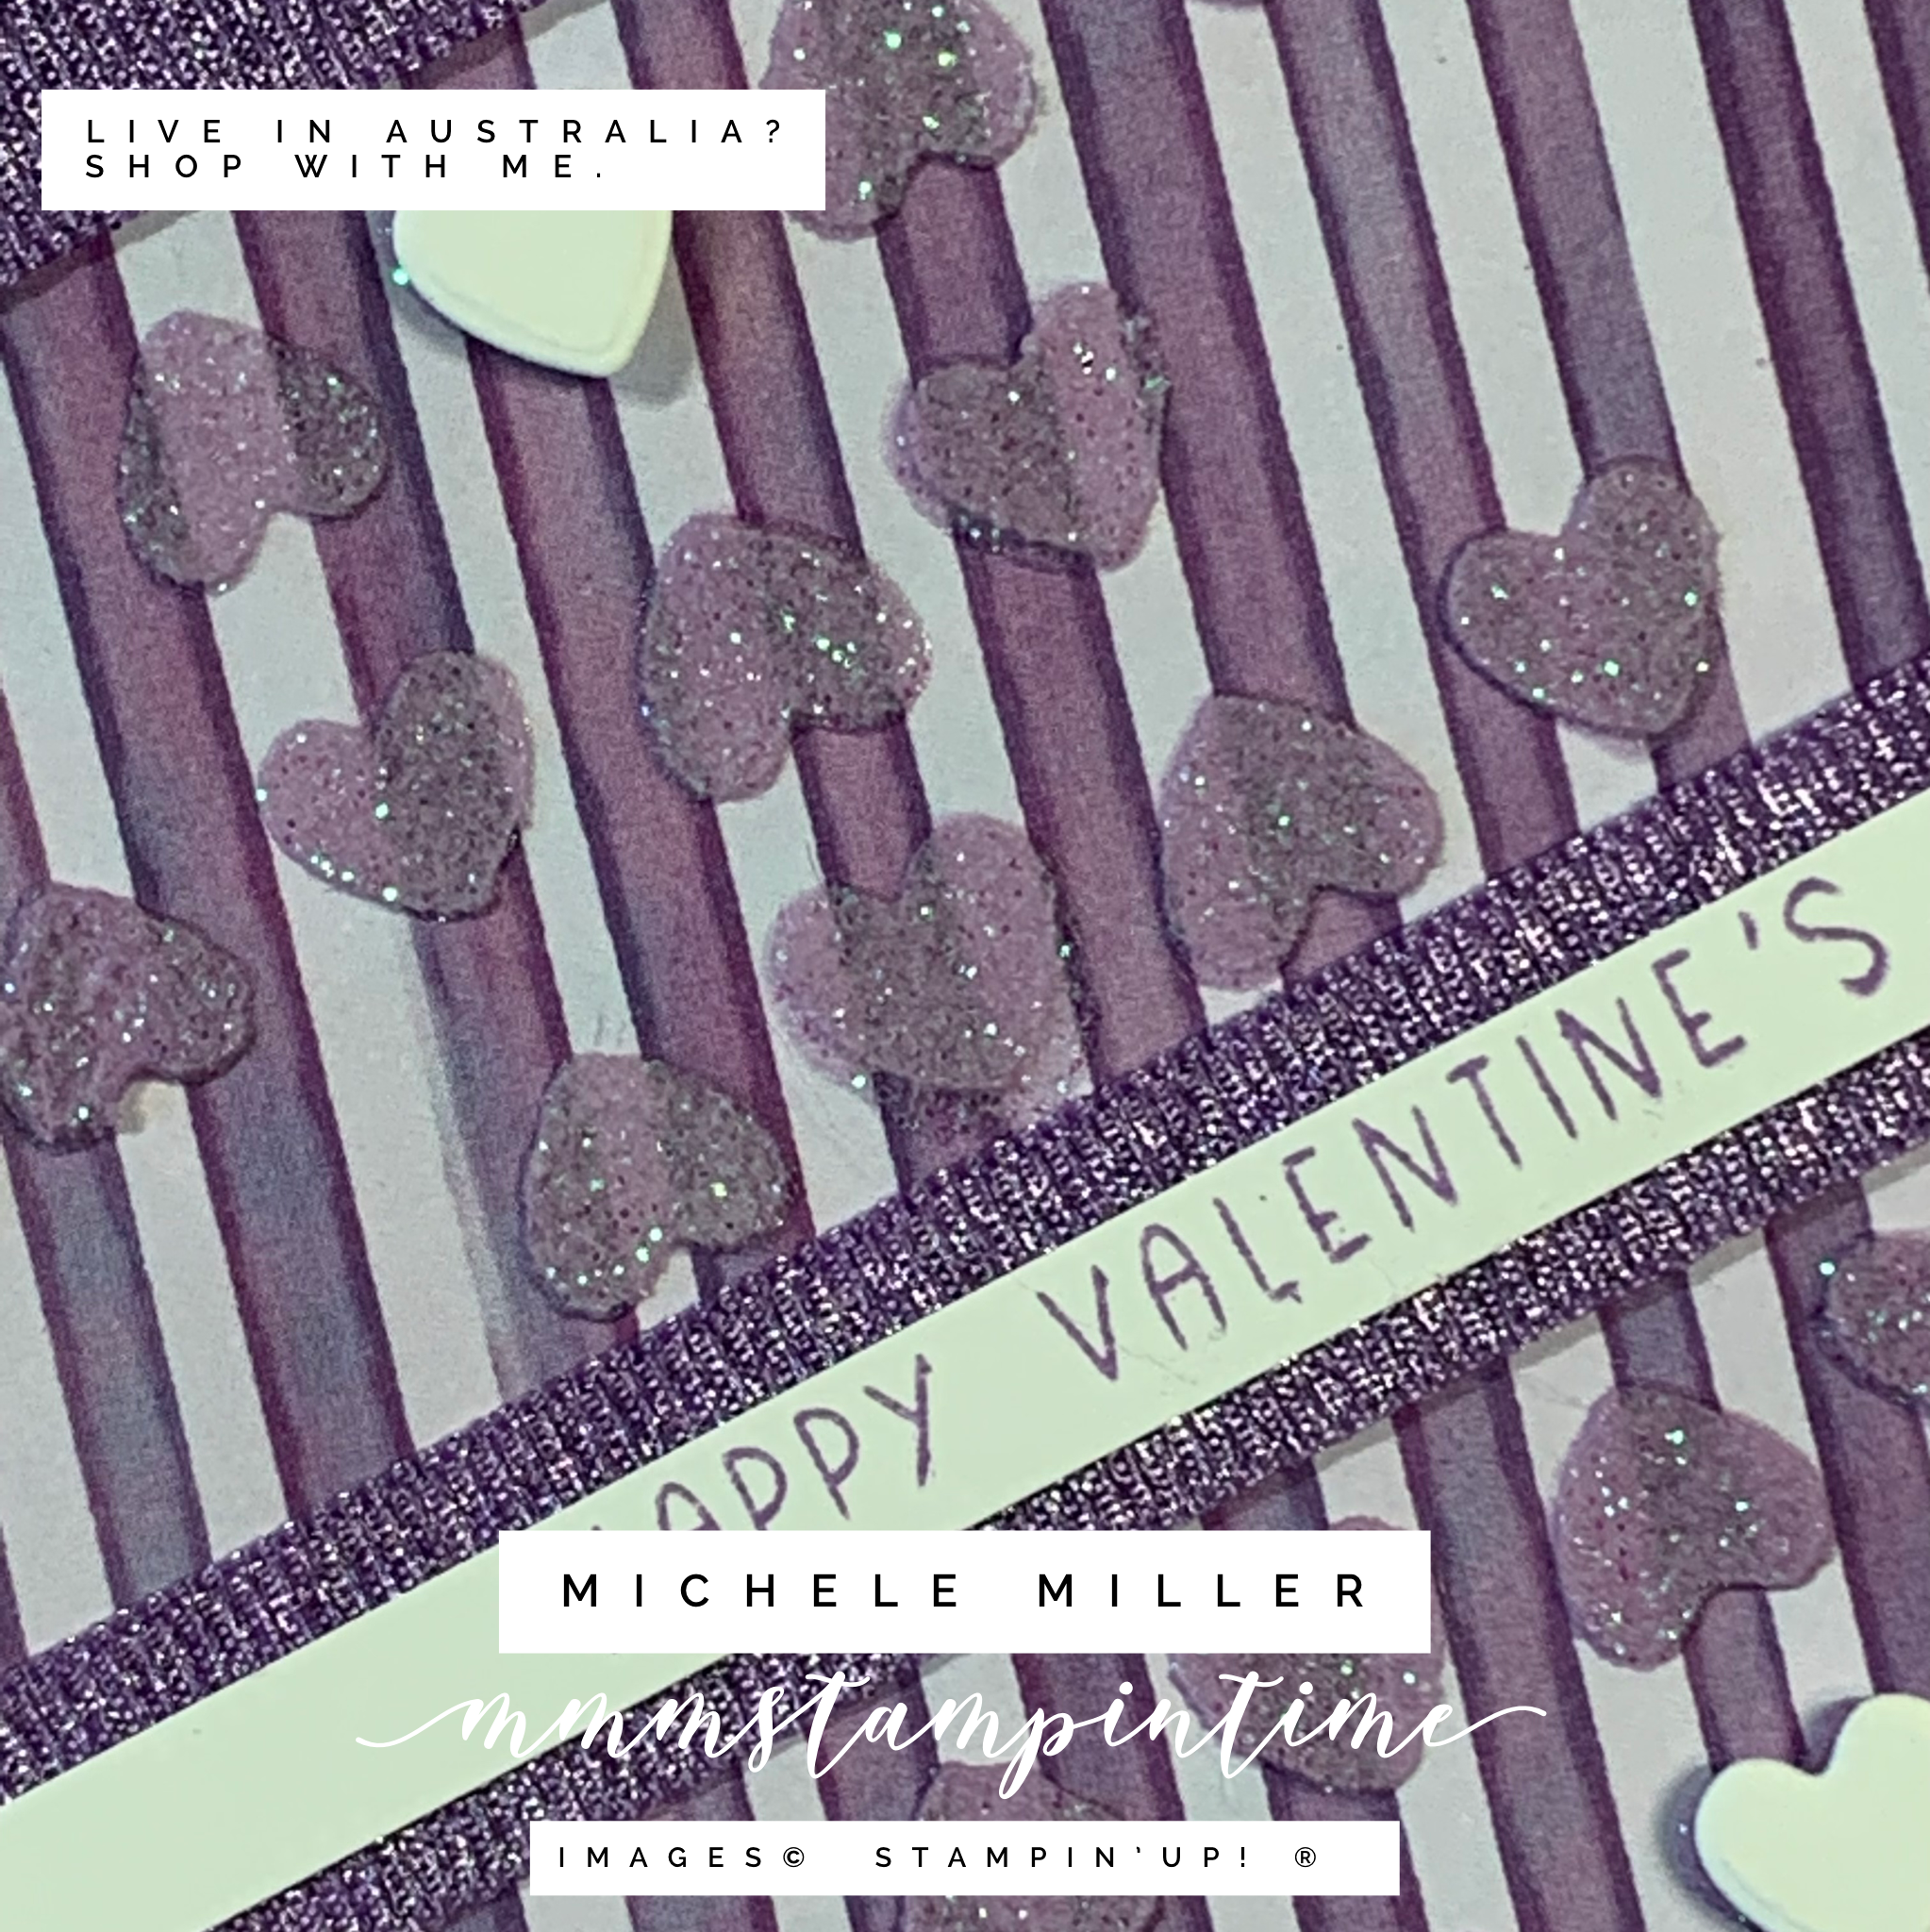
For the second card, I blended the Shimmery Embossing Paste with some drops of Highland Heather reinker on the largest Acrylic Block using the spatula. This time I used the Highland Heather striped DSP.

I wrapped two lengths of Highland Heather Grosgrain Ribbon diagonally around the DSP and secured it to the back of the DSP and Basic White cardstock using Tear and Tape.

The sentimet was stamped and cut before positioning it across the middle of the lower ribbon.

The Basic White actually looks a little green in this image – something to work on!

I used three of the Basic White hearts, from the original mask, to use as features on the card front.

The card inserts and envelopes both feature the ‘Luv U’ heart stamp.

This is how my mask looked after I had finished these cards. I could have used some Window Sheet and wiped it clean to use again – next time, perhaps.

What do you think about today’s Technique post? Make sure you let me know what techniques you would like me to share on a Tuesday.

Tomorrow is What’s New on Wednesday.

Until then, happy stamping.

If you live in Australia, you can order any of the products I used to make this card by going to my online store. Just click on any of the images below.

Because some of the products I have used to make this card are not yet available to customers, I am not able to show them at this time. As soon as product images go live, I will create this section.

Product List
Stamparatus
[148187]
$85.00
Paper Snips
[103579]
$17.00
Posted on Leave a comment

MEMORIES on MONDAY – MY SCRAPBOOKING DAY

I am easing very nicely into my new weekly schedule of blog posts. As I mentioned on Saturday, I have done very little scrapbooking in the last 10 to 15 years. I have so many printed photos that need scrapbooking attention and possibility twice as many more yet to be printed and scrapped. At least now I know that I am restarting this part of my crafting life.

Today, I decided to share a recent event with a simple 8″x 6″ Memories & More layout.

This week, I am featuring the Sweet Talk Suite – it will be available to my customers from January 4th.

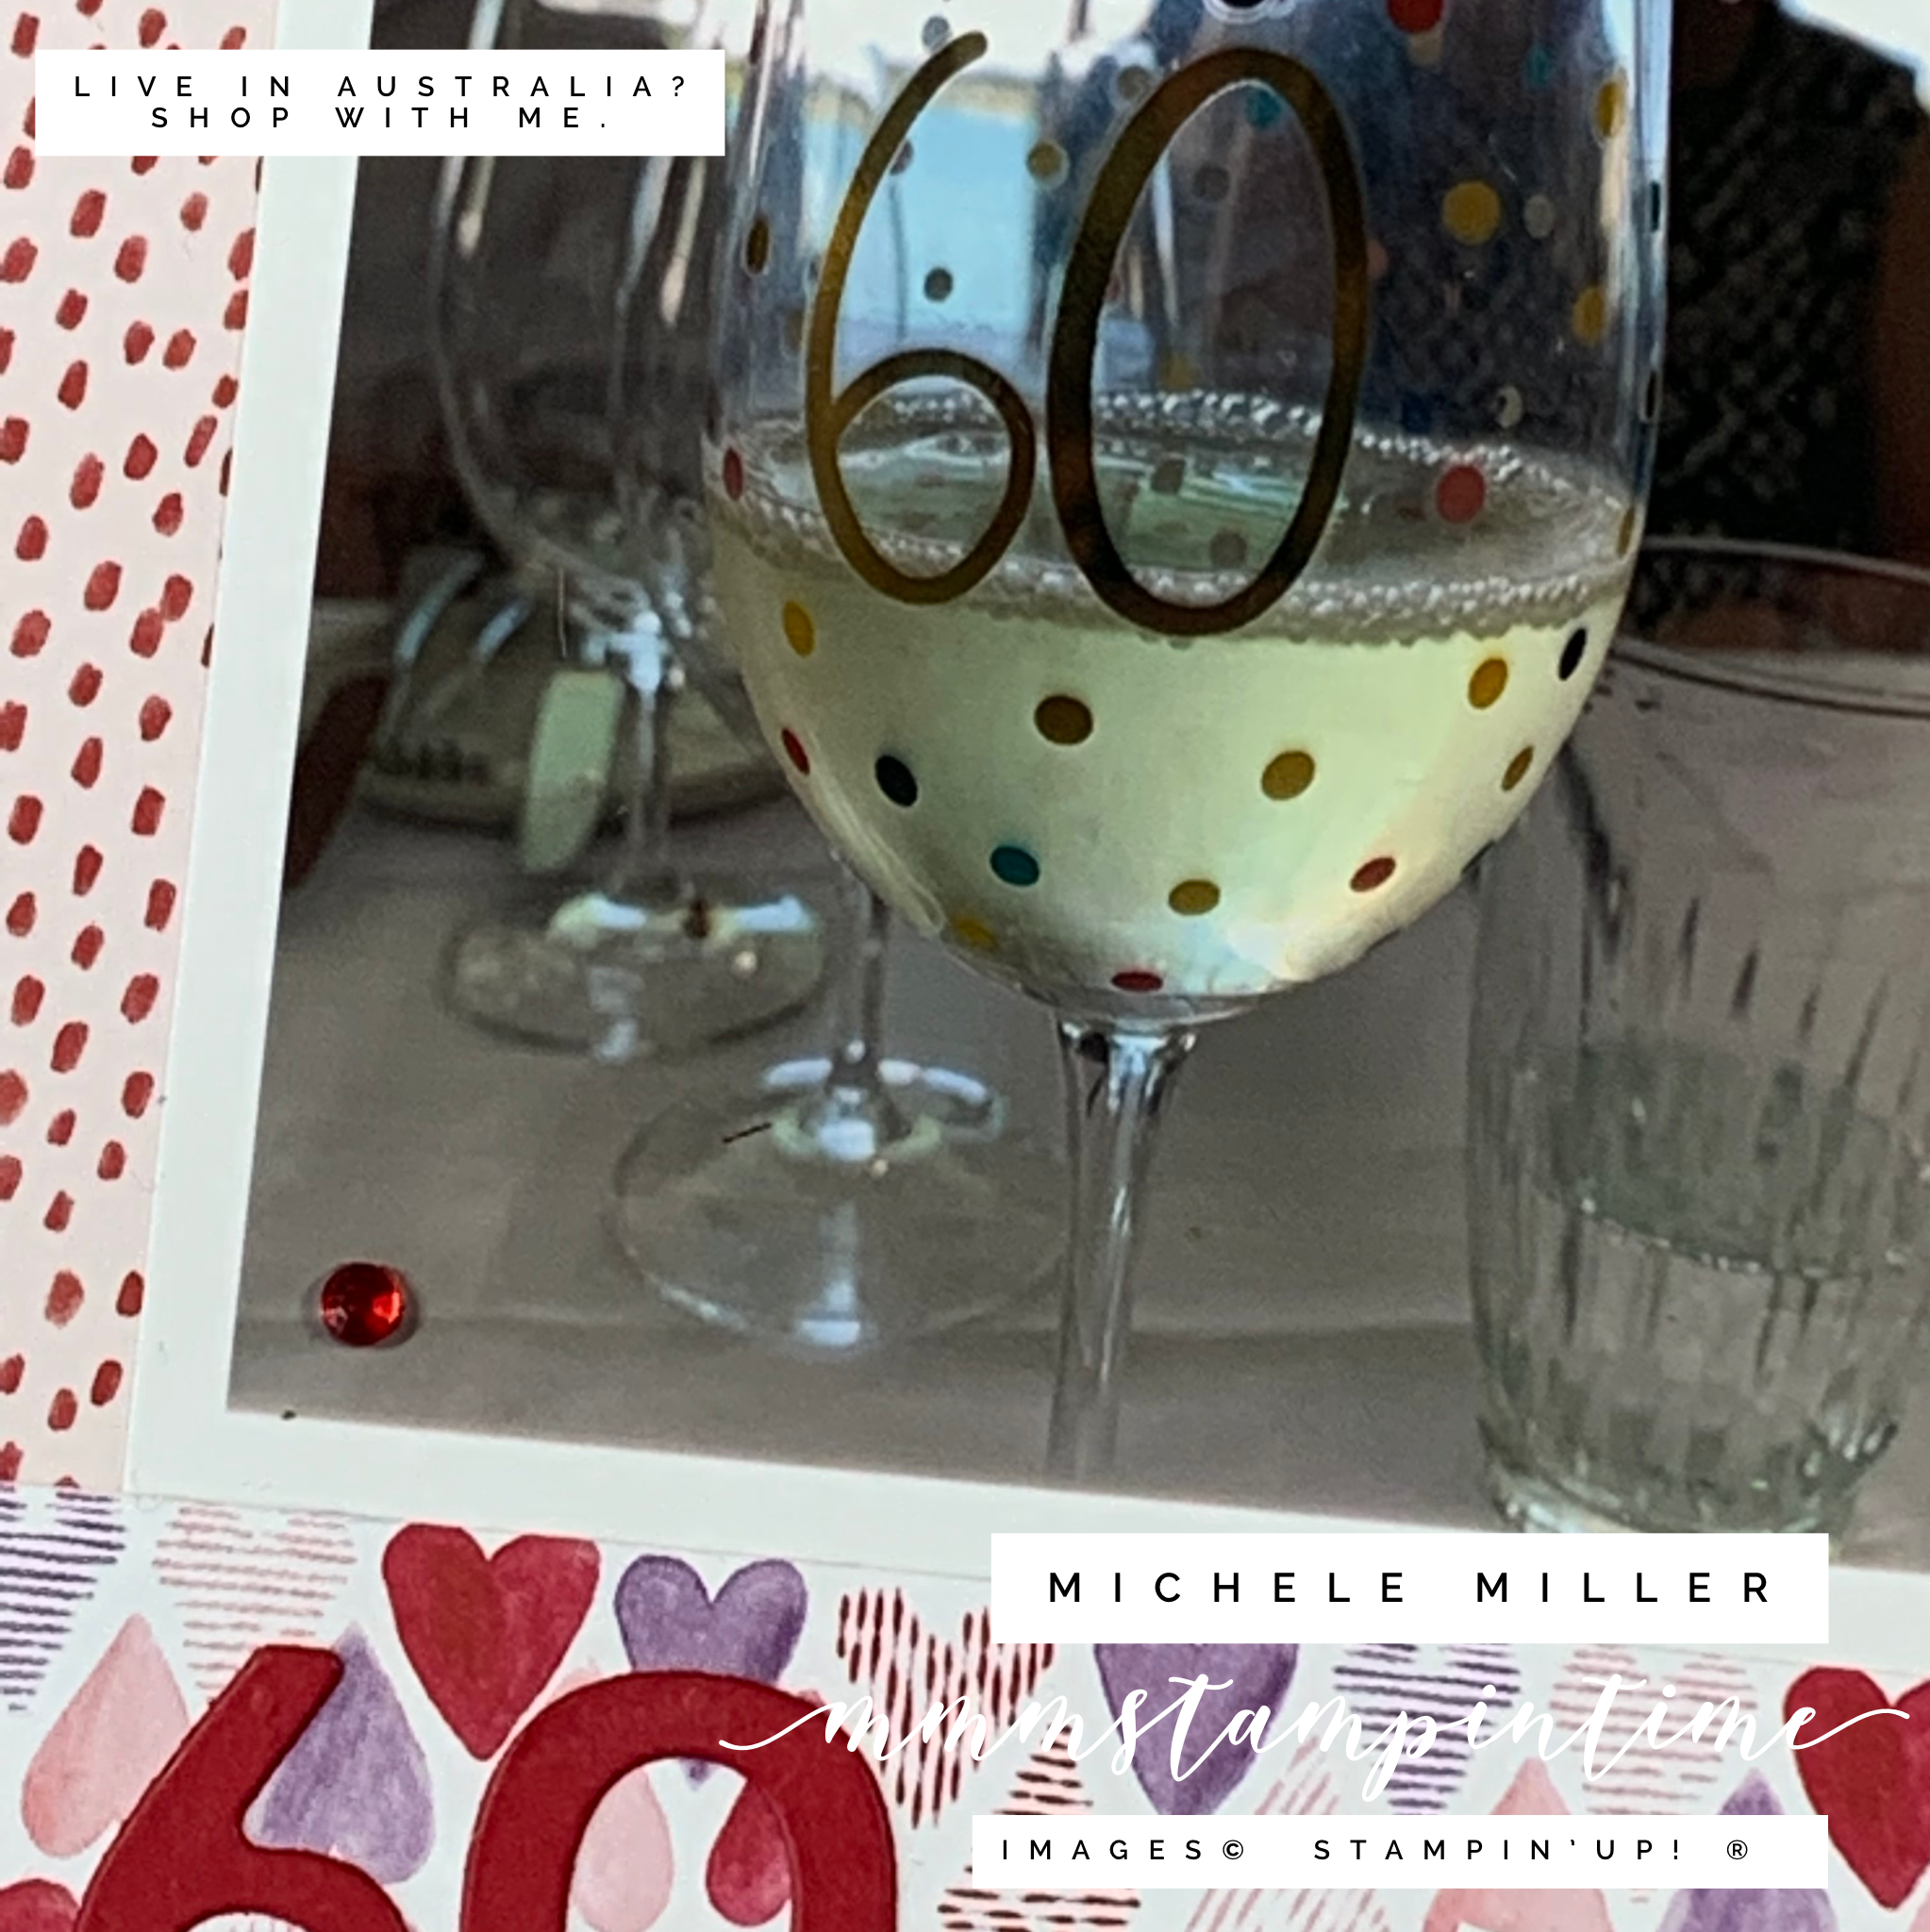
I used two designs from the Sweet Talk 12″x 12″ Designer Series Paper for this page. The Real Red elements were perfect to coordinate with the blue clothing Rob and I were wearing. My ‘birthday suit’ was one of my first ‘gifts to me’ for this milestone birthday.

The occasion was my 60th birthday celebration we enjoyed while we were holidaying in Noosa. I was delighted that my daughters, sister and her family, and brother joined me. A very dear friend was also able to be with us.

I won’t share any photos of the food in this post – but, if you can ever eat at Rickys in Noosa it is AMAZING!

I must admit that I love being able to use the Playful Alphabet Dies and Adhesive Sheets in my paper crafting.

For my journalling, I used the tag die from the Sweet Heart Dies set to cut the two pieces that I have written my thoughts.

The Real Red Faux Linen Ribon is so gorgeous and soft to work with. I added a few Red Rhinestone Basic Jewels to ensure this memory had just the right amount of bling.

Although Stampin’ Up! © does not have 12″x 12″ albums and pockets in its inventory anymore, the 6″x 8″ album and photo pocket pages are a very useful alternative.

This page was a quick and easy layout and I liked the way the Sweet Talk DSP coordinated so well. The hearts were a perfect way to show the love that I felt on my birthday.

I mentioned earlier that I was doing a little bit of ‘happy birthday to me’ shopping. I also bought an awesome Bluetooth Selphy Square Printer – I added the App to my phone and sent the photos – they were printed in a jiffy! And, they look just like mini Polaroid prints. Look at me – old bird, new tricks.

I am definitely looking forward to more Memories on Monday scrapbooking and sharing them with you.

Tomorrow is Technique Tuesday – what do I have planned?

Until next time, happy stamping.

If you live in Australia, you can order any of the products I used to make this card by going to my online store. Just click on any of the images below.

Because some of the products I have used to make this card are not yet available to customers, I am not able to show them at this time. As soon as product images go live, I will create this section.

THERE IS CURRENTLY A PROBLEM WITH THE IMAGE UPLOAD – ONCE FIXED, I WILL REDO THE PRODUCT AREA.

Product List
Paper Snips
[103579]
$17.00