Posted on Leave a comment

SENDING THANKS FOR YOUR SUPPORT

At the beginning of each month I will taking part in Bruno & Kylie Bertucci’s Demonstrator Training Program Blog Hop.

Thank you for joining us for our Stampin’ Up!® Demonstrator Training Program Monthly Blog Hop! We are so happy that you could join us today for this blog hop for ideas and creative inspiration. We are a group of Stampin’ Up!® Demonstrators from around the world that are taking part in training that is helping us to build a successful Stampin’ Up!® business and reach some goals we have set. We really appreciate your support.

You may be starting here or have come from another blog – either way you can find the link list at the bottom of this post so that you can see every blog post and idea today.

For today’s project I wanted to highlight the In Symmetry Bundle.

So remember if you place an order or join with me in October 2021 you will receive one of these cards to thank you for your purchase and if your order is $60 or more I will also send you a small gift.

These cards are bright and cheerful because the Sweet Symmetry Designer Series Paper designs are bright and cheerful. Although I must confess the Night of Navy floral design is my favourite.

I used all the coordinating colours for the card bases – Bumblebee, Calypso Coral, Flirty Flamingo, Just Jade and Night of Navy. Then I chose five of the DSP designs, cut them to size and glued each to a base.

I cut the sentiment panels using one of the Seasonal Labels Dies before stamping the ‘thanks’ using my Stamparatus. The sentiment is from the Artistically Inked Stamp Set and because it’s a cling stamp the Stamparatur allowed me to align the stamp and die cut panel perfectly each time.

The flower and leaves, from the In Symmetry Stamp Set, were stamped on the front panel, card insert and envelope.

The last step was to colour some of the silver Epoxy Essentials in Flirty Flamingo, Just Jade and Night of Navy using the dark Stampin’ Blends. Then I popped three on each card front.

Thanks so much for stopping by today!

As mentioned at the top, this is a blog hop so make sure you ‘hop’ around to all the amazing projects on this hop! Click on the links below to visit them.

Do you need any of the products used on today’s project? See the products below or Click HERE to go shopping and check out the amazing products Stampin’ Up!® have on offer.

Until next time, happy stamping.

If you live in Australia, you can order any of the products I used to make this card by going to my online store. Just click on any of the images below.

Posted on Leave a comment

NATURE’S HARVEST THANK YOU CARD

When I saw the images in the Nature’s Harvest Stamp Set, I knew they would coordinate beautifully with those in the Dragonfly Garden Stamp Set.

Thanks fro popping by today. I hope you like the card that I am sharing with you today.

I stamped one of the images from the Dragonfly Garden Stamp Set directly on to a 6″x 6″ piece of Harvest Meadow 12″x 12″ Designer Series Paper. This is a Cling Stamp Set and I used my Stamparatus to stamp the image evenly. I stamped it three times, hinge-stepping with a double space, at one height then shifted the DSP so that I could stamp it again at a lower level.

I coloured the flowers using the Light Pumpkin Pie Stampin’ Blend and Light Cajun Craze Stampin’ Blend, before cutting the front DSP panel using the largest Scalloped Contours Dies.

The white edge of a length of Pale Papaya & White Woven Ribbon was cut away so that I could create a frayed effect. This length was then threaded through the scalloped sides of the stamped panel.

The large floral image from the Nature’s Harvest Stamp Set was stamped and then coloured using Light Cajun Craze, Light Pumpkin Pie, Light Soft Succulent and Dark Soft Succulent Stampin’ Blends. After colouring the image I fussy cut the floral trio and added it to the card front using Stampin’ Dimensionals.

The card insert and envelope each had half the remaining stamped DSP added.

The sentiment, from Nature’s Harvest, was stamped and trimmed down to place in the bottom right-hand corner of the card.

The final touch was to add some Soft Succulent jewels from the 2021-2023 In Colour Jewels.

Well, I have certainly come a long way in 12 months when it comes to fussy cutting. I still need to refine this technique but I am very pleased with my progress.

Make sure you let me know what think of this thank you card. If you live in Australai and would like me to send this card to you, leave a comment and I will make a random selection.

Until next time, happy stamping.

If you live in Australia, you can order any of the products I used to make this card by going to my online store. Just click on any of the images below.

Product List
Paper Snips
[103579]
$17.00
Posted on Leave a comment

A DAY LATE WITH THIS PROJECT!

I was having so much fun preparing this project for my Facebook Live that I completely forgot to photgraph and post it. So, I finished the Live this morning and have just taken these photos.

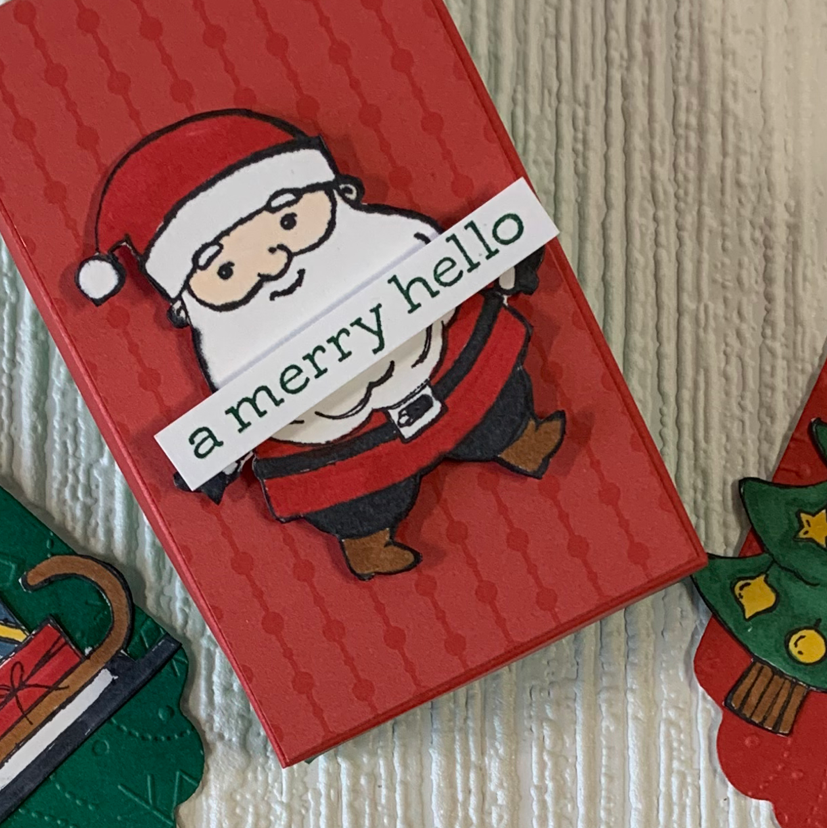
Thanks for popping by to see how cute this gift box is. It is filled with Christmas gift tags. I used the Be Jolly Stamp Set for this project.

The gift box uses Poppy Pararde and Shaded Spruce card, as well as a piece of Designer Series Paper from the Brights 6″x 6″ stack. The box base was cut to 5-3/4″x 4-1/4″ and then scored on all four sides at 1″. The lid was cut to 4-3/4″x 3-1/4″ and scored at ‘a hair’ less than 1/2″.

This Santa image was stamped using Memento Tuxedo Black ink and coloured using Stampin’ Blends – Black, Cinnamon Cider, Petal Pink and Poppy Parade. Santa was then fussy cut and popped up on the lid using Stampin’ Dimensionals.

The greeting, from the Be Jolly Stamp Set, was stamped with Shaded Spruce.

When the lid comes off 12 gift tags are revealed. I used one of the Seasonal Labels Dies to make this tag.

There are four different tags – two Santas, a Christmas tree and Santa’s sleigh. These were all coloured using Stampin’ Blends before being fussy cut. Santa’s beards have Clear Wink of Stella brushed across them.

Some of them have been embossed using the snowflakes Wintry 3D Embossing Folder. The others were stamped with ‘be jolly’ using the Stamparatus to hinge-step stamp the greeting evenly along the tag.

Each coloured tag has a white tag adhered to its back. This piece was stamped with ‘to’ and ‘from’.

Now all I need to do is decide who to give this gift box of tags to.

Until next time, happy stamping.

If you live in Australia, you can order any of the products I used to make this card by going to my online store. Just click on any of the images below.

Product List
Paper Snips
[103579]
$17.00
Stamparatus
[148187]
$85.00