Posted on Leave a comment

WELL, WHAT’S HAPPENING THIS WEDNESDAY? TIME FOR A STAMPIN’ UP! UPDATE

This week’s update is all about two new kits.

Kits Collection by Stampin’ Up! is all about making crafting fun, accessible, and inclusive! Click on any of the three images below to order your kit fro my online store.

The first of these new kits is the Card Keeper Kit.

This kit comes with everything you need to make 10 beautiful all-occasion cards. With a variety of sentiments, you can create an assortment of cards fit for birthdays, saying thanks, and more. And don’t miss the coordinating card container! This cute storage option is the perfect solution for keeping these all-occasion cards organised and ready to go

The second of these new kits is a Christmas Ornaments Kit.

This craft kit comes with everything you need to make 9 beautiful Christmas ornaments, including precut paper greenery, pinecones, bright berries, and festive details. Whether you gift it to a friend or keep it for yourself, this kit is the perfect solution for quick and easy Christmas crafting projects.


If the Christmas Ornaments Kit has put you in the Christmas mood, then you should like today’s Christmas card.

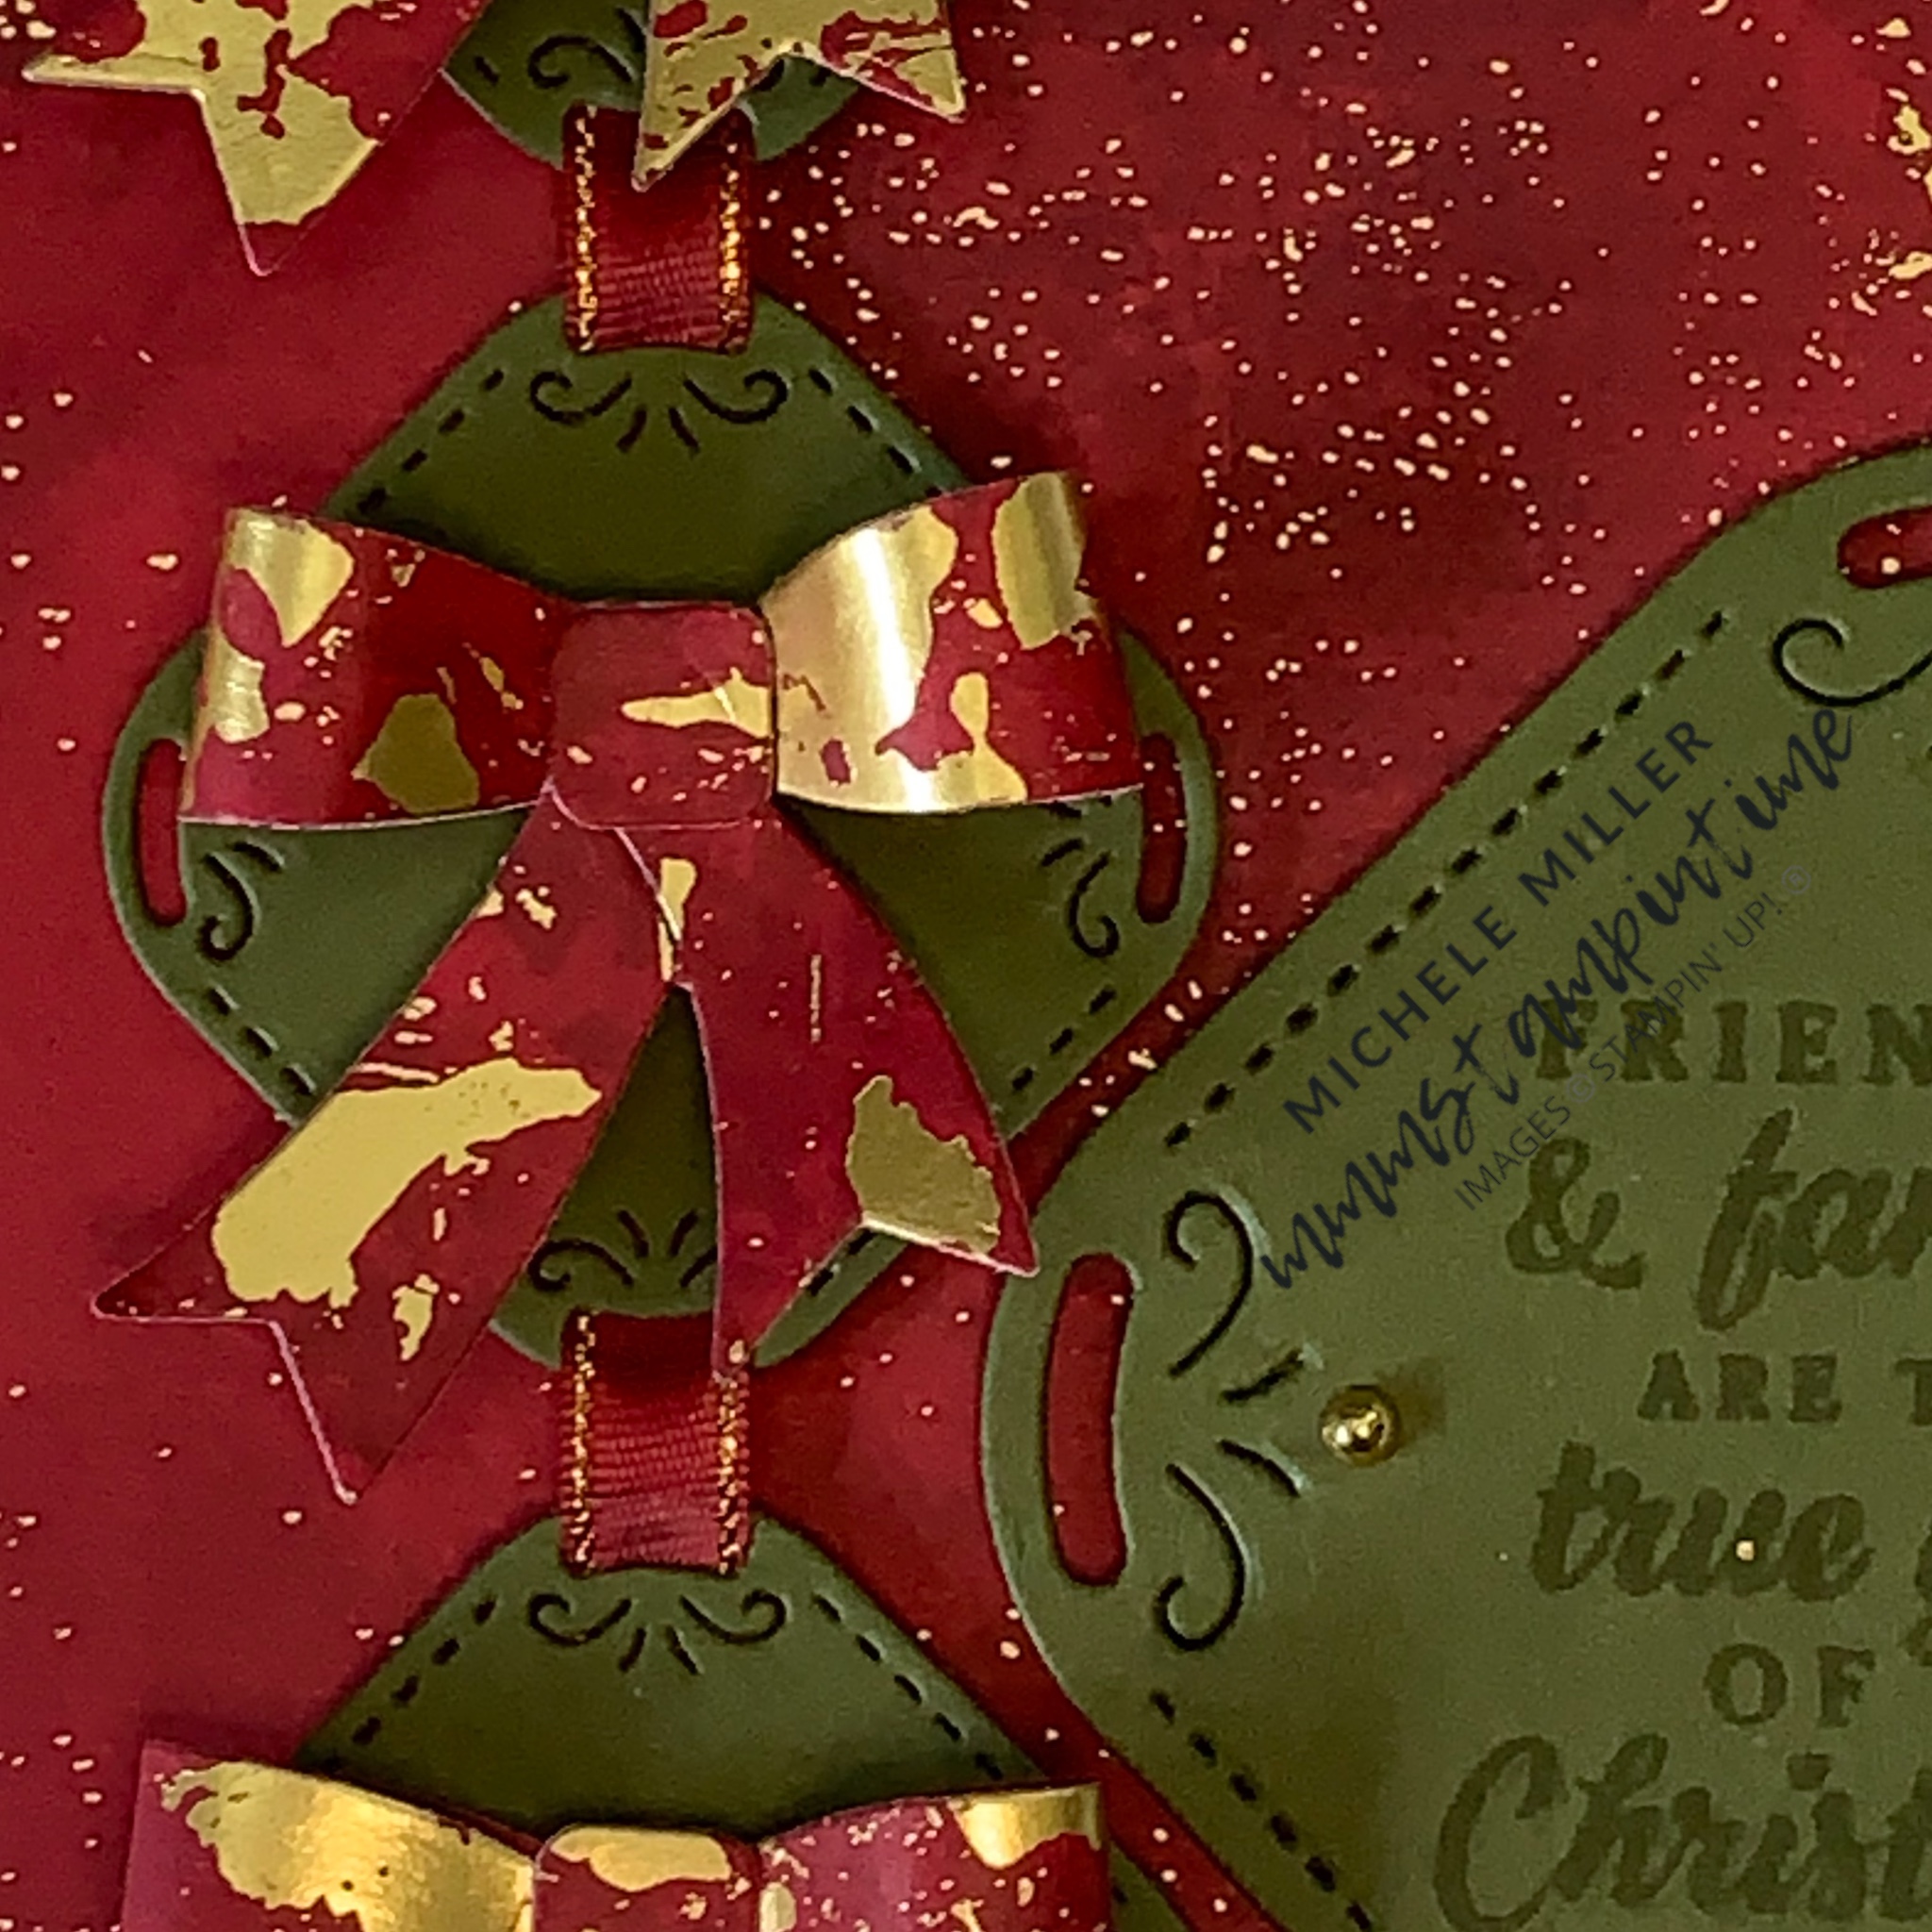
After preparing the Cherry Cobbler cardbase, I created the Gold Foil and Designer Series Paper layers.

I die cut three small rounded squares and one large one. These are in the Peaceful Seasons Dies pack.

The three smaller squares had a length of Cherry Cobbler & Gold Satin Ribbon threaded through them. Then the squares were positioned on the foil and DSP layers using Stampin’ Dimensionals. The ribbon was then tucked under the back of the panel and secured with Teat and Tape.

These layers were then adhered to the cardbase with Multipurpose Glue.

I die cut the larger square and stamped the Christmas greeting onto it with Mossy Meadow ink. Then I trimmed back the right hand side of the die cut piece. This piece was then positioned on the card front with Stampin’ Dimensionals.

The Peaceful Evergreens Dies have four dies that can be used to create a gorgeous bow. I have created three bows to posiotn on the three smaller squares that have already been attached to the card front.

The card insert and back of the envelope have both had more of the DSP attached.

For a final touch, three small gold pearls, from the Blooming Pearls embellishments, have also been added to the card front.

Tomorrow I have a 3D project to share with you.

Until then, happy stamping.

If you live in Australia, you can order any of the products I used to make this card by going to my online store. Just click on any of the images below.

Product List
Paper Snips
[103579]
$21.00
Posted on Leave a comment

TODAY IS TUESDAY AND IT’S TIME FOR SOME TIPS & TECHNIQUES

Today I have a simple GATEFOLD CARD with BELLYBAND to share with you, using products from the Season of Elegance Suite Collection.

I use a cardbase that measures 5 3/4″ x 4 1/8″ which is slightly smaller than a half A4 sheet of cardstock.

TIP: To achieve these two very even and aligned folded panels, I use my Simply ScoresScoring Tool with the coordinaing Metric Scoring Plate. I score each side, along the 5 3/4″ side at the 5.25mm mark.

After scoring and folding the Gatefold card base, I adhered panels from the Seasons of ELegance 12″x 12″ Designer Series Paper to the front and inside card flaps.

A pane of Thick Basic White card was glued inside the card and a strip of the same paper was adhered to the insert. The back of the envelope also had some of the DSP added.

For the bellyband I used a 9 1/2″ x 1 1/2″ piece of Pretty Peacock cardstock and scored it at 2 1/4″ and 6 1/2″.

I cut a tree using the smallest of the full trees from the Peaceful Evergreens Dies..

TIP: Cut a piece of Pretty Peacock and a piece of the Designer Series Paper and glue them together. After die cutting the tree, it will be firmer and stand better when the band is removed.

After the tree is adhered to the band, I added the Christmas greeting.

TIP: Add Adhesive Sheet to the back of the Gold Foil – it will make it easier to adhere the greeting to the band.

TIP: Keep the panel from where the greeting was cut away. Position this on the band, where you want to place the greeting, and secure it with some Post-it tape.

TIP: Peel away rhe adhesive sheet backing from the greeting and position it inside the negative space. This will help ensure that the greeting maintains its original shape and length.

To finish the card I added some gold pearls from the Blooming Pearls

To finish the bellyband I used gold embossing powder to heat emboss ‘merry’ onto a small strip of Pretty Peacock card. After trimming it I added some Mini Stampin’ Dimensionals to the back of the strip and popped it on.

Romorrow I will have another Christmas card to share with you.

Until then, happy stamping.

If you live in Australia, you can order any of the products I used to make this card by going to my online store. Just click on any of the images below.

Product List
Heat Tool
[129056]
$56.00
Paper Snips
[103579]
$21.00
Posted on Leave a comment

IT’S MONDAY AND THAT MEANS IT IS TIME TO HIGHLIGHT SOME NEW STAMPIN’ UP! PRODUCTS

This week I plan to showcase the Season of Elegance Suite Collection, from the September – December 2024 Mini Catalogue.

This suite collection includes two bundles, but more about the features on Friday.

As you can see there are lots of gorgeous goodies included in the suite.

Today I have a textured Christmas themed card to share.

I took a 5 3/8″ x 3 3/4″ panel of Basic Beige card and used the Painted Trees 3D Embossing Folder to add texture to it.

After embossing the panel, I used my Mossy Meadow small Blending Brush to lightly build up colour on each of the trees. I also used an empty Wink of Stella brush to add colour into more specific areas to darken the green on the trees.

After the ink was dry, I painted Clear Wink of Stella across the trees to add shimmer to the card front.

I used another empty Stella brush to paint Pearlixed Enamel Effects onto the trees for a wintry, snow effect.

After the ink and enamel dried, I adhered the Basic Beige panel to a Mossy Meadow panel.

The greeting, from the Peaceful Season Stamp Set, was stamped in Mossy Meadow and then cut using a die from the Peaceful Season Dies.

A length of Basic Beige Bordered Ribbon was threaded through the die cut piece and Stampin’ Dimensionals were placed on the back of the greeting. The greeting was positioned on the front of the trees and the ribbon was wrapped around the layered card panels. The ribbon was tied into a simple know and trimmed.

These layers were then adhered to a Basic Beige card base.

I added a strip of Basic Beige paper, from the Season of Elegance DSP, inside the card and to the back of the envelope.

Finally, I added some Blooming Pearls to the front of the card.

Tomorrow is Tuesday and I will have a project featuring some tips and techniques to share with you.

Until then, happy stamping.

If you live in Australia, you can order any of the products I used to make this card by going to my online store. Just click on any of the images below.

Product List
Paper Snips
[103579]
$21.00