Posted on Leave a comment

IT’S TECHNIQUE TUESDAY & WHO CAN RESIST EMBOSSING?

I have always loved the ways we can use the English language in so many creative ways. It was so much fun teaching my high school English students different literary devices and techniques to achieve more expressive effects.

Two of my favourites are ALLITERATION and WORDPLAY. You can both of these in today’s title. The first it obvious but the second will reveal itself very quickly.

Today, I am sharing a card using RESIST EMBOSSING with some very simple water colouring.

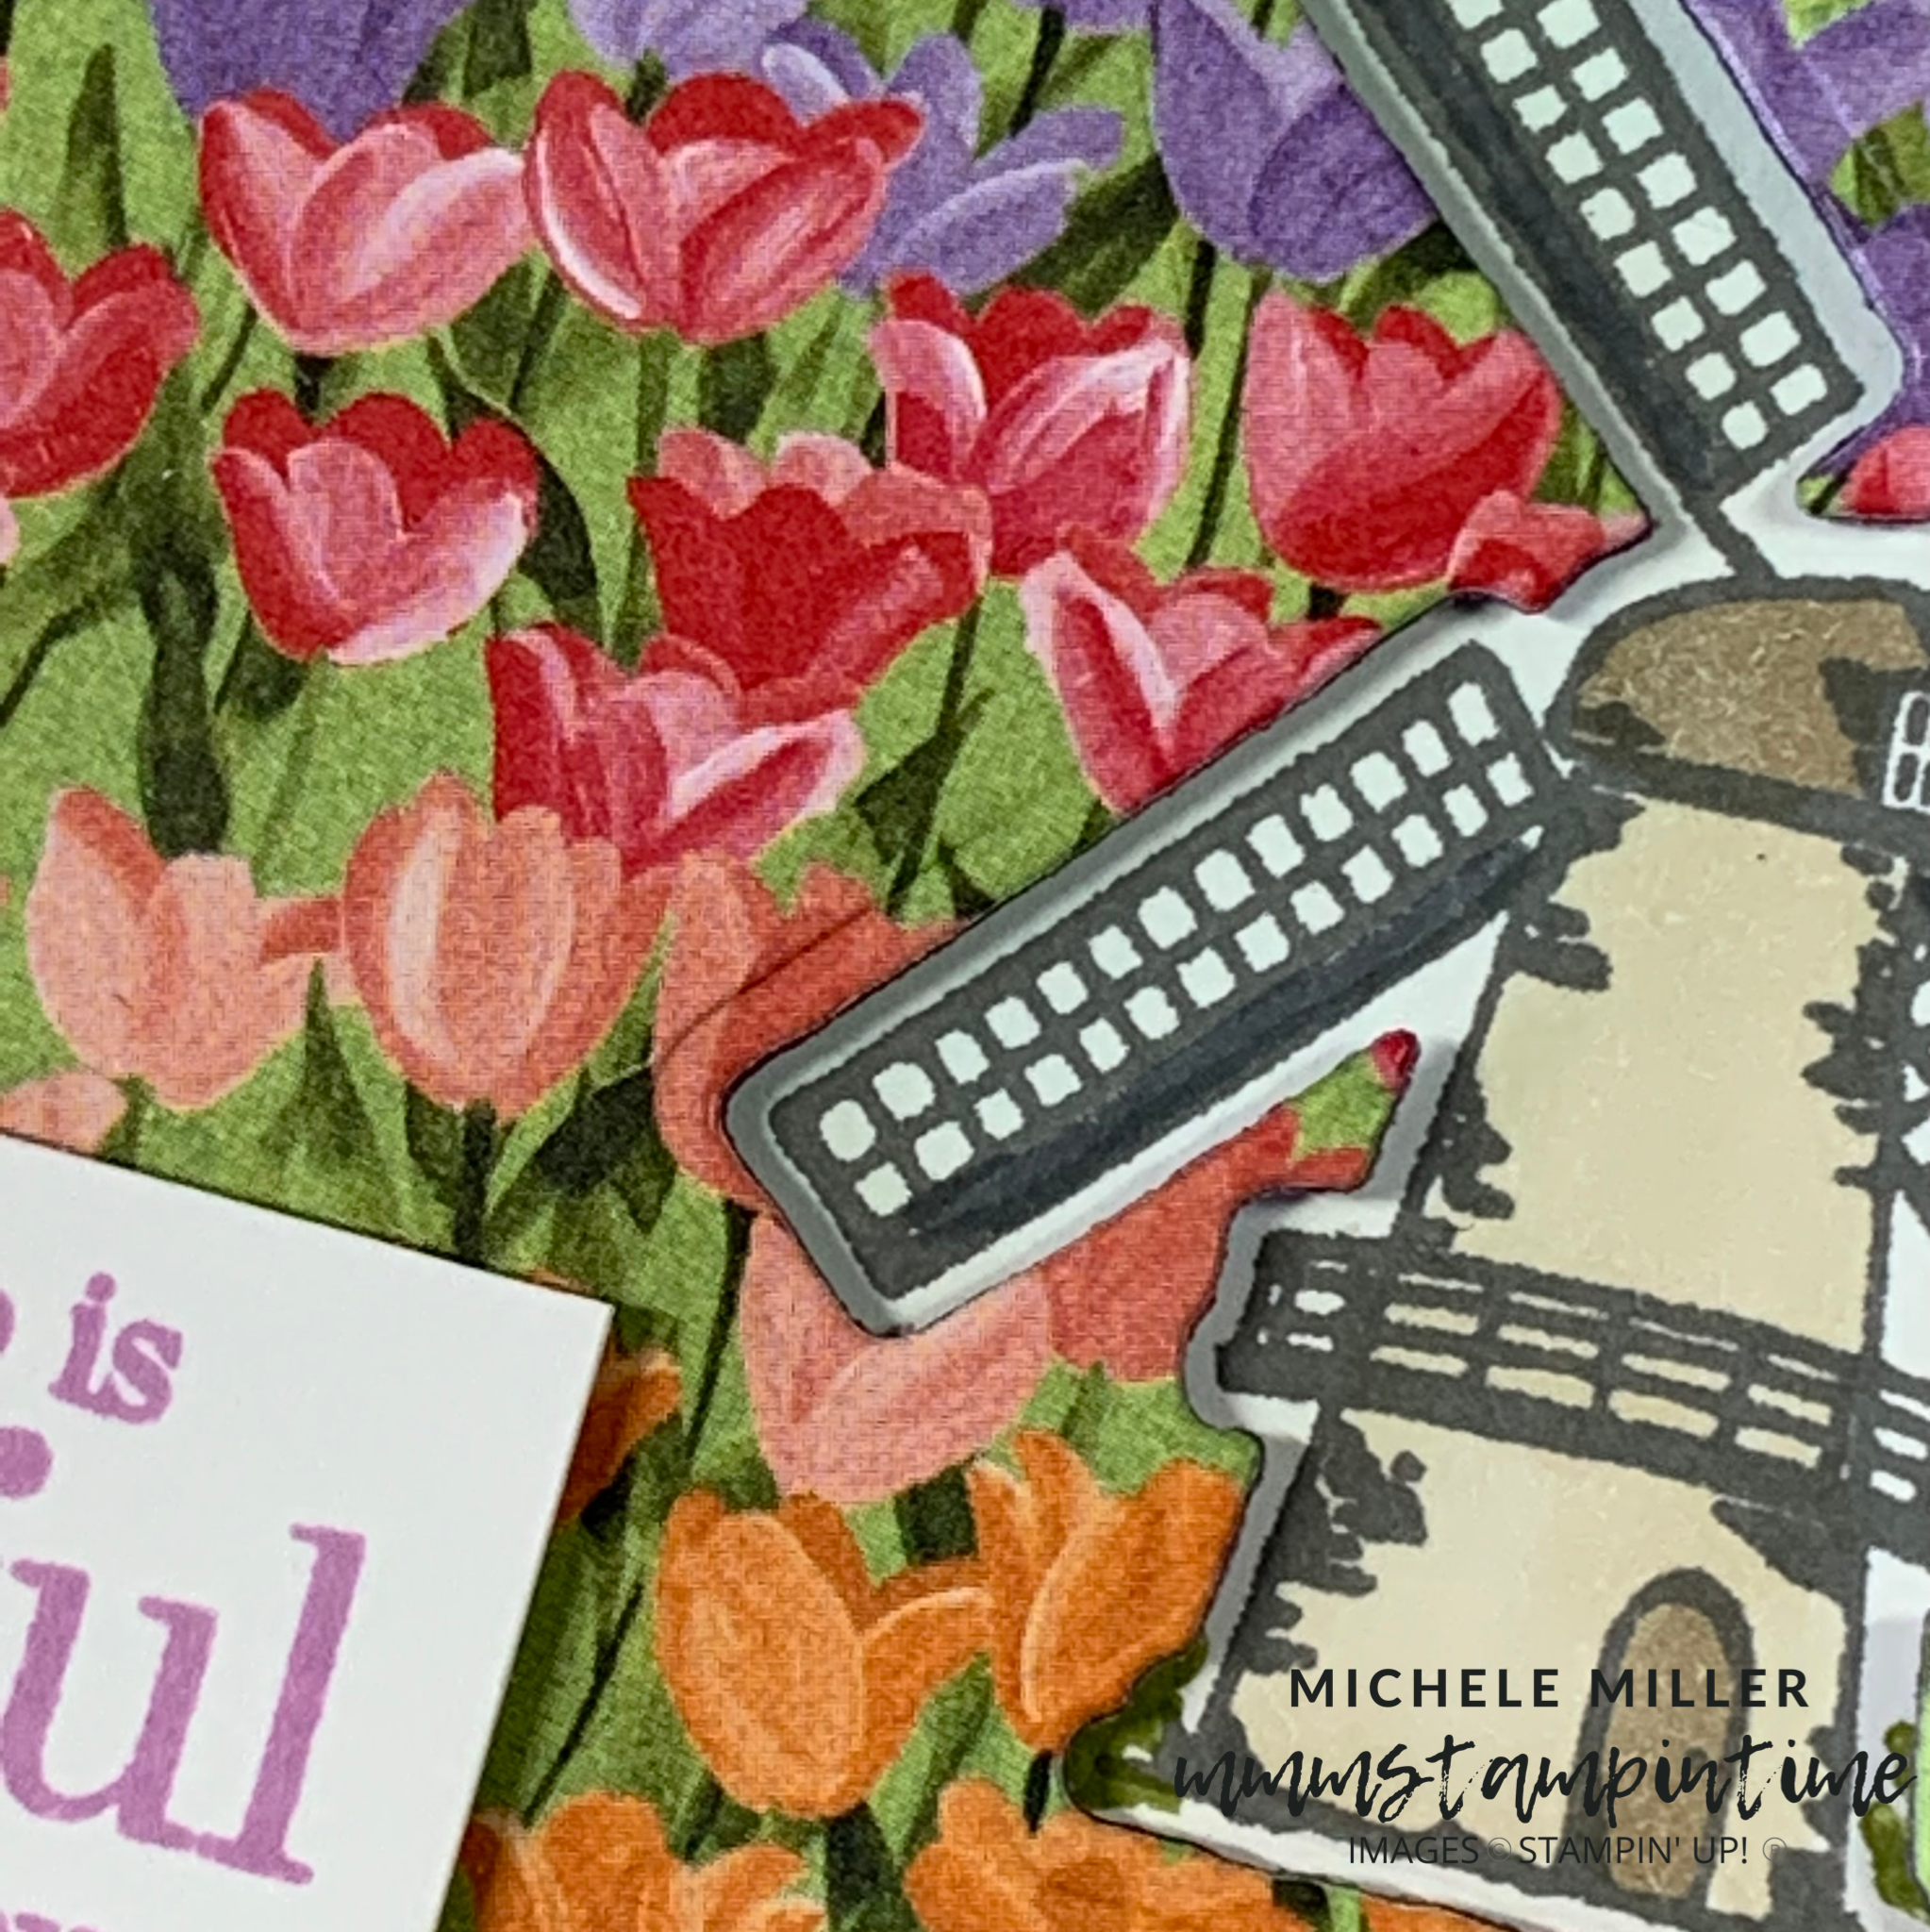
If you have been following along, you will know that this week I am featuring the Flowering Fields Suite Collection.

FLOWERING FIELDS SUITE COLLECTION (ENGLISH)

For this card I have used the Flowering Tulips Bundle and Flowering Fields Designer Series Paper.

FLOWERING TULIPS BUNDLE (ENGLISH)

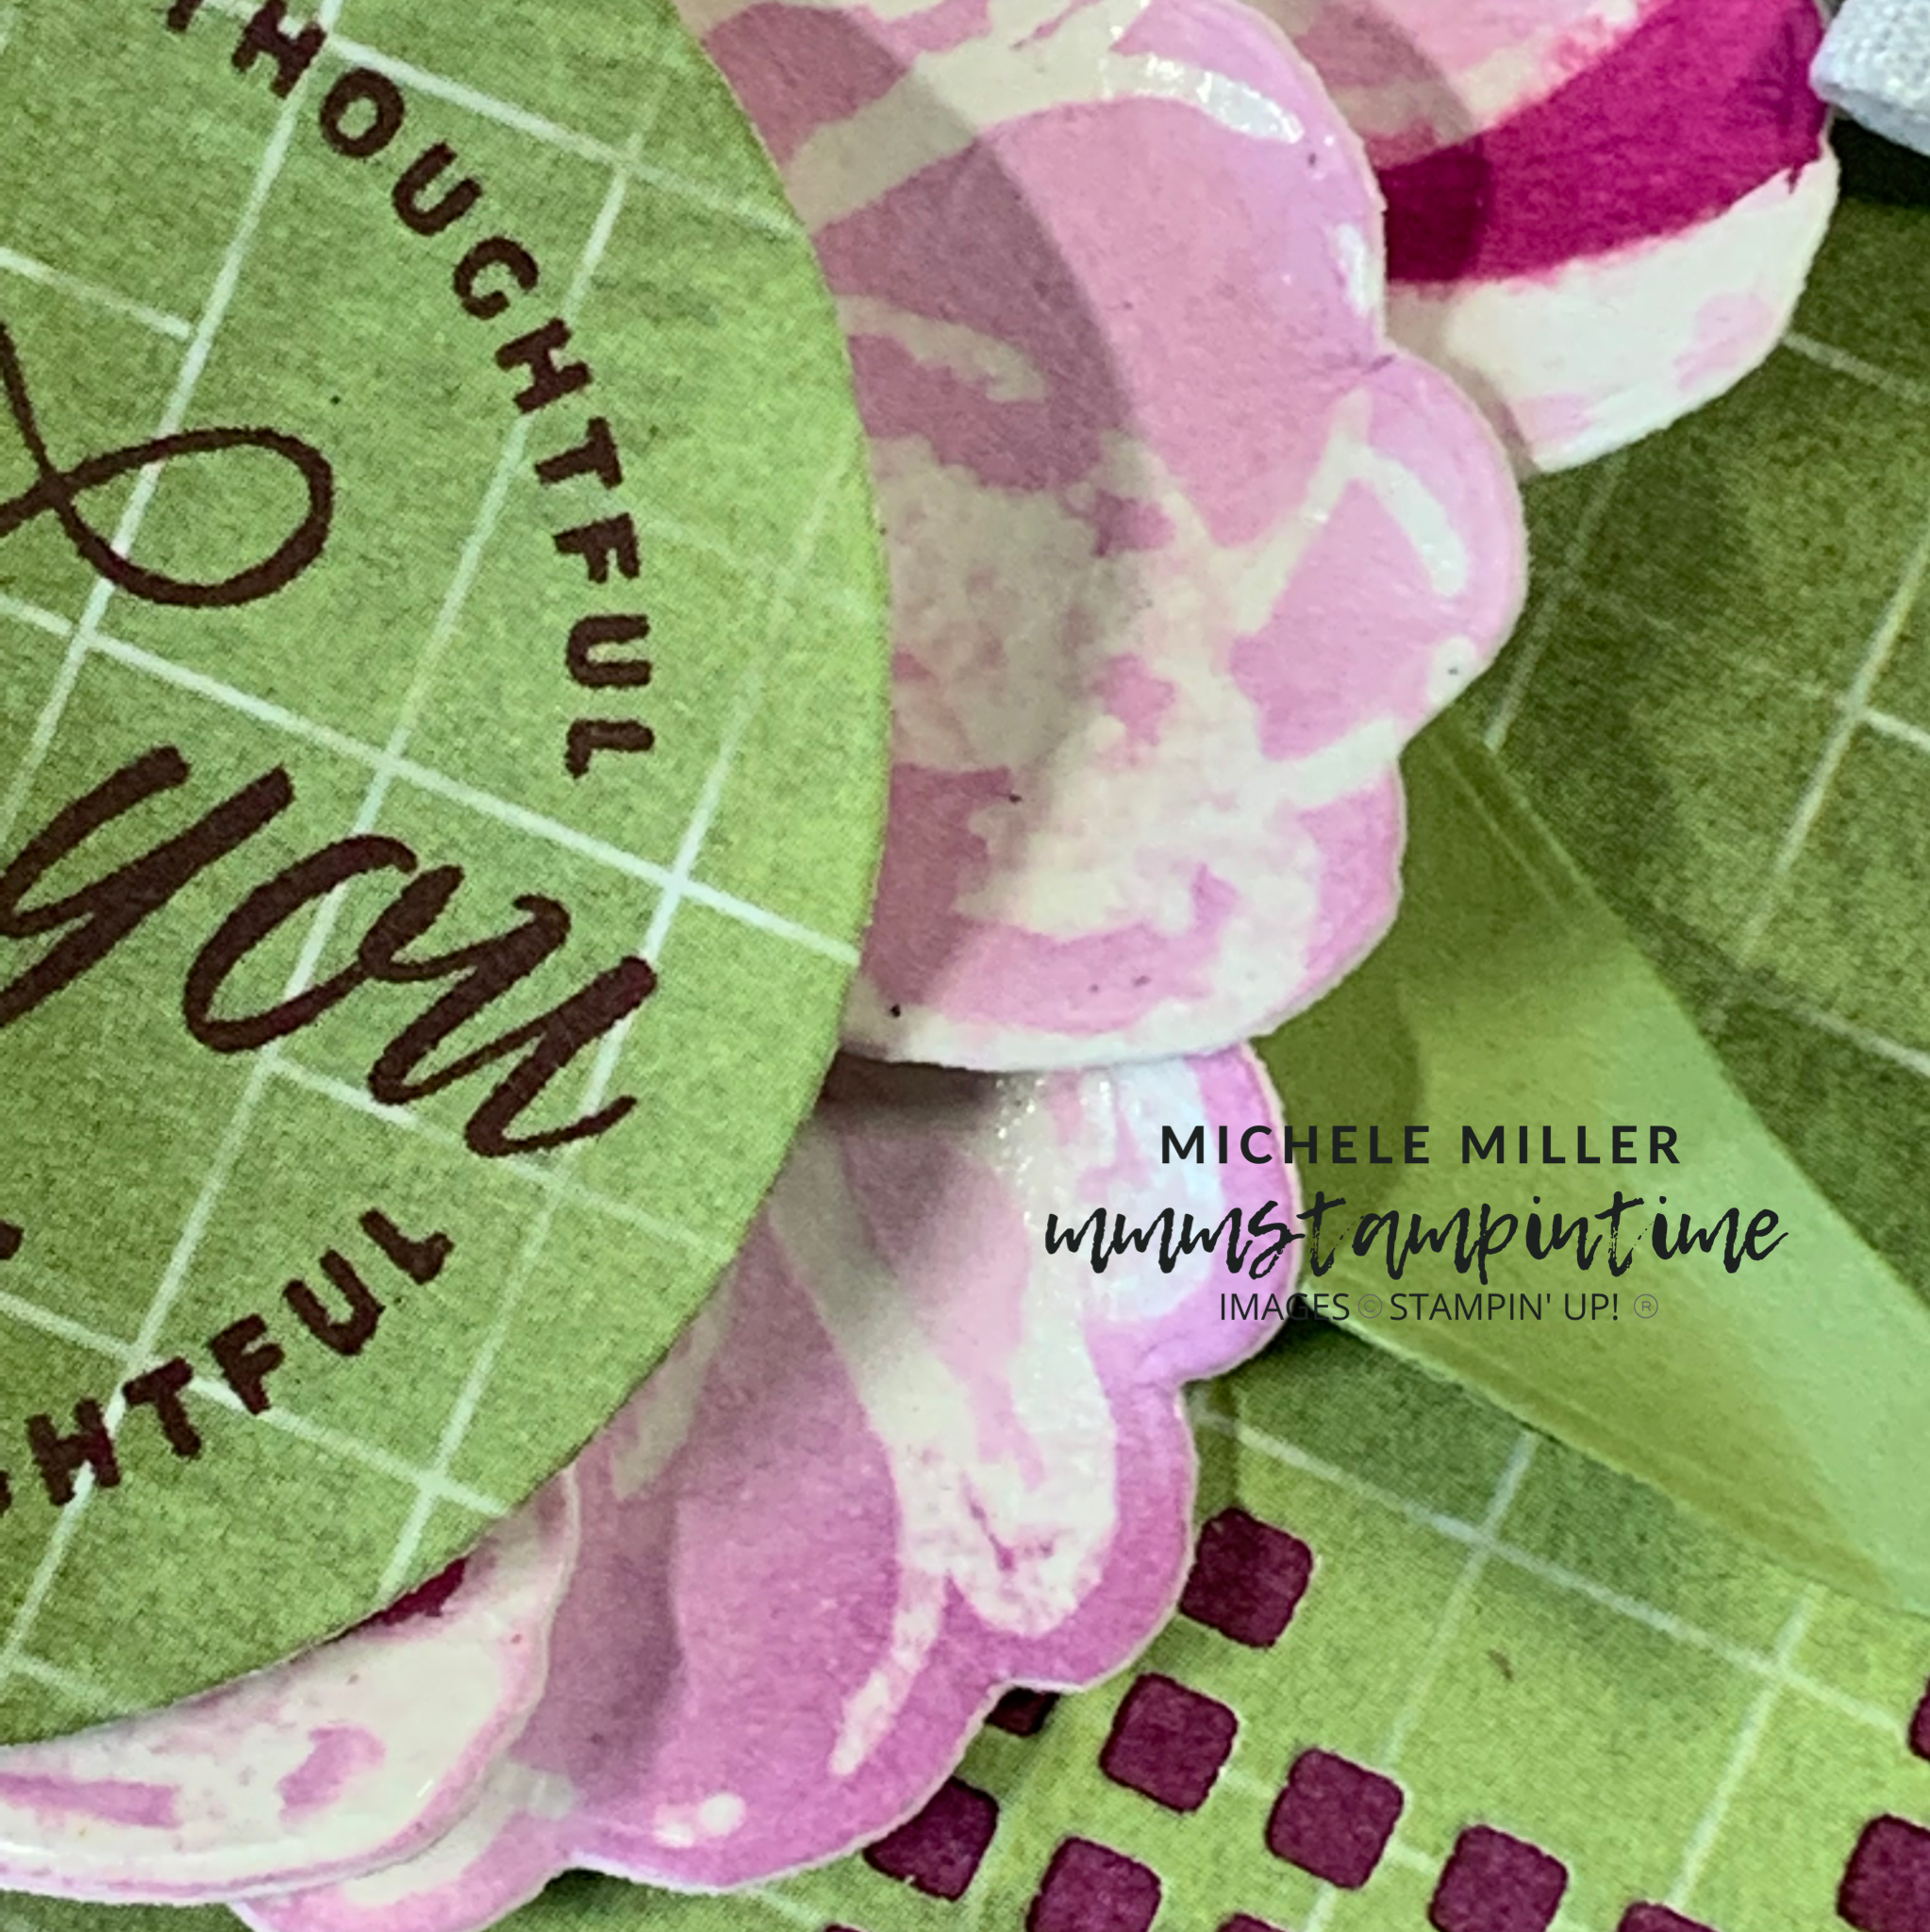
I used the Fluid 100 Watercolour Paper, Water Painters and the Fresh Freesia and Rich Razzleberry Classic Stampin’ Pads as the basis for water colouring flowers for the card.

I started by stamping the floral images onto the water colour paper using Versamark and then adding Clear Embossing Powder. This was then set using the Heat Tool.

Then I used my Water Painters to add water directly to the paper and then to add colour to the images.

The heat embossed clear embossing powder ‘stays’ white after the water colouring has been completed. When the paper is dry, each of the three different flowers were then cut using the outline dies from the Tulip Dies set.

Then I gently scrunched the flowers to give them some shape and texture.

The card base is Rich Razzleberry and I chose this piece of Designer Series Paper for the next layer of the card. Before this DSP layer was adhered to the card front, I added the checked Pear Pizzazz DSP piece . This piece features the geometric small squares die cut effect. Then I used a length of 1/2″ white Faux Linen Ribbon, from the Flowers for Every Season Ribbon Combo Pack, to tie a bow and wrap it around the DSP layers. The ribbon was secured behind this DSP using Tean & Tape.

The DSP and ribbon layers were then adhered to the card front.

Then I worked on creating these cascading flowers, using Multipurpose Glue and Stampin’ Dimensionals. I die cut three small leaves from a scrap of Pear Pizzazz cardstock and gently crunched them. With some Multipurpose Glue added to the base of each leaf, I tucked them in behind the flowers.

I used the ‘thank you’ sentiment, from the Flowering Tulips Stamp Set, to stamp on to the same piece of Pear Pizzazz DSP in Rich Razzleberry. This was then cut using one of the Layering Circles Dies. Stampin’ Dimensionals were placed on the back of the sentiment circle and then popped up on the card front. This is such a gorgeous sentiment – I love the way the two fonts work so well together, as well as the ‘logo style’ it has been styled.

The card insert and the back flap of the envelope both had some of the Pear Pizzazz DSP attached to create a coordinated and complete look to this card.

NOTE TO SELF – when I look back at the card, I think I should have lightened the colour in the centre of the flowers. What do you think? I would love your feedback!

Tomorrow is Welcome to Wednesay and this is the day that I will share projects that I have created for blog hops and challenges. I make a project each week for the Global Design Project challenge and will soon start sharing a project for the Freshly Brewed Projects Blog Hop.

Until the, happy stamping.

If you live in Australia, you can order any of the products I used to make this card by going to my online store. Just click on any of the images below.

Product List
Heat Tool
[129056]
$50.00
Paper Snips
[103579]
$17.00
Posted on Leave a comment

STEP IT UP SUNDAY FOR SOMETHING SPECIAL

I have loads of fun taking the cards I share each Saturday and stepping them up. Saturday’s cards are my #simplestamping cards and by Sunday, they get a makeover. I add more colour, more layers, more products and use more tools.

Let me show you the first card, from yesterday, to remind you of the basic layout.

Just stamps, ink and paper = #simplestamping.

Stepping this card is definitely what I prefer to do. I have three cards to share with you today.

I took a 5″x 1″ strip of the green gird Designer Series Paper and gently tore away the long edge create this ragged effect. Then I glued it to the bottom edge of the note card.

I stamped the sentiment, from the Special Moments Sale-a-bration Stamp Set, using Pear Pizzazz ink. The tree and shrubs are from the Tulip Fields Stamp Set. I also stamped these on the envelope and inside the card.

The windmill was stamped, coloured and cut using the coordinating die from the Tulips Dies set. I used the Basic Gray Stampin’ Write Marker™ to colour the outer edge of the blades.

The tulip rows were cut using a die from the same set. I cut the length of tulips into three pieces to create three garden beds.

The clouds were cut from one of the pieces of DSP.

The second card is a reverse eclipse card (well, that’s what I call it).

I chose a different piece of Designer Series Paper for this card and I layered it on a piece of Fresh Freesia cardstock.

The windmill was cut away using that die.

The same sentiment was stamped on a piece of Basic White cardstock and trimmed down. Stampin’ Dimensionals were used to pop the greeting up on the card front.

Then I wrapped some white baker’s twine, from the Essentials Pack, around the Fresh Freesia base and tied a bow.

I stamped and coloured the windmill on a piece of Basic White cardstock. Then I used a Blending Brush to lightly colour the area behind the windmill using Pool Party to create some sky.

Stampin’ Dimensionals were placed behind the windmill cut away and I positioned the stamped image under the die cut space.

I added more dimensionals to the back of the layer before attaching it to the note card.

I added one of the gorgeous Brushed Brass Butterflies to the card front. They are so very pretty.

My last card uses a few more elements.

The background layer was embossed with the Gingham Embossing Folder. I attached it to the front of the note card.

I used the Rectangular Postage Stamp Punch to cut two of the floral pieces from the Flowering Fields DSP. The third punched piece was cut from the green design that I used in today’s first card.

I die cut five tulip strips and added them to the back of the green punched piece using Stampin’ Seal. The green piece was then placed in the centre of the card using Stampin’ Dimensionals. The two floral pieces were glued down using Multipurpose Glue.

I stamped, coloured and die cut a windmill to add to the centre punched panel.

The sentiment was stamped onto a piece of vellum using StazOn Jet Black ink. I trimmed the vellum down so that it could fit in the bottom right hand corner. This piece was then added to the card using a strip of Stampin’ Seal.

To finish off the card, I used some more of Brushed Brass Butterflies.

I would love to know what you think about my stepped up cards.

Tomorrow is Memories on Monday, so I’m to see if I can find some photos to use.

Until then, happy stamping.

If you live in Australia, you can order any of the products I used to make this card by going to my online store. Just click on any of the images below.

Product List
Paper Snips
[103579]
$17.00