Posted on Leave a comment

ENJOY THE JOURNEY WITH A FEW EXTRA MASCULINE ELEMENTS

This collection of new products are perfect for masculine cards.

For this card I decided to add texture and colour elements to the card.

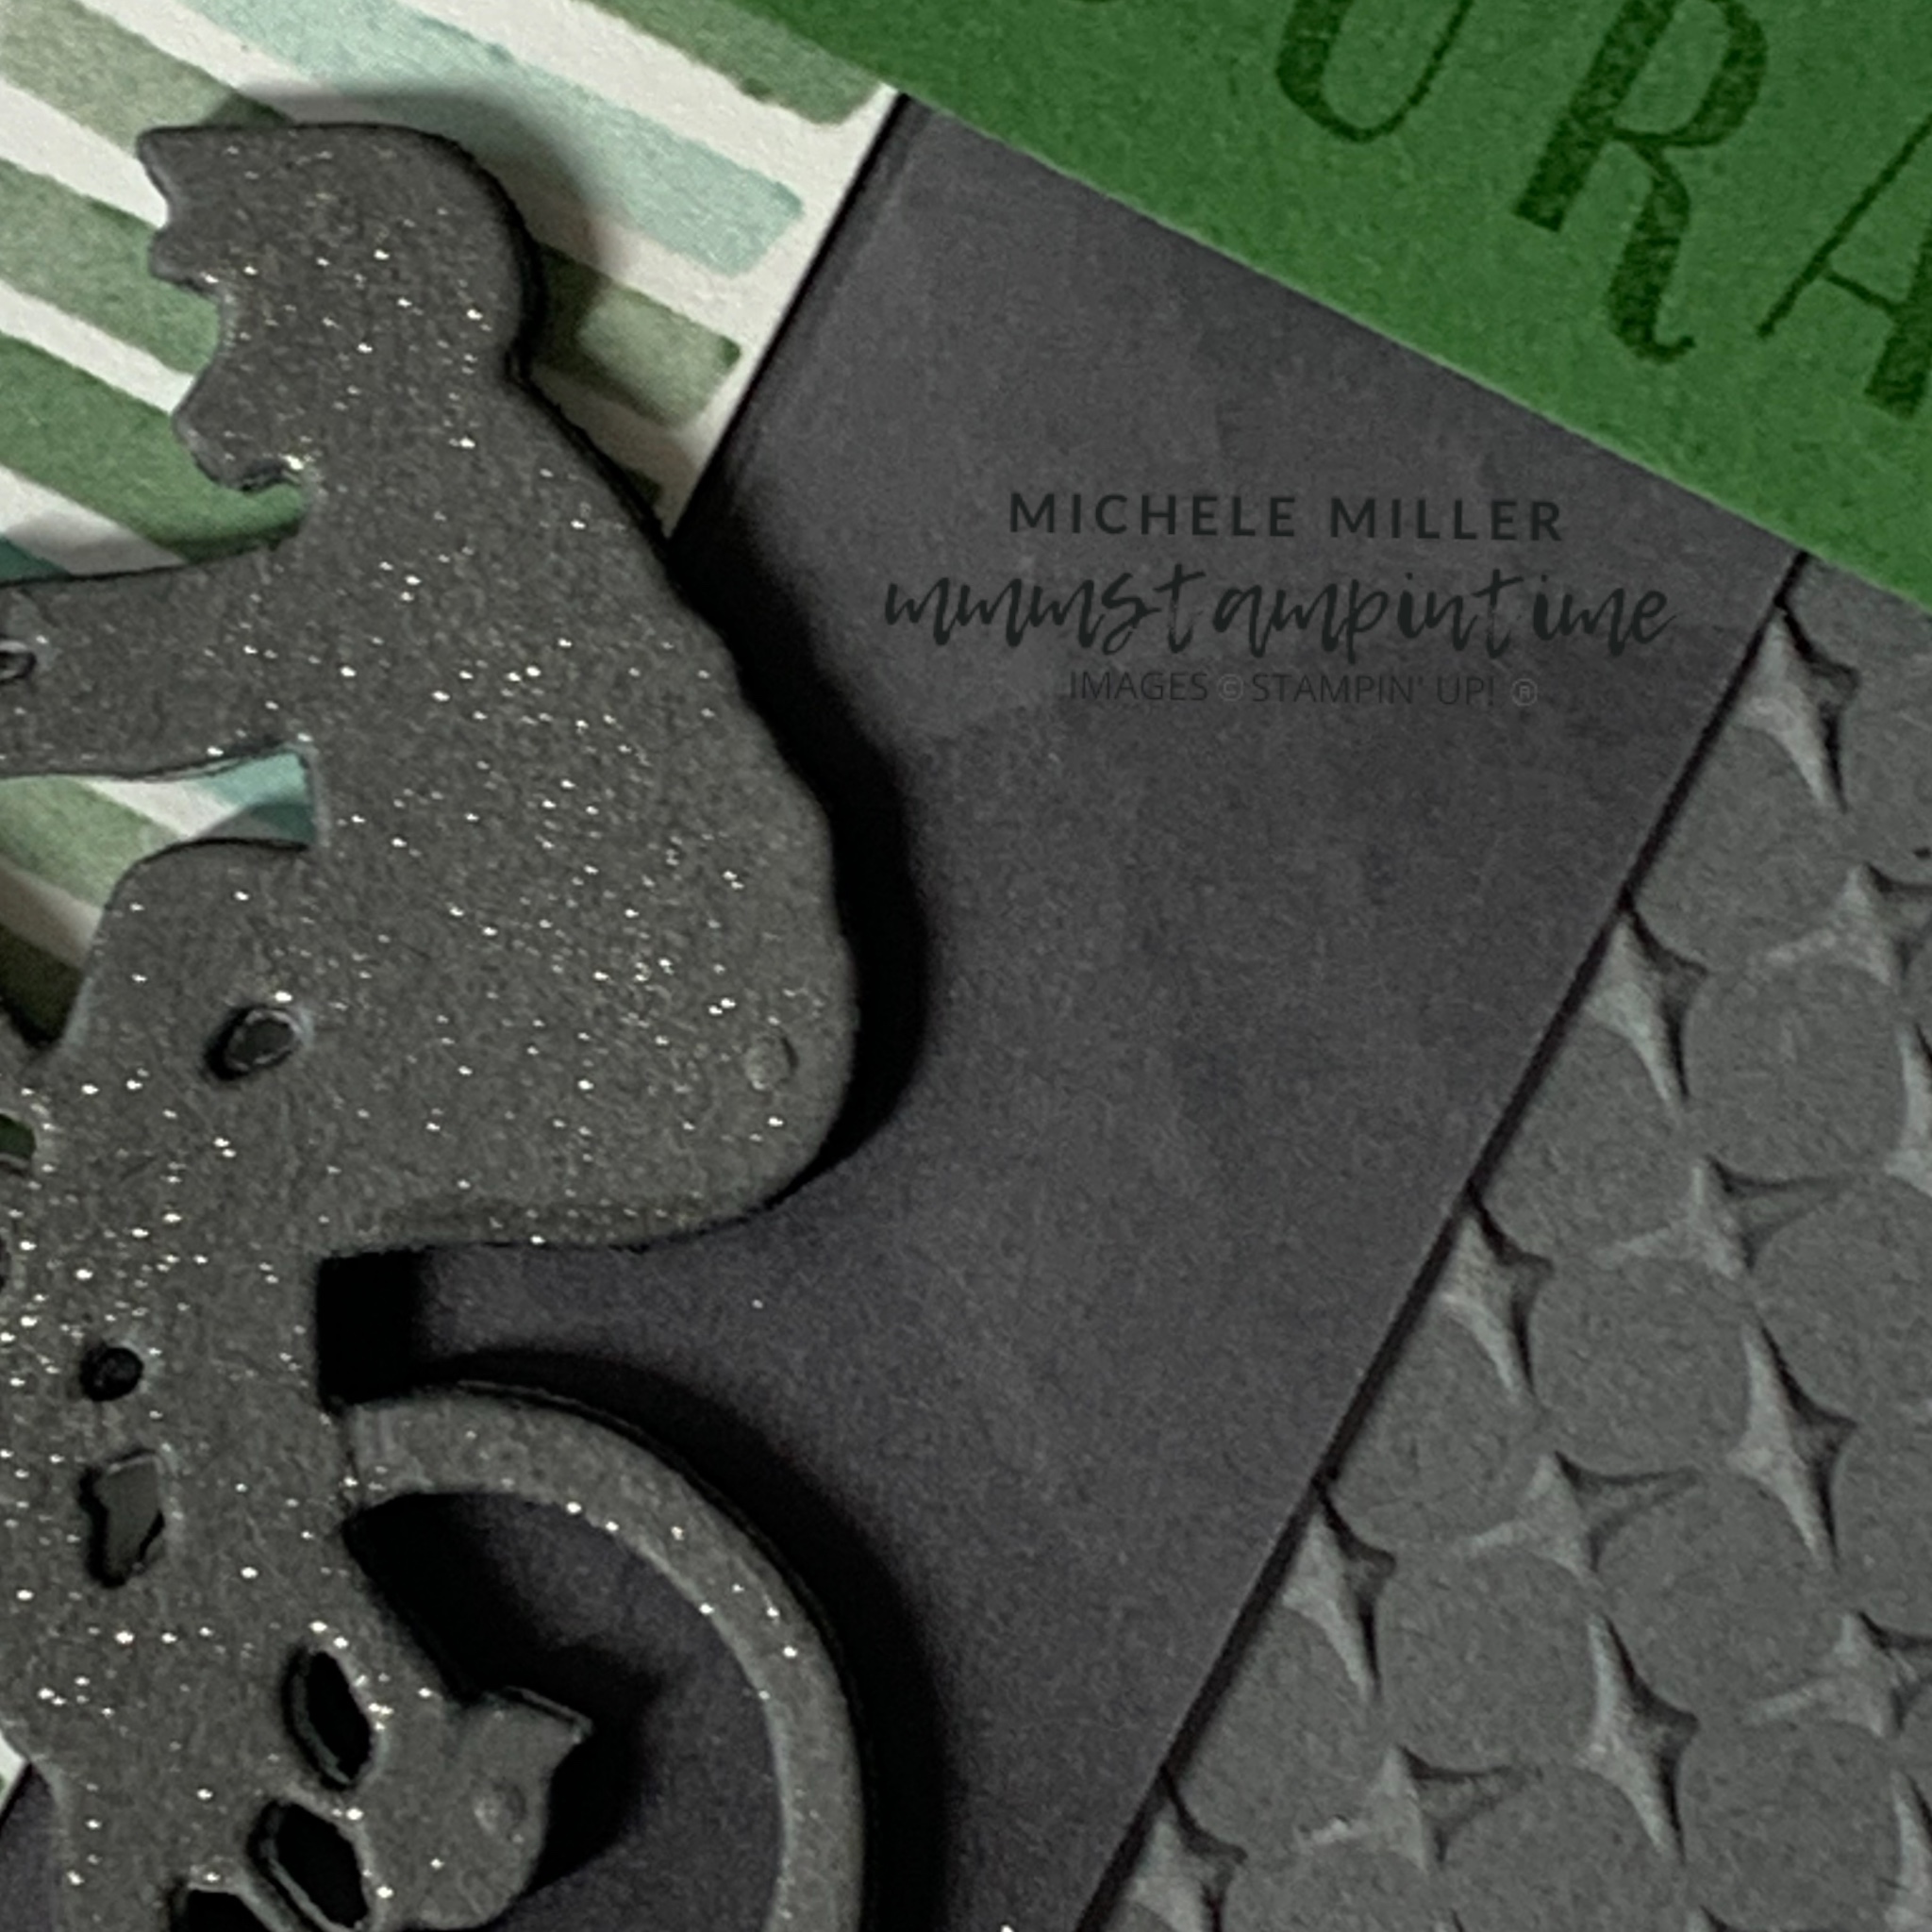
I started with a Basic Gray card base to coordinate with the panel of Designer Series Paper built up with greens and grays. A panel of Basic Gray cardstock was embossed using the METAL PLATE 3D EMBOSSING FOLDER.

Between the DSP and embossed gray layers I added a panel of vellum from the LOVELY LAYERS 3-3/4″x 5″ VELLUM.

After these layers were combined I wrapped a length of Garden Green twine from the THREE TWINE COMBO PACK and tied a knot.

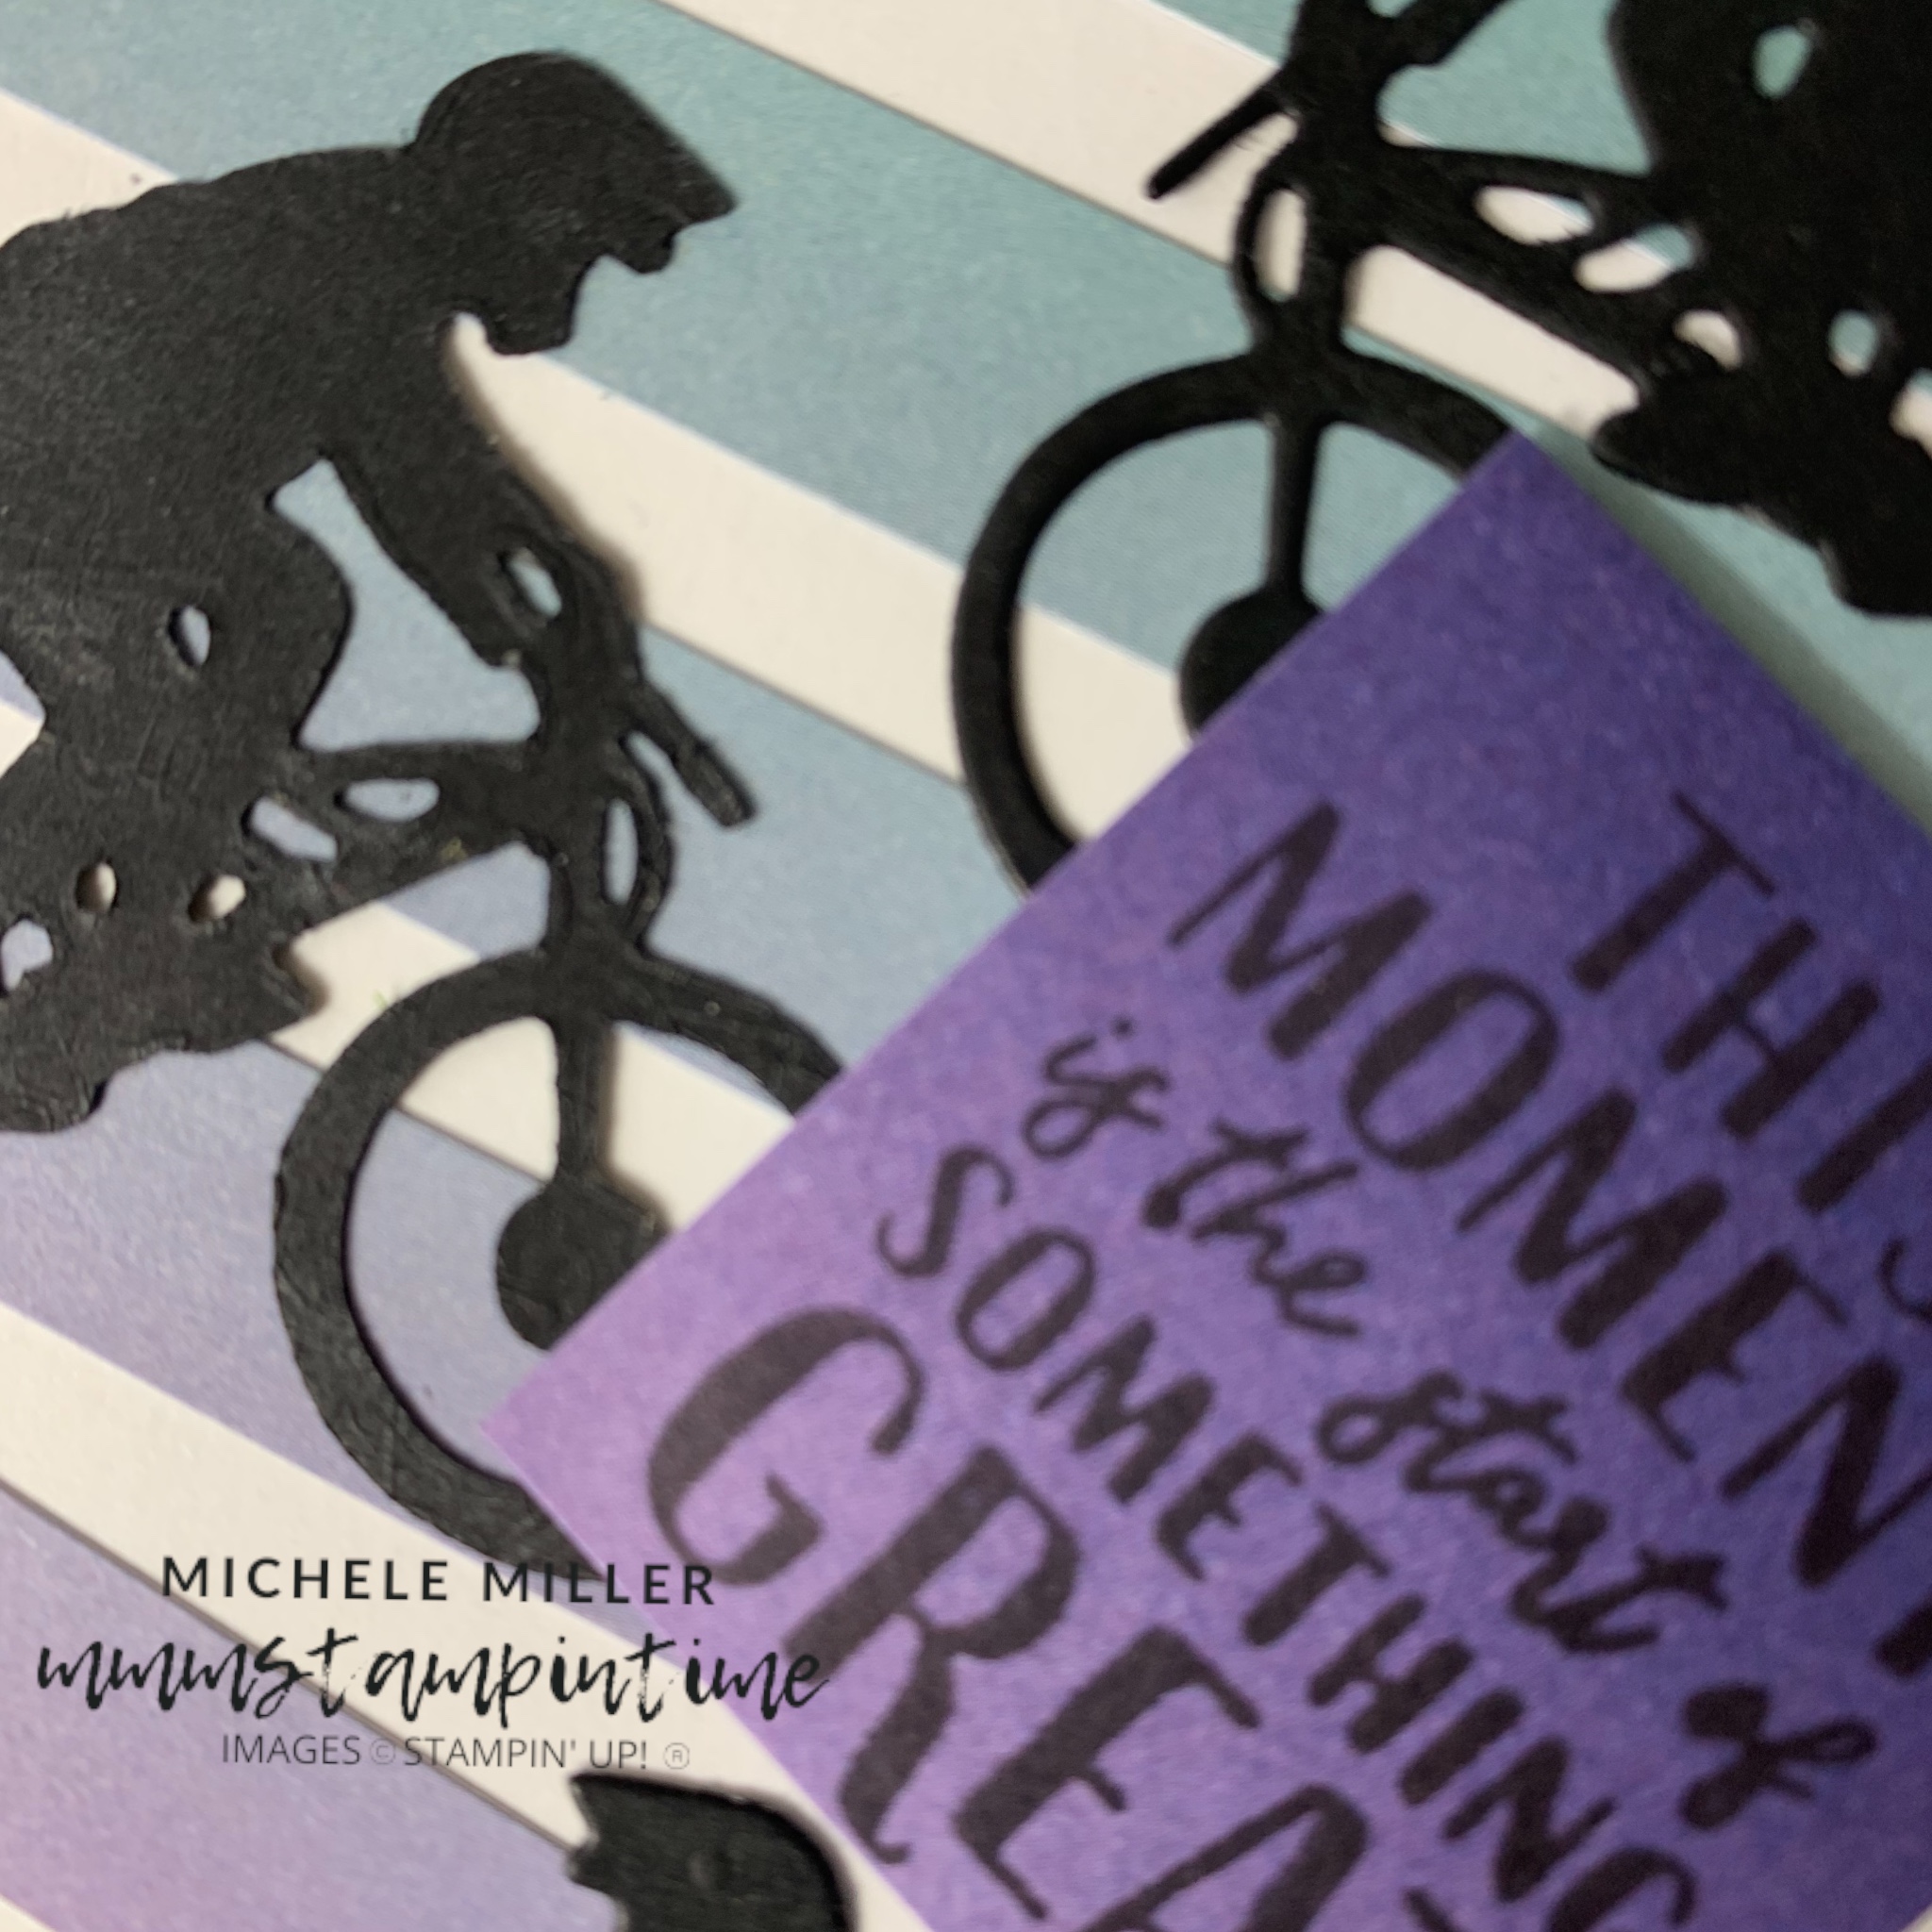
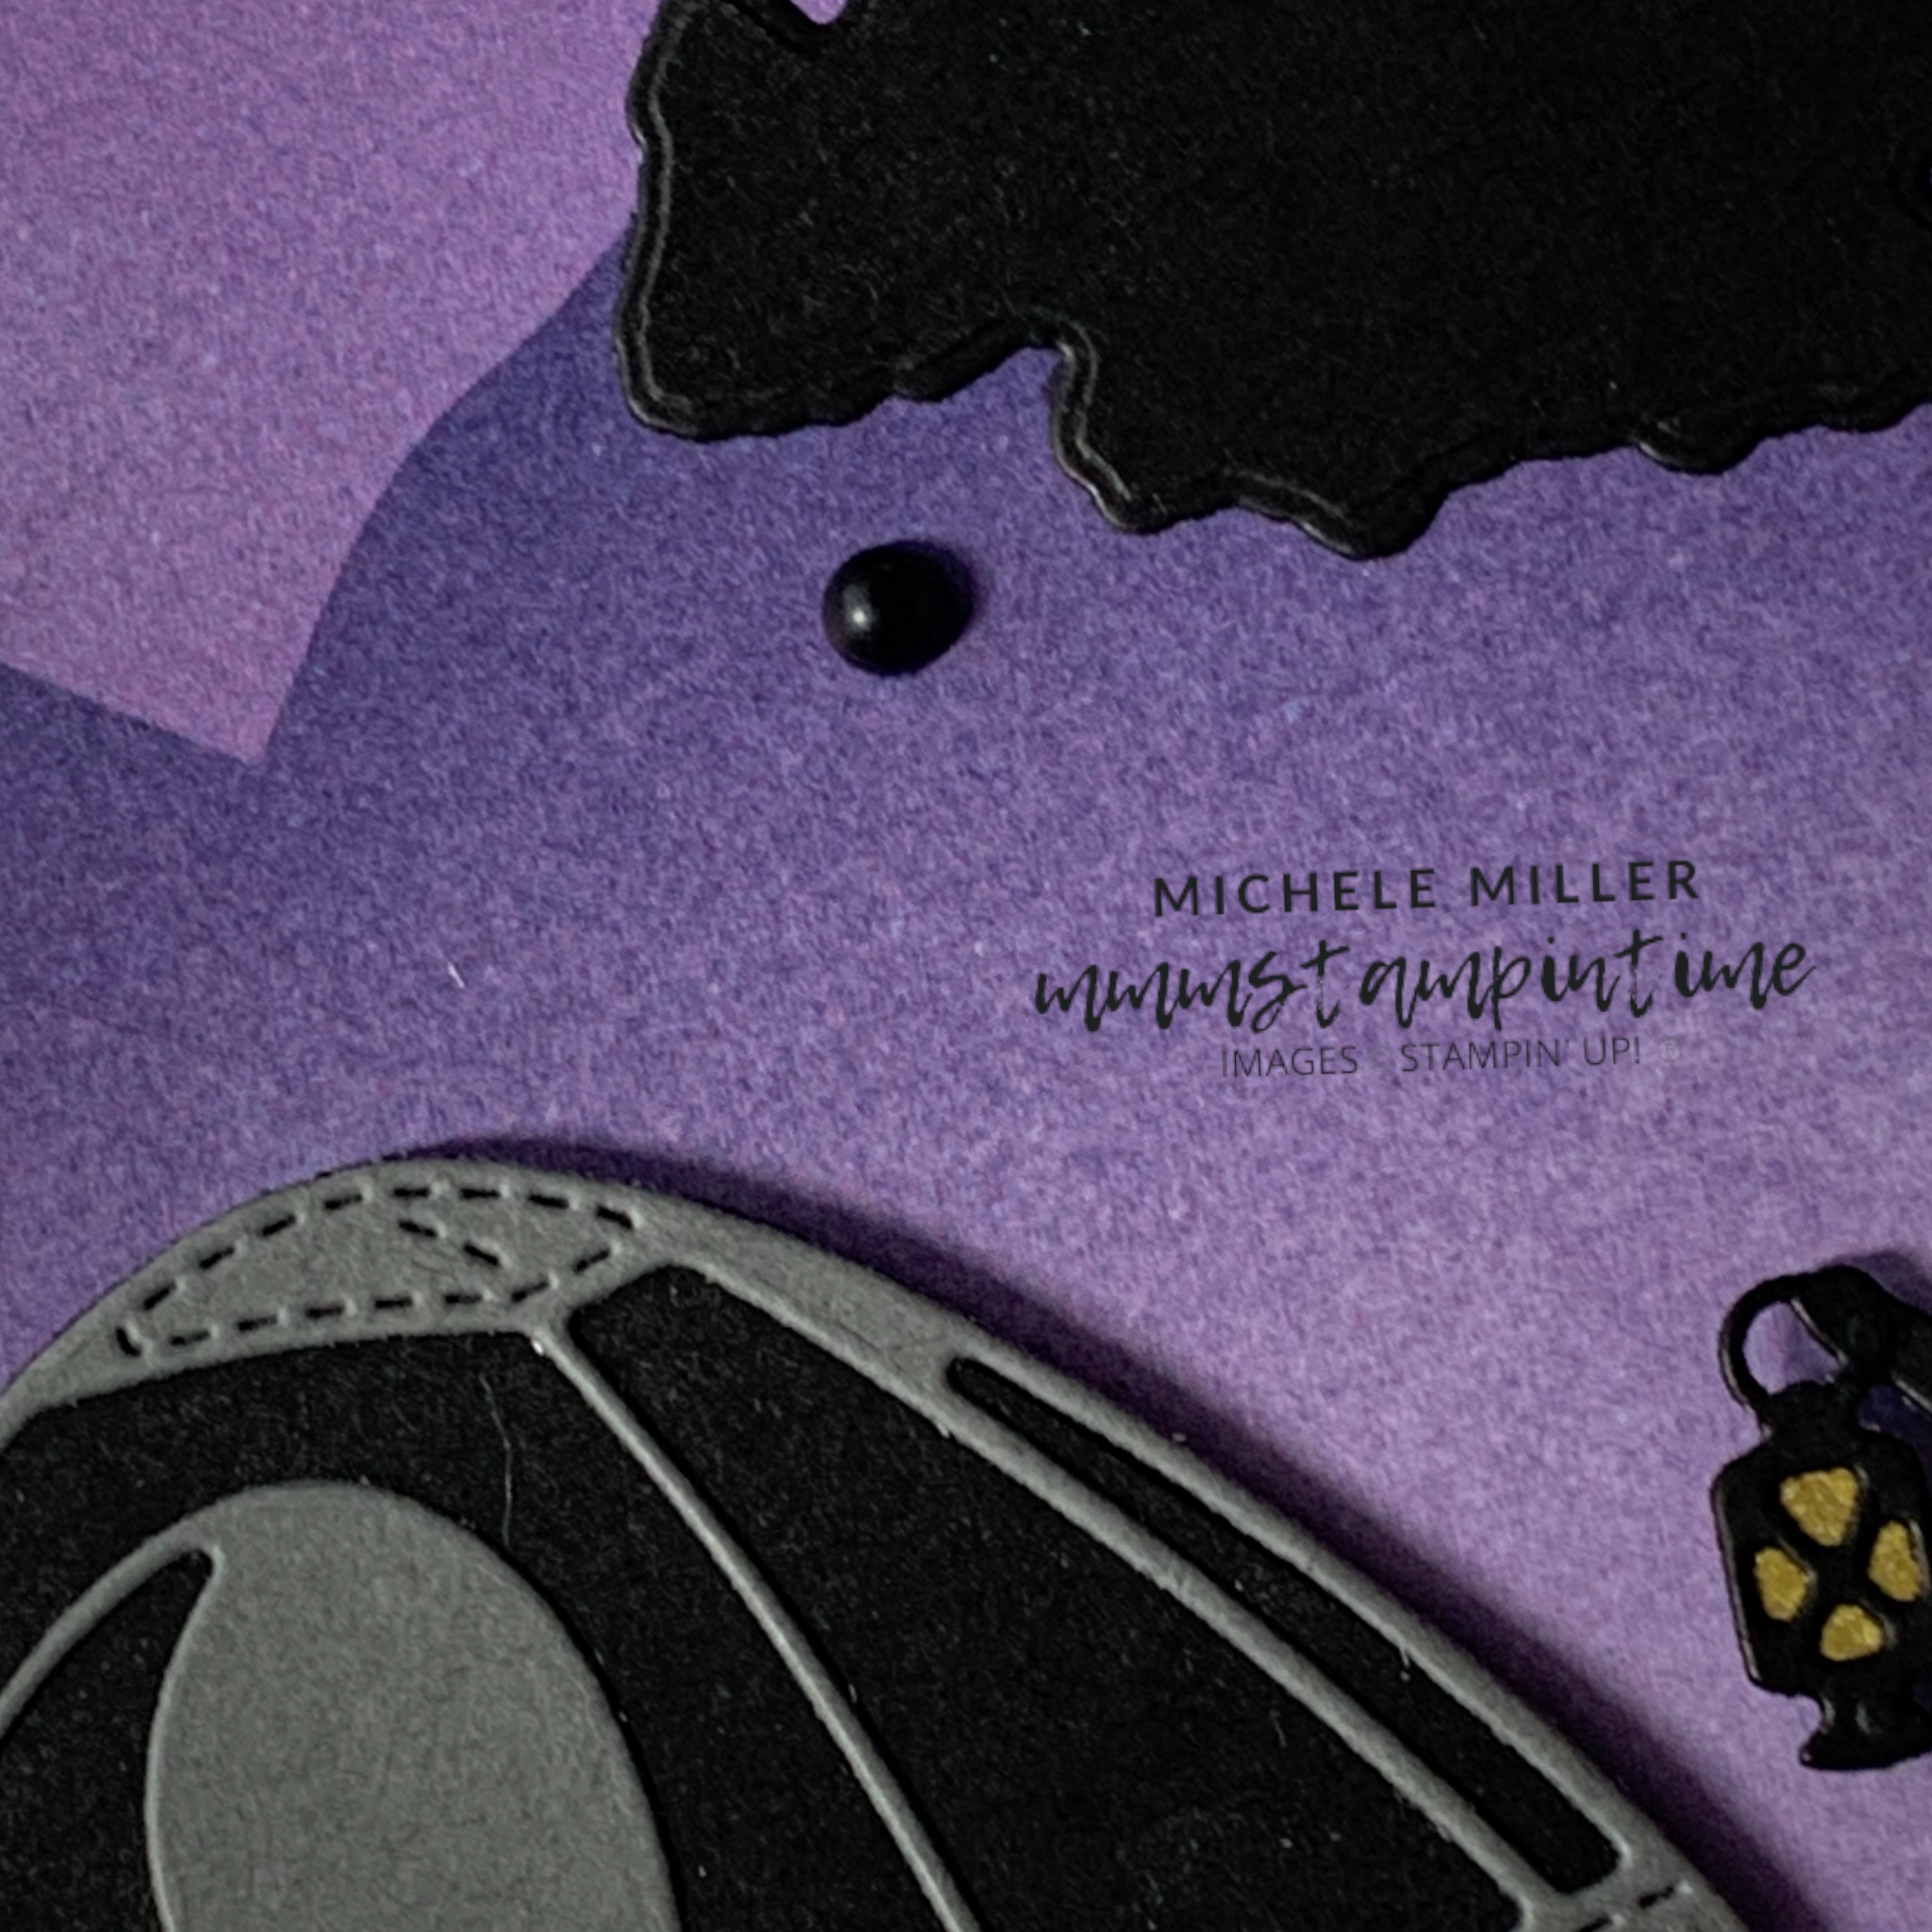
After the three card front layers were attached to the front of the card, I added a Basic Gray bike to the card. It was cut with FOAM ADHESIVE attached. I used a Basic Gray marker to colour the white edges of the foam adhesive.

The sentiment was stamped in Garden Green on to cardstock of the same colour.

The card inset and envelope were finished with strips of the chosen DSP adhered in place. This is one really quick and easy way to ensure the card and envelope coordinate.

Another project tomorrow – I love how easy it is to create so many projects using the one collection of products in just one week!

Until then, happy stamping.

If you live in Australia, you can order any of the products I used to make this card by going to my online store. Just click on any of the images below.

Product List
Paper Snips
[103579]
$19.25
Posted on Leave a comment

A SUPER SIMPLE MASCULINE CARD

I have a few more projects for you this week using the ENJOY THE JOURNEY SUITE COLLECTION. It is perfect for anyone who enjoys a little outdoor adventrure.

For this card I wanted to feature a trio of mountain biking silhouettes. Using ADHESIVE SHEETS makes adhering a detailed die cut so much easier.

I chose a piece of ENJOY THE JOURNEY 12″x 12″ DESIGNER SERIES PAPER that has this wonderful gradation of colours from Starry Sky through to Highland Heather then Coastal Cabana.

I cut a 3″ wide panel and then seven 1/2″ strips. These strips were then adhered to the card front, each at a slightly different angle. This gives the card a sense of movement.

After the strips of DSP were positioned on the card front, I removed the backing from the adhesive sheet and placed the three bicycles as you can see.

The sentiment, from the GREATEST JOURNEY STAMP SET, was stamped on to a piece of the same DSP. This was trimmed into a rectangle and attached to the card using STAMPIN’ DIMENSIONALS. The top right hand corner of the sentiment panel was also trimmed.

The final step was to add some MATTE BLACK DOTS as embellishments.

I think this sentiment is going to be so versatile. Can you think of times when you would give a card to someone because they are about start something that is going to be great?

Tomorrow is another day and that means another project. Until then, happy stamping.

If you live in Australia, you can order any of the products I used to make this card by going to my online store. Just click on any of the images below.

Product List
Paper Snips
[103579]
$19.25
Posted on Leave a comment

TIME FOR ANOTHER GREATEST JOURNEY CARD

The card I have to share with you today is very similar to the card I posted yesterday. It also features one of the DSP designs. (First time here? DSP = Designer Series Paper).

ENJOY THE JOURNEY 12" X 12" (30.5 X 30.5 CM) DESIGNER SERIES PAPER

These landscape scenes are amazing – so many possibilities!

The Highland Heather and Starry Sky ombre DSP is great for these Basic Black and Basic Gray silhouettes.

After cutting the hiker, I adhered a small piece of Distressed Gold 12″x 12″ Specialty Paper to give the lantern a warm glow.

For the tent, I attached some Adhesive Sheet to the back of the Basic Gray cardstock. This makes it so much cleaner to attach this overlay.

After all the elements were adhered to the card front, I wrapped a length of black twine, from the Baker’s Twine Essentials Pack, around the card and tied a bow. I secured the bow with a Mini Glue Dot.

The sentiment was stamped onto a piece of Basic Gray cardstock and then trimmed down. The tent, hiker and sentiment were all positioned on the card front using Stampin’ Dimensionals.

The card insert and envelope each had a hiker silhouette added.

The final touch was to add a few Matte Black Dots.

Tomorrow’s card will feature the bike silhouette!

Until then, happy stamping.

If you live in Australia, you can order any of the products I used to make this card by going to my online store. Just click on any of the images below.

Product List
Paper Snips
[103579]
$19.25