Posted on Leave a comment

THIS SUNDAY BRINGS MY COUNTRY WOODS SUITE COLLECTION PROJECT SHARES TO A CLOSE

For almost the last two weeks I have been sharing the Country Woods Suite Collection projects, that I created for a recent Paper Angels Team Day, with you.

They have ranged from easier cards for newer crafters to more elaborate projects for the more expereinced and well equipped crafter. I have showcased this product collection and used other products to maximise creative opportunities to show what you can use this new collection with. There have been a variety of tips, techniques and fun folds on offer as well. I hope that you have enjoyed what I have shared and are now inspired to move on to your own creations.

Today I have a 12″x 12″ scrapbook page to share with you.

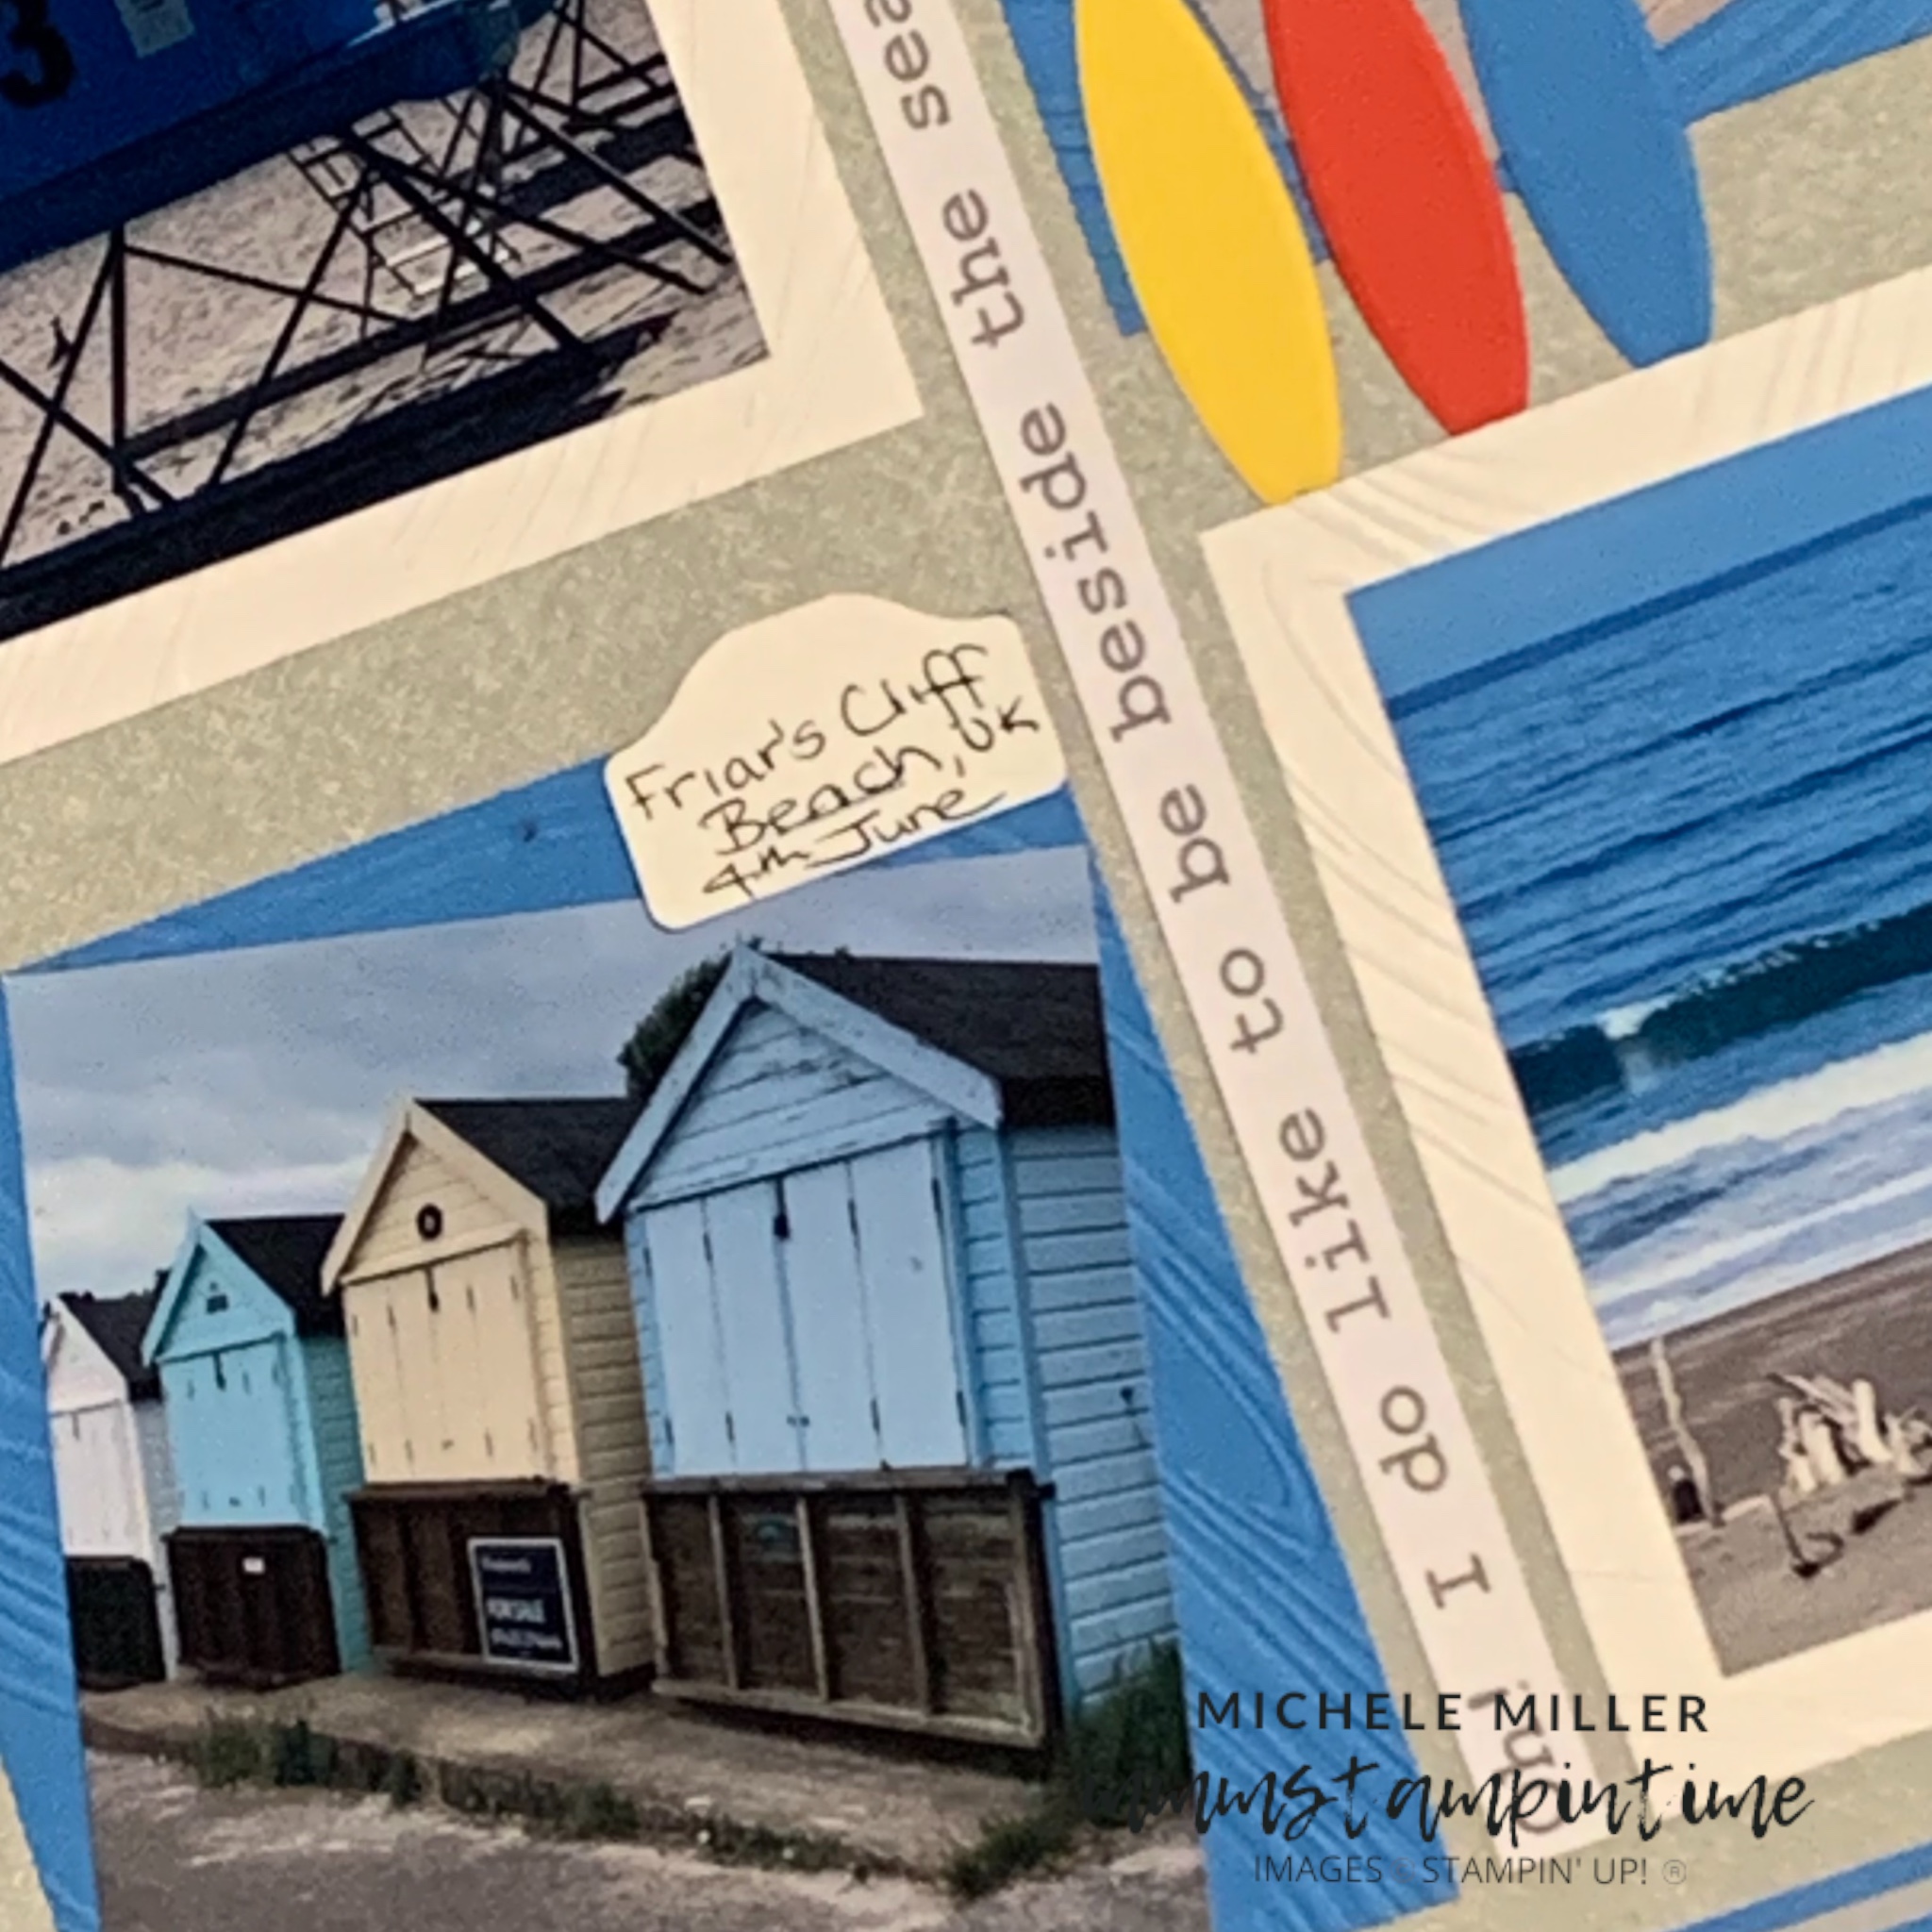
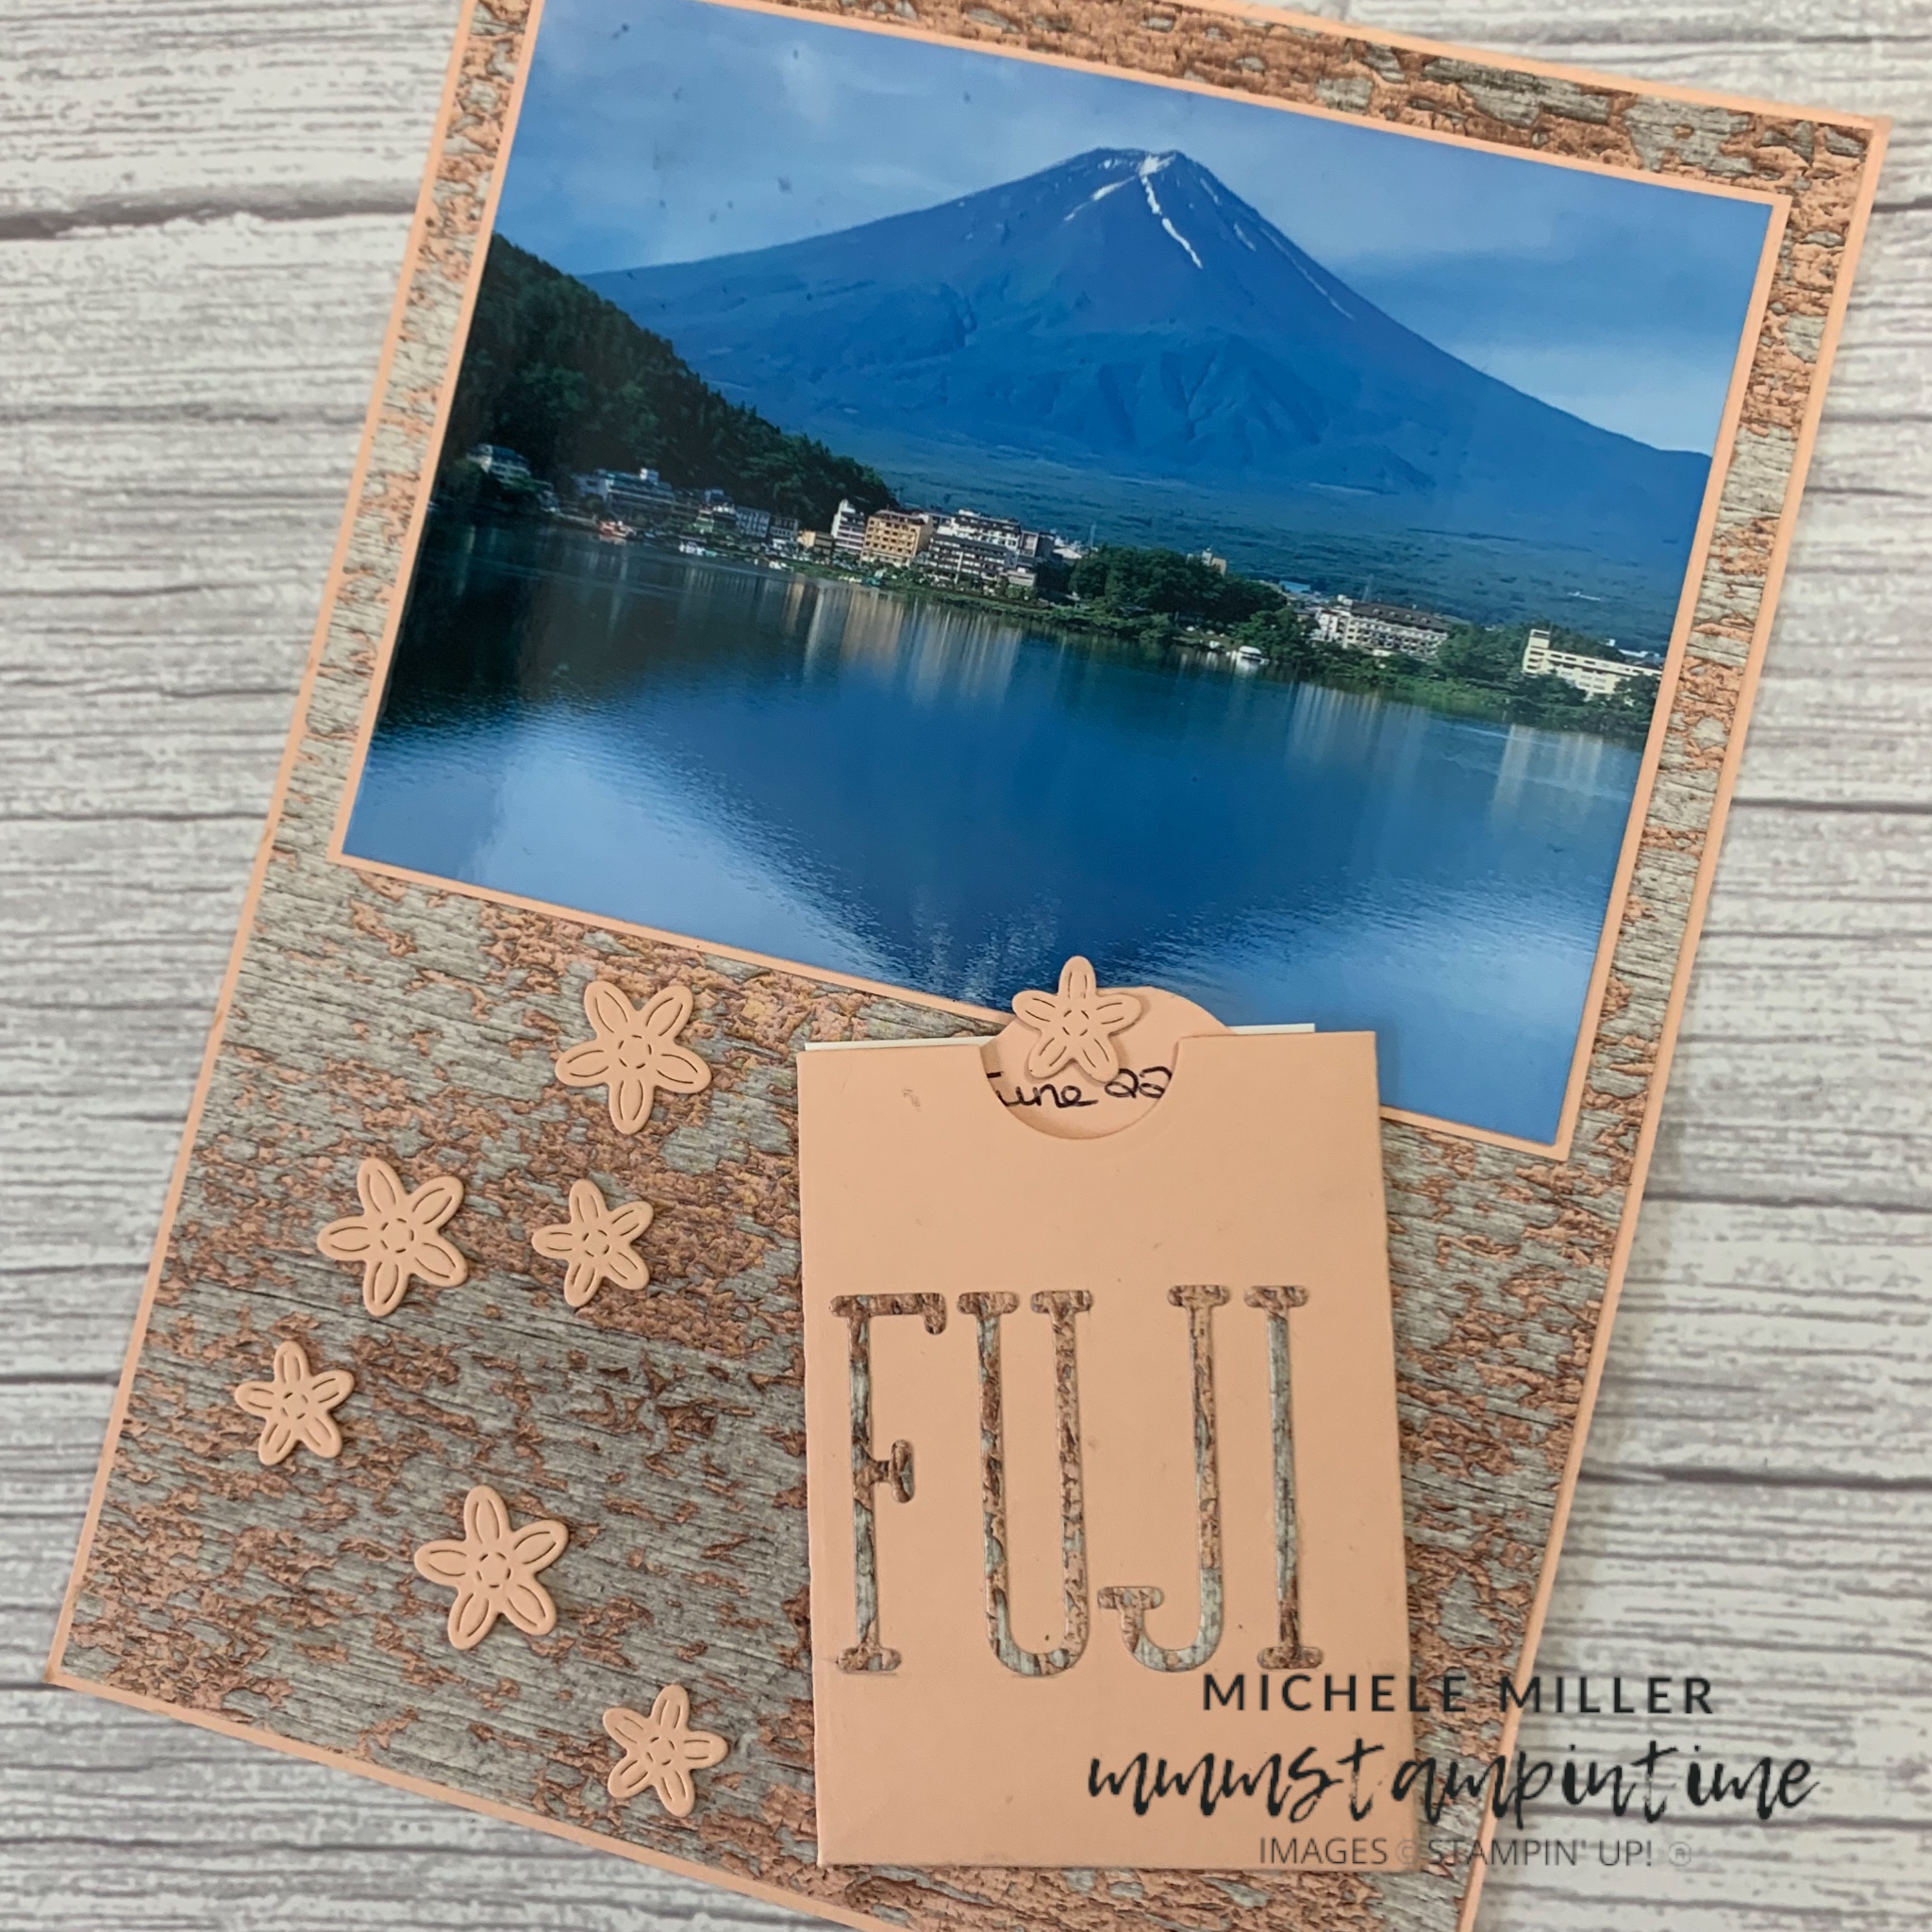
It incorporates four photographs – two from our recent visit to the US and two from the UK.

For this page I used multiple layers of card – a 12″x 12″ Basic White base and then receding layers of coloured card – Azure Afternoon, Smoky Slate, Azure Afternoon and Smoky Slate. Finally, I added a piece of paper from the Country Lace DSP collection.

This piece of DSP was a perfect match for the US beach scentes and the UK concrete in the photos.

I cut four 3 3/4″ panels in Basic White and Azure Afternoon and used the So Swirly 3D Embossing Folder to give them texture.

These embossed panels were adhered evenly on the page before the photos were added.

I used the Keeping Tabs Die/Punch to create each journalling tab to then add to each photograph.

I used the Beach Day Dies to cut the three surfboards I added to the page.

How much do you think this beach hut would cost to buy?

I printed the central sentiment using a typewriter style font and trimme dit down to add to my page.

This was such an awesome memory page to make because of the wonderful experiences we had.

Tomorrow, being Monday means, I will introduce a new collection of products to share with you.

Until then, happy stamping and scrapbooking.

If you live in Australia, you can order any of the products I used to make this card by going to my online store. Just click on any of the images below.

Product List
Posted on Leave a comment

THIS SATURDAY I HAVE SOME SCRAPBOOKING/MEMORY KEEPING PAGES TO SHARE WITH YOU

It has been quite a while since I have done any real scrapbooking or memory keeping. But having so recently returned from a 10 week overseas holiday I had many memories ready to be shared.

The first memory page is from one of the wonderful days I spent in Rotterdam visiting my dear Stampin’ Up! friend Lotte Noordjzig-Walther. We first met in Orlando, Florida in 2018. We were both attending On Stage and were volunteers. We have managed to catch up at twice at events in Dortmund and Vienna.

This memory is from the day I spent with her at a crafting event she and her team were holding at a week long summer festival held just outside Amsterdam

Lotte picked me up from my central Rotterdam accommodation and we drove to the event, chatting all the way. We also spent the following day walking, talking and eating our way around Rotterdam.

I took many photos at the crafting event but chose this one to share.

I started by choosing the Wood Textured Specialty Paper because it tied in so well with the pine panelling in the craft space at the event. Using the Basic Beige Classic Stampin’ Pad and a small BLending Brush, I worked some colour across the white card.

After the photo was adhered, I die cut many flowers in the 2024-2026 In Colour cardstock to match the flower garland made to decorate the crafting space. The flowers were added to the scrap page following the same colour sequence of the garland.

The Labeled with Love die cut card was perfect for my journalling.

After adding Adhesive Sheet to the back of some Shy Shamrock card I used the Alphabet A La Mode dies to cut the letters for the page. Then I was able to add my title to the page – A LOTTE FUN.

This page was a LOTTE fun to create and it is a wonderful way to capture this memory.

About three weeks after being in Rotterdam, Rob and I had headed to Japan for a 15 day tour.

Towards the end of that tour we visited Mt Fuji. We headed up to the Fifth Station and were shrouded in cloudy mist. Then we drove to Lake Kawaguchi and stayed overnight in a hotel with views across the lake to Mount Fuji.

When we woke the following morning, on our 39th wedding anniversary, we were greeted with a spectacular and clear view of the mountain.

For this memory page I chose a Petal Pink background to match the pink hotel that can be seen across the lake.

This piece of Country Woods Designer Series Paper was a perfect match for this page. After layering all the elements of this page I then used one of the Pocket Thoughts Dies to create a journalling pocket.

The new Keeping Tabs Die/Punch is perfect to add to the top of a journalling panel.

The word FUJI was created using the same DSP, with attached Adhesive Sheet, and the Alphabet A La Mode Dies.

Although we were not in Japan during cherry blossom season, I thought that adding some of flowers from the Country Flowers Dies would be an appropriate embellishment.

Tomorrow I will share a 12″x 12″ scrapbooking page with you.

Until then, happy stamping.

If you live in Australia, you can order any of the products I used to make this card by going to my online store. Just click on any of the images below.

Product List
Posted on Leave a comment

IT’S FRIDAY & TIME FOR A FUN FOLD CARD … OR THREE

Today I have three different Fun Fold Cards to share with you.

The first card today is a Side Step Card.

Just like the two cards shared on Wednesday, all these cards use a Basic Gray card base, the same piece of Designer Series Paper and a Silver Foil feature.

After cutting and scoring the side step card, I added the DSP panels.

Each of the silver foil urns were cut and coloured by pressing the silver side of each urn directly onto the Jet Black Staz On ink pad. This leaves the textured image that you can seebelow.

Several Pretty Peacock Glimmer Paper leaves and many more Pretty in Pink Glimmer flowers were die cut.

The urns were attached to the card front, either directly onto the DSP or popped up with Stampin’ Dimensionals. Then the leaves and flowers were added to build up a gorgeous floral bundle.

The sentiment was stamped onto a thin Basic Gray panel and then adhered to the front of the card. An extra pink glimmer flower was adhered next to the sentiment.

A thin panel of Pretty in Pink Glimmer Paper was adhered to the card insert.

The next card is a Triple Diamond Fun Fold Card

This fun fold card starts with a Basic Gray portrait card with the front panel folded back and scored.

Each card section then had a panel of Smoky Slate card and a panel of the chosen DSP adhered into place using Multipurpose Glue.

Using one of square Stylish Shapes Dies, I cut four Basic White Thick card square pieces. Three of them then had slightly smaller Basic Gray squares added to them.

The final white square was stamped with the sentiment, in Highland Heather, before being trimmed.

After die cutting three silver tubs, I stamped the FLOWER MARKET image in Jet Black Staz On ink. I also used the ink pad to swipe some of the ink across the tubs. The tubs were then filled with Shy Shamrock Glimmer leaves and Highland Heather Glimmer flowers.

The first three Basic White squares were adhered to the first 1/4 panel and the fourth was added to the inside area using a a simple pop-up mechanism.

To finish the card, I added a Basic White panel to the back of the card. It had Shy Shamrock Glimmer leaves and Highland Heather flowers added.

The envelope flap had the same DSP added. Finally, I added some Purple Fine Shimmer Gems to the front panel.

The last card for this post is an Accordian Gate Fold card.

This card started as a piece of Basic Gray card measuring 11″x 4 1/8″, scored at 2 7/8″, 6 1/4″ and 9″.

Most panels of the scored card then had panels of Country Woods DSP adhered. The main central card section has a Smoky Slate and Basic White panel added.

Three lengths of white Baker’s Twine, from the Essential Pack, were coloured using the dark Misty Moonlight Stampin’ Blend Pen. These were secured, with Stampin’ Dimensionals, to the first panel on the front of the card. These were then covered by a stamped silver urn and floral bouquet.

The sentiment was stamped in Misty Moonlight onto a piece of Basic White Thick card and trimmed down to fit into this panel.

Smoky Slate Pearls were coloured just like the baker’s twine.

Another urn and floral bouquet were stamped and cut ready to be added inside the card.

These are the last of the cards to go into the gift box I shared yesterday.

Over the weekend I will share some more projects – 3D and memory keeping/scrapbooking.

Until then, happy stamping.

If you live in Australia, you can order any of the products I used to make this card by going to my online store. Just click on any of the images below.

Product List
Paper Snips
[103579]
$21.00