Posted on Leave a comment

IT’S FRIDAY & TIME FOR A FUN FOLD CARD … OR THREE

Today I have three different Fun Fold Cards to share with you.

The first card today is a Side Step Card.

Just like the two cards shared on Wednesday, all these cards use a Basic Gray card base, the same piece of Designer Series Paper and a Silver Foil feature.

After cutting and scoring the side step card, I added the DSP panels.

Each of the silver foil urns were cut and coloured by pressing the silver side of each urn directly onto the Jet Black Staz On ink pad. This leaves the textured image that you can seebelow.

Several Pretty Peacock Glimmer Paper leaves and many more Pretty in Pink Glimmer flowers were die cut.

The urns were attached to the card front, either directly onto the DSP or popped up with Stampin’ Dimensionals. Then the leaves and flowers were added to build up a gorgeous floral bundle.

The sentiment was stamped onto a thin Basic Gray panel and then adhered to the front of the card. An extra pink glimmer flower was adhered next to the sentiment.

A thin panel of Pretty in Pink Glimmer Paper was adhered to the card insert.

The next card is a Triple Diamond Fun Fold Card

This fun fold card starts with a Basic Gray portrait card with the front panel folded back and scored.

Each card section then had a panel of Smoky Slate card and a panel of the chosen DSP adhered into place using Multipurpose Glue.

Using one of square Stylish Shapes Dies, I cut four Basic White Thick card square pieces. Three of them then had slightly smaller Basic Gray squares added to them.

The final white square was stamped with the sentiment, in Highland Heather, before being trimmed.

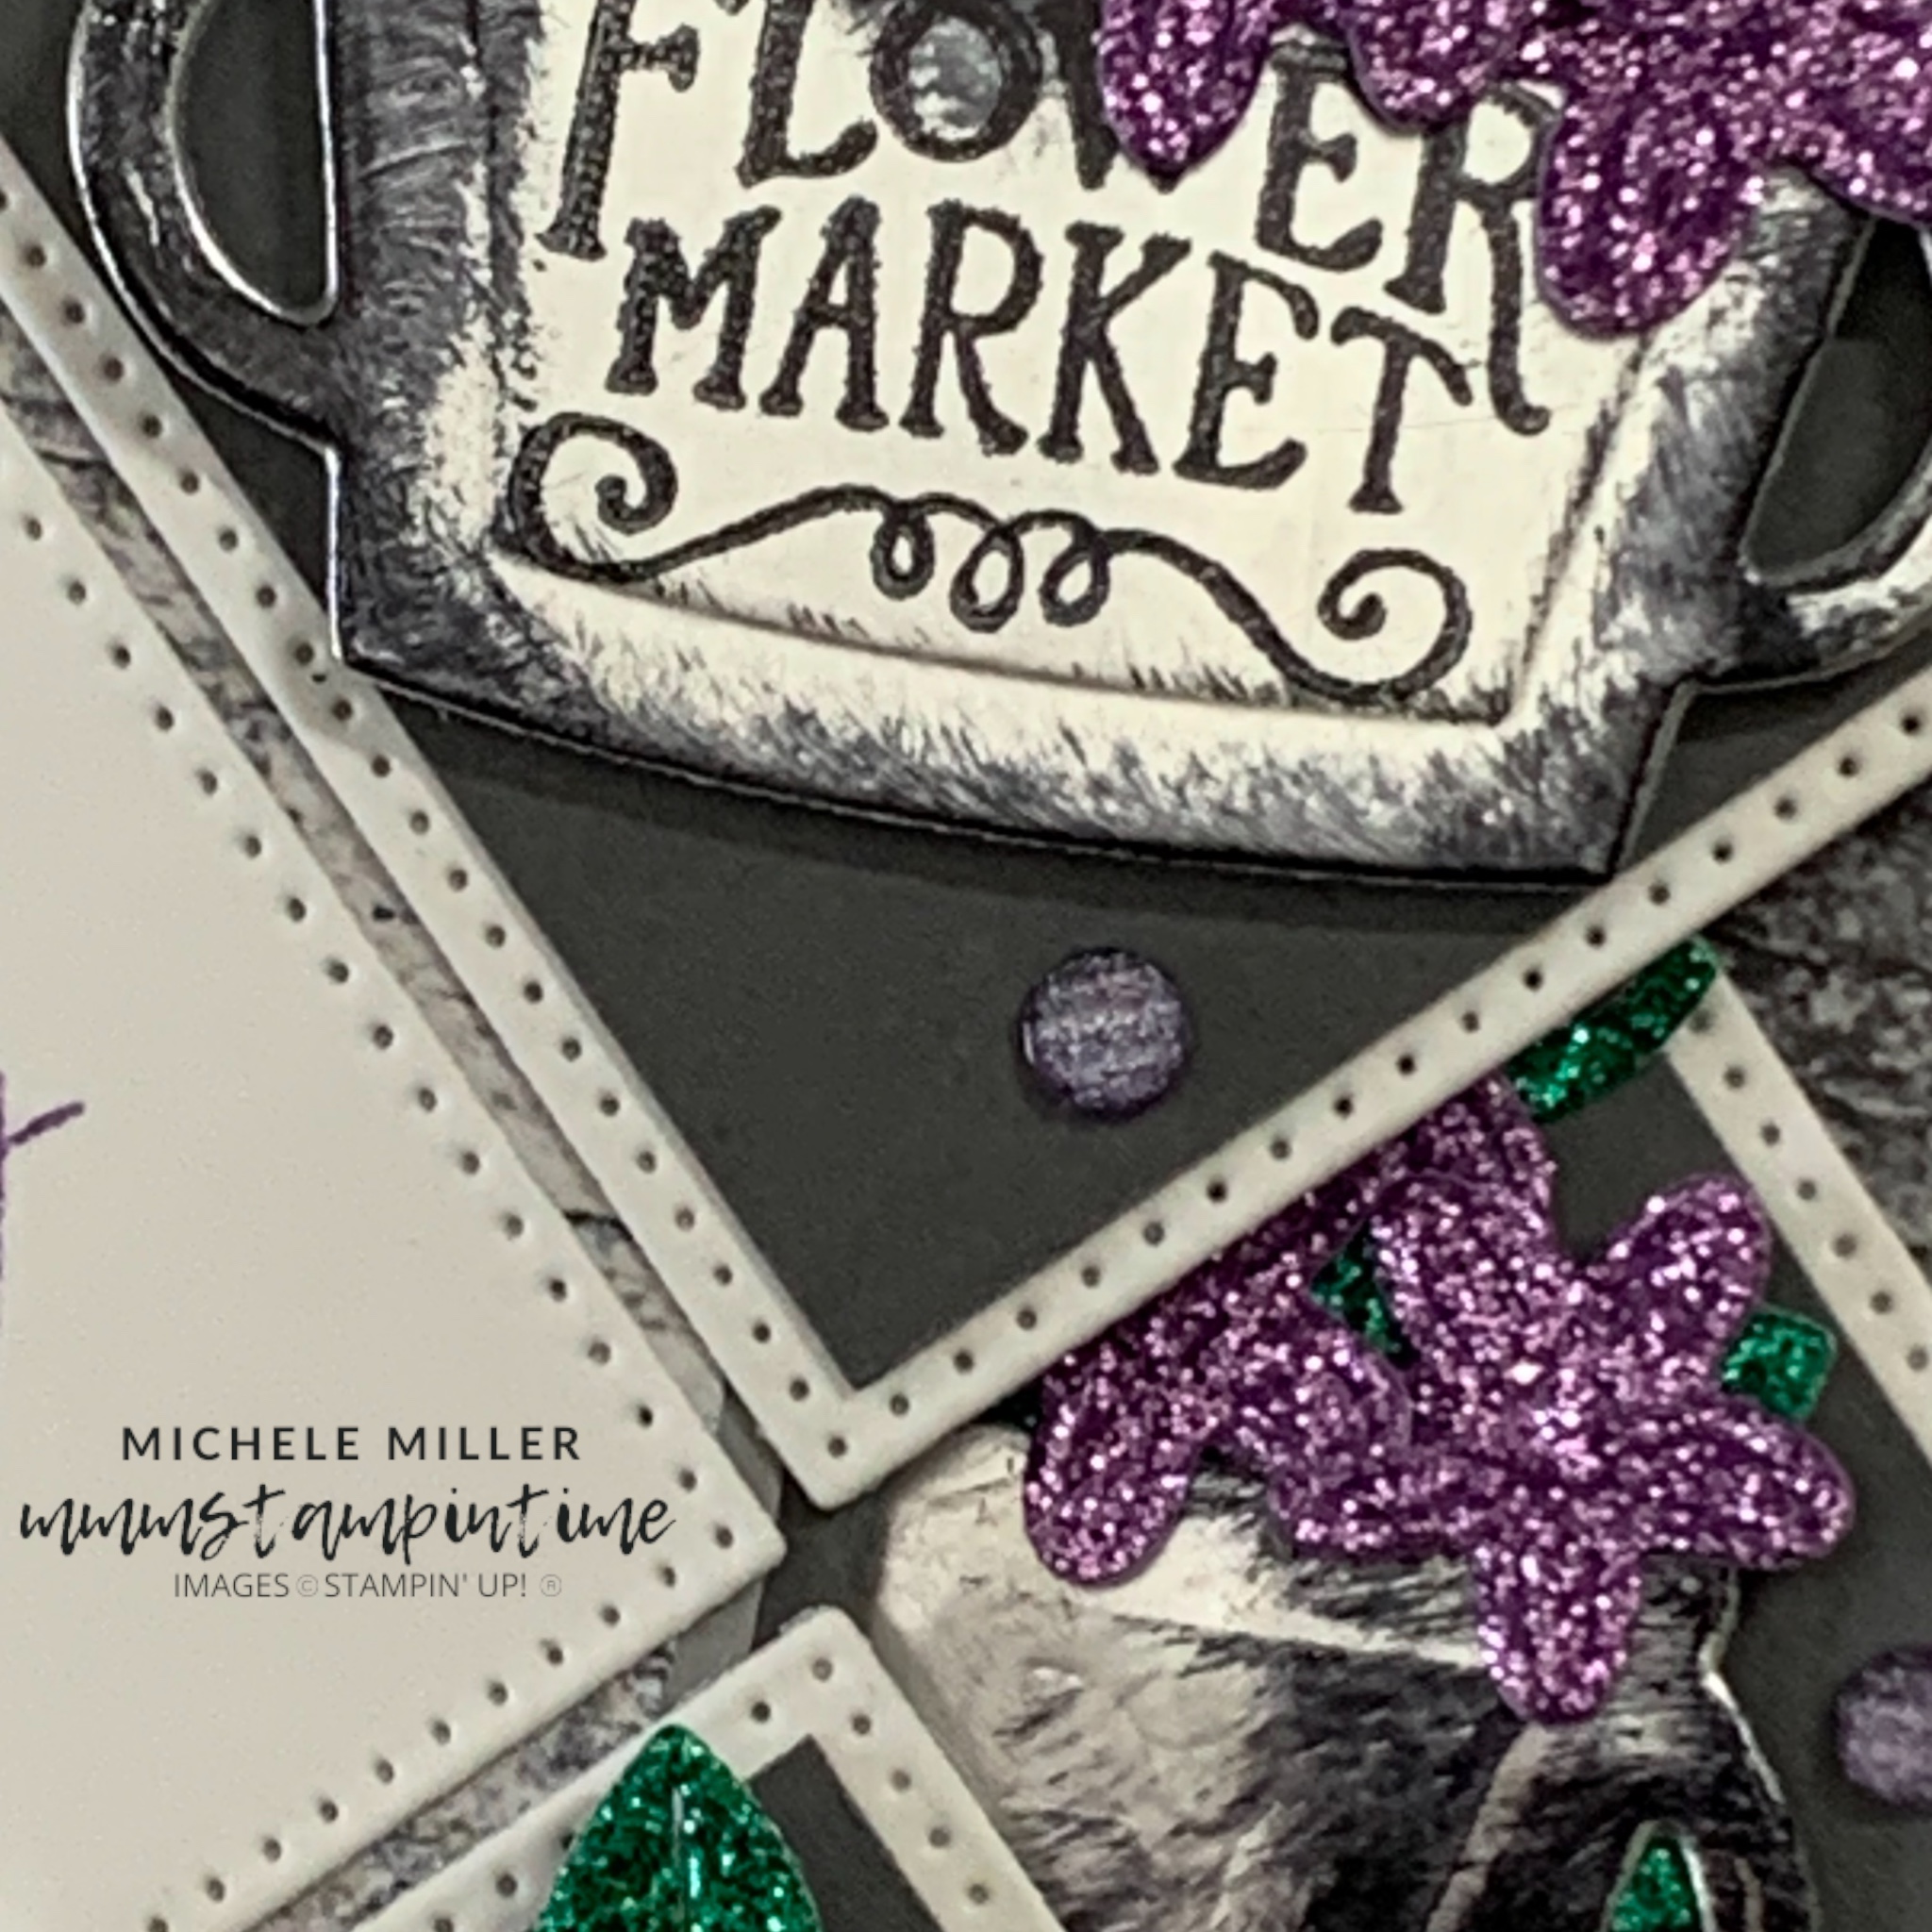
After die cutting three silver tubs, I stamped the FLOWER MARKET image in Jet Black Staz On ink. I also used the ink pad to swipe some of the ink across the tubs. The tubs were then filled with Shy Shamrock Glimmer leaves and Highland Heather Glimmer flowers.

The first three Basic White squares were adhered to the first 1/4 panel and the fourth was added to the inside area using a a simple pop-up mechanism.

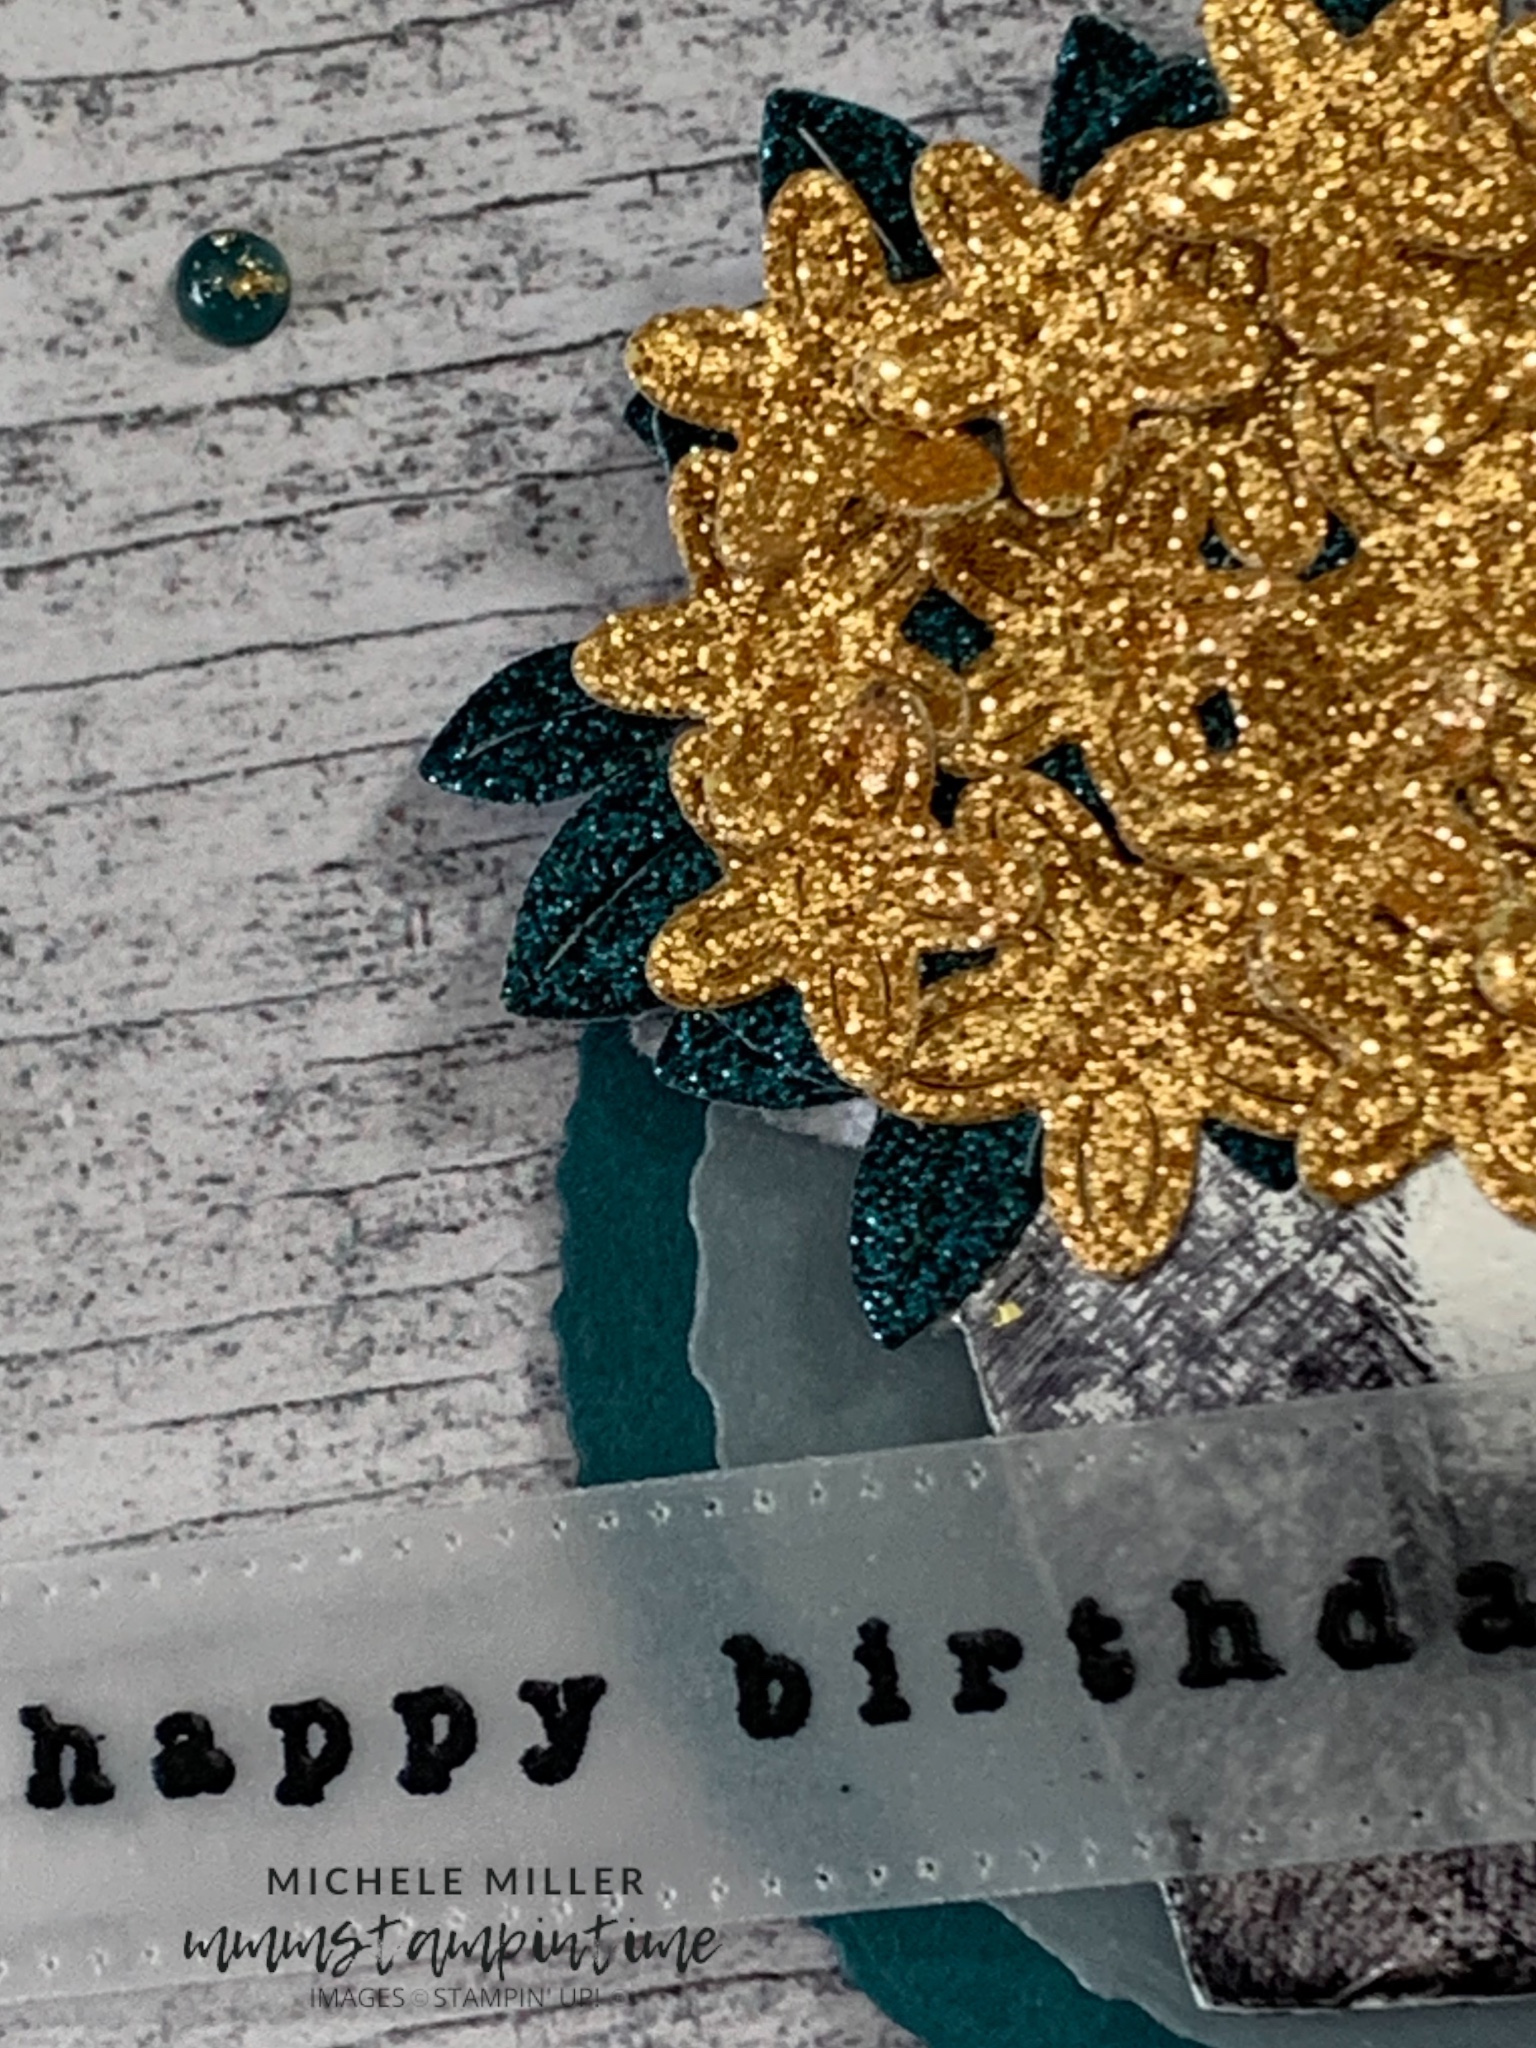
To finish the card, I added a Basic White panel to the back of the card. It had Shy Shamrock Glimmer leaves and Highland Heather flowers added.

The envelope flap had the same DSP added. Finally, I added some Purple Fine Shimmer Gems to the front panel.

The last card for this post is an Accordian Gate Fold card.

This card started as a piece of Basic Gray card measuring 11″x 4 1/8″, scored at 2 7/8″, 6 1/4″ and 9″.

Most panels of the scored card then had panels of Country Woods DSP adhered. The main central card section has a Smoky Slate and Basic White panel added.

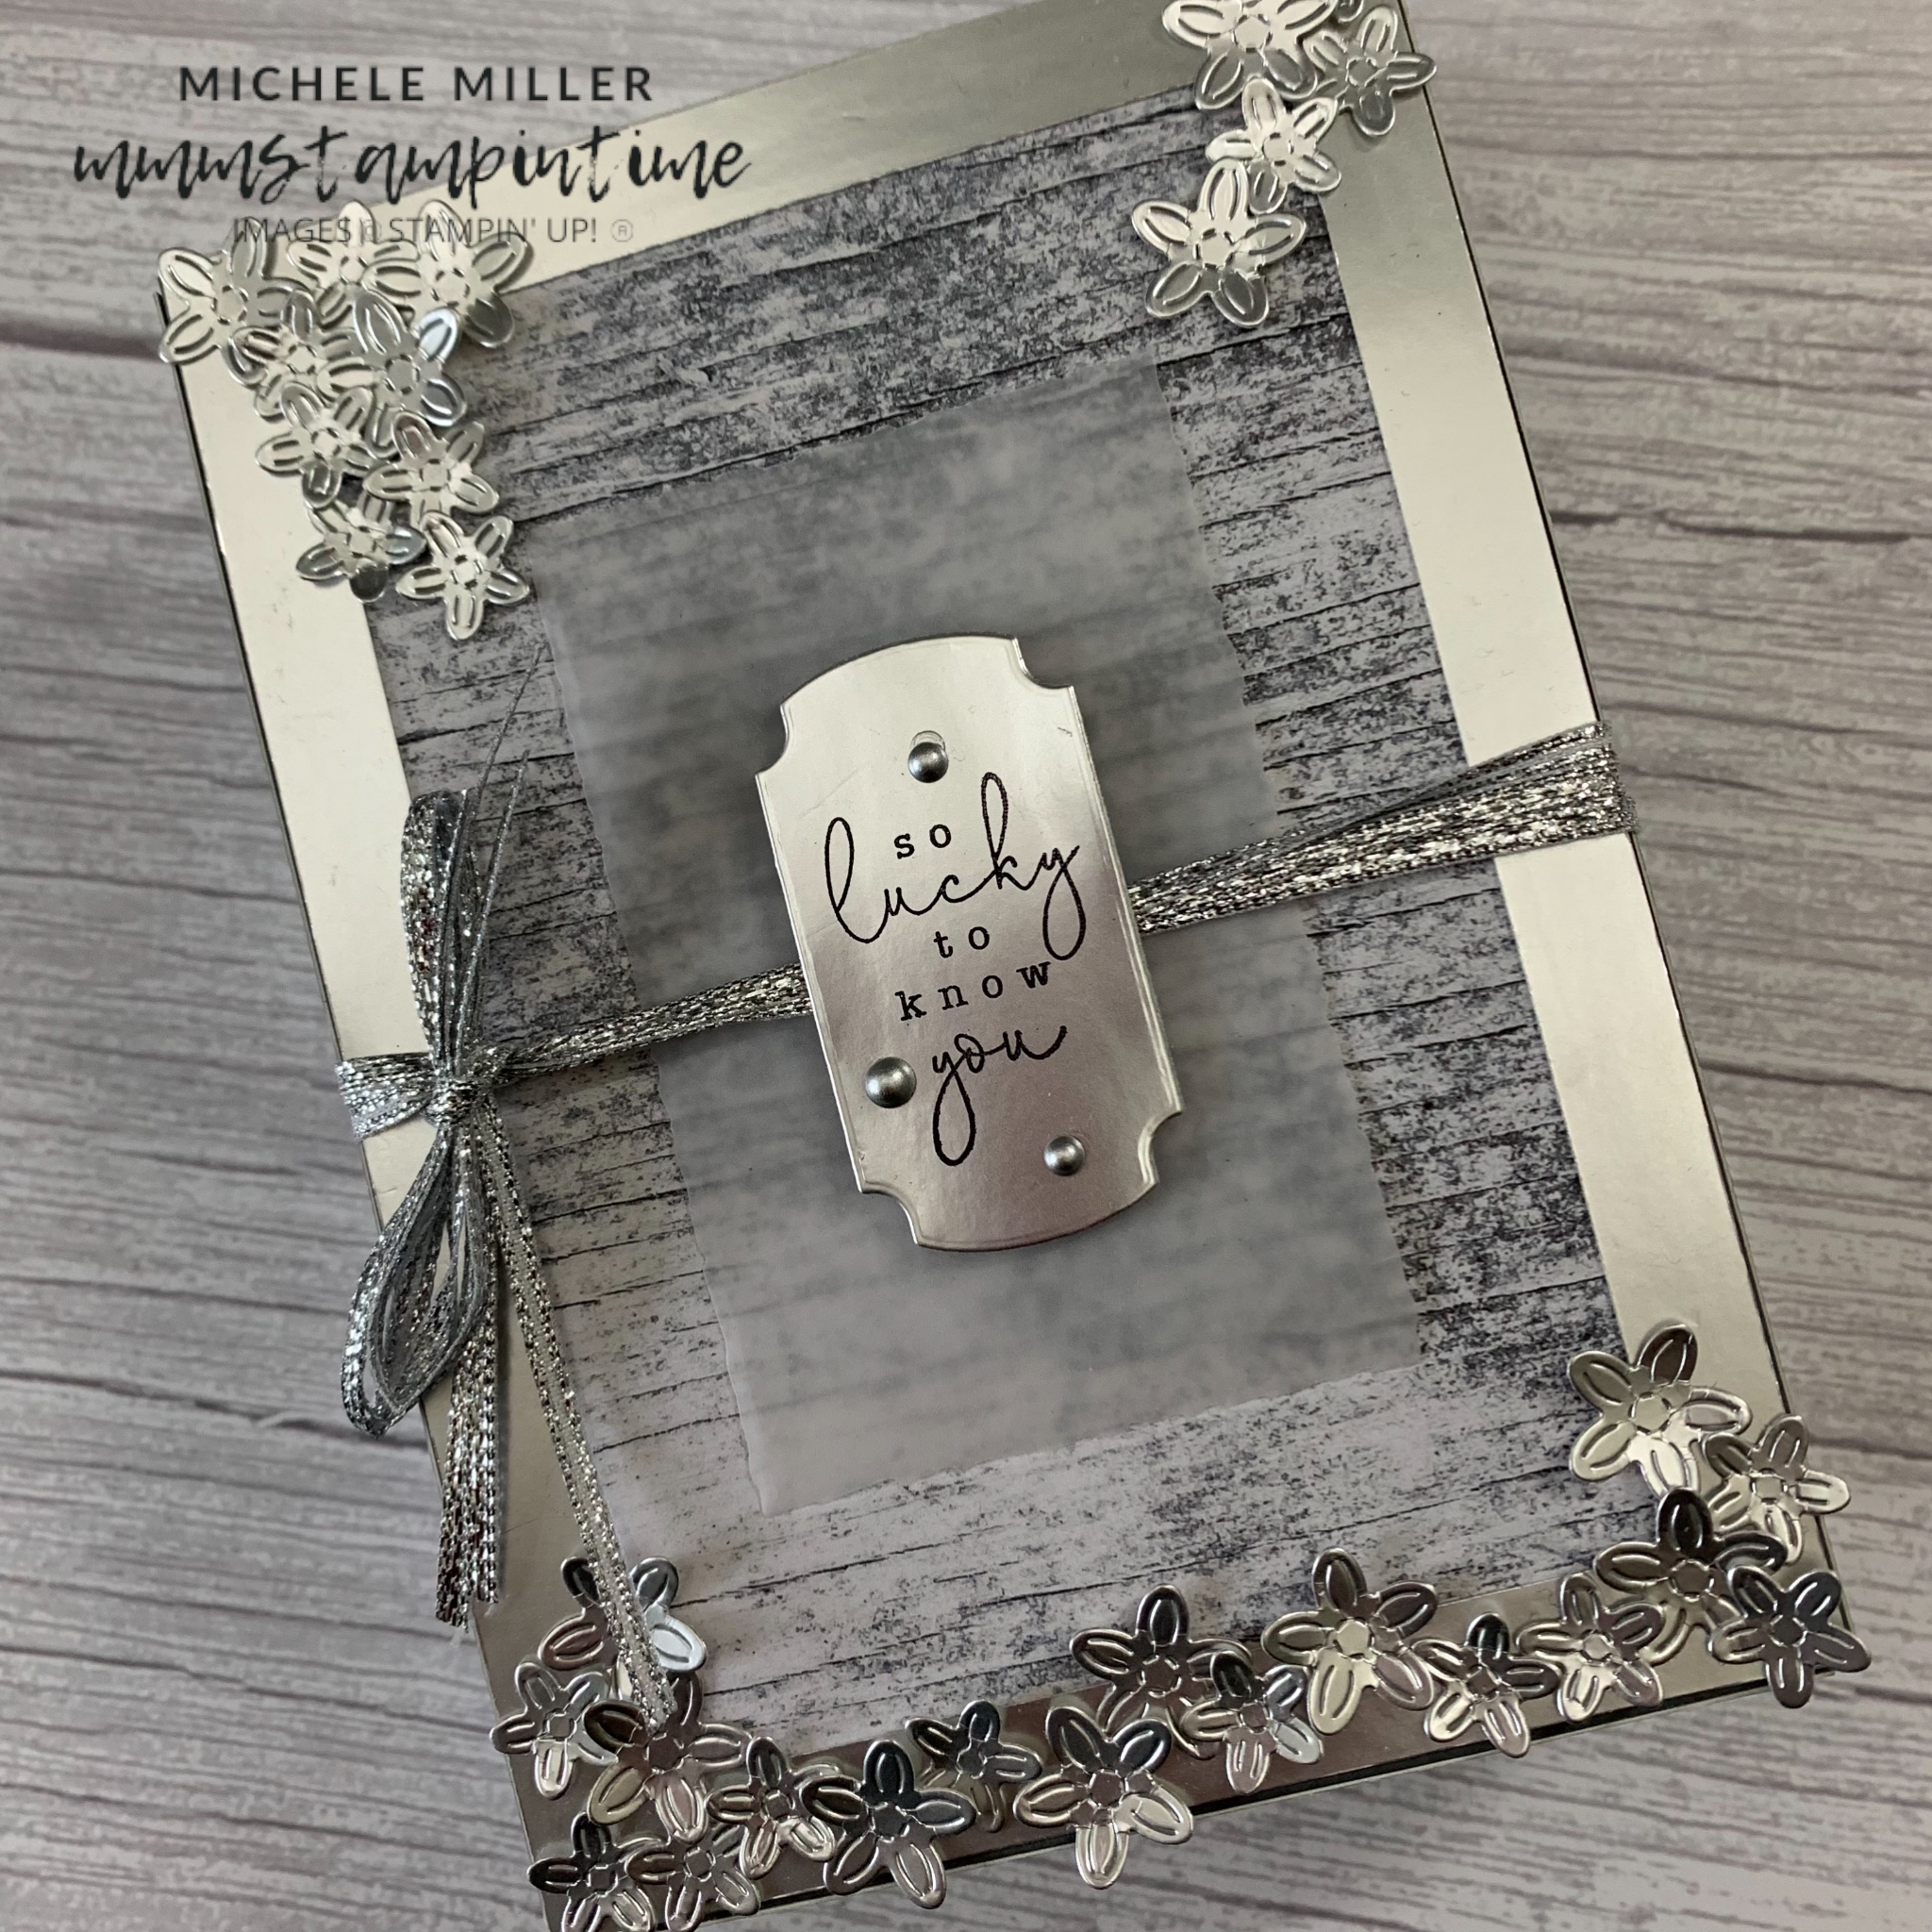
Three lengths of white Baker’s Twine, from the Essential Pack, were coloured using the dark Misty Moonlight Stampin’ Blend Pen. These were secured, with Stampin’ Dimensionals, to the first panel on the front of the card. These were then covered by a stamped silver urn and floral bouquet.

The sentiment was stamped in Misty Moonlight onto a piece of Basic White Thick card and trimmed down to fit into this panel.

Smoky Slate Pearls were coloured just like the baker’s twine.

Another urn and floral bouquet were stamped and cut ready to be added inside the card.

These are the last of the cards to go into the gift box I shared yesterday.

Over the weekend I will share some more projects – 3D and memory keeping/scrapbooking.

Until then, happy stamping.

If you live in Australia, you can order any of the products I used to make this card by going to my online store. Just click on any of the images below.

Product List
Paper Snips
[103579]
$21.00
Posted on Leave a comment

THURSDAY MEANS THAT IT IS TIME FOR A 3D PROJECT …OR THREE

Today I have the gift box I created to hold the cards I shared yesterday and the other three, to be revealed tomorrow.

Get ready for some serious use of Silver Foil!

The basic gift box is made using Basic Gray card and measures 7″ x 5″.

The top and sides of the lid had a panel of the same DSP from the cards shared yesterday.

Then I added mitred 1/2″ silver foil strips to the top and 1/4″ strips were added to the top and bottom of each side.

A piece of vellum was cut using one of the Deckled Rectangle Dies and then adhered to the centre of the lid top.

The sentiment was stamped, using Staz On Jet Black ink, onto a piece of silver foil and cut using the Labeled with Love die/punch.

I positioned Stampin’ Dimensionals behind the sentiment panel, leaving a space to thread three lengths of Silver Trim through before tying a bow.

I die cut loads and loads of silver foil flowers and added them to the top of the box.

The box lid was finished with some Smoky Slate Pearls.

Here you get a sneak peek inside the gift box with all five cards inside.

Here is another 3D project I created using this collection. It was designed to hold two cellophane wrapped hanging birdseed feeders.

I used the large Pocket Thoughts Die to cut four Early Espresso panels.

I cut away the left flap and then added Stampin’ Seal+ to the right flap. Then I joined the four panels. Before forming the box shape I assembled four birdhouses, each with its own unique roofline.After adhering the a birdhouse to each side of the box, I joined the final side.

I cut a 3 3/4″ square base for the gift box that was attached to the base flaps of the box.

The next gift box is actually the first project I made using the Country Woods Suite Collection.

I started by creating the front and back birdhouse panels.

From there I took measurements and mocked up a template for the base, sides and lid of the box.

Here is a basic template for the birdhouse giftbox. I cut and scored the template using Pool Party card and then again using a piece of the Country Woods DSP.

I also added an extra 1/4″ on each side of the long section to allow for adhering the card to the front and back birdhouse pieces.

The box holds lots of lovely Lindt chocolates inside.

Tomorrow I will share three more Fun Fold cards that make up the gift box collection.

Until then, happy stamping.

If you live in Australia, you can order any of the products I used to make this card by going to my online store. Just click on any of the images below.

Product List
Paper Snips
[103579]
$21.00
Posted on Leave a comment

WELL, WHAT’S HAPPENING THIS WEDNESDAY?

Well, today I have two cards to share with you. They are part of a gift box of five cards. I will share the gift box tomorrow and them three fun fold cards on Friday.

All five cards use the same paper from the Country Woods DSP, as well as Silver Foil and Shimmer Paper.

The first card is a simple portrait tent fold card. The card base is Basic Gray.

After attaching the DSP panel to the front of the card I stamped the sentiment on a strip of Basic Gray card. It was stamped with Versamark and heat embossed using the new WOW Black Embossing Powder. Then it was attached to the card front with Multipurpose Glue.

The flower tub was die cut from a small piece of Silver Foil. The FLOWER MARKET label was stamped using Staz On Jet Black ink. The ink was swiped across the urn to give it a tarnished effect. The stamped tub was then trimmed down and added to the card with Stampin’ Dimensionals.

Then I die cut many flowers from a piece of Petal Pink Glimmer Specialty Paper, from the Three Colour Glimmer collection, and added them to the tub.

The card insert and envelope flap were finsihed with the same DSP before some Petal Pink Foiled Gems were added.

The next card is a basic flip fold card that uses 3/4 of a piece of Basic Gray A4 card.

After cutting and scoring the card into thirds I began to work on the front.

I added a Silver Foil and then a DSP layer to the card front.

Then I used two of the smaller Deckled Circles Dies to cut Pretty Peacock and Vellum layers. The circles were adhered together and then trimmed to give a straight edge on the right hand side. The circles were then secured to the card front using Stampin’ Dimensionals.

I cut the taller urn from a piece of silver foil and then swiped Jet Black Staz On across it. Then it was added to the card front with dimensionals.

Several leaf branches were cut from Pretty Peacock specialty paper from the Three Colour Glimmer Paper collection. Even more flowers were cut from a strip of Peach Pie glimmer paper from the 2024-2026 In Colour Glimmer Specialty Paper collection.

The sentiment was stamped and embossed with the new WOW black embossing powder. It was cut with one of the banner dies from the Stylish Shapes Dies.

Then some Pretty Peacock Foiled Gems were added.

When the card is opened it reveals a gift card pocket which was made using the middle sized Pocket Thoughts die. It was embossed using the Eyelet 3D Embossing Folder. The gift card pocket was secured using Stampin’ Seal+.

The sentiment was also stamped and heat embossed before being adhered to the inside of the card. An extra Peach Pie glimmer flower was added.

Open the card up even further and you will find a place to write your own message.

The birthday sentiment was created again and die cut in the same way.

Tomorrow I will show you the gift box created to hold all five cards.

Until then, happy stamping.

If you live in Australia, you can order any of the products I used to make this card by going to my online store. Just click on any of the images below.

Product List
Heat Tool
[129056]
$56.00
Paper Snips
[103579]
$21.00