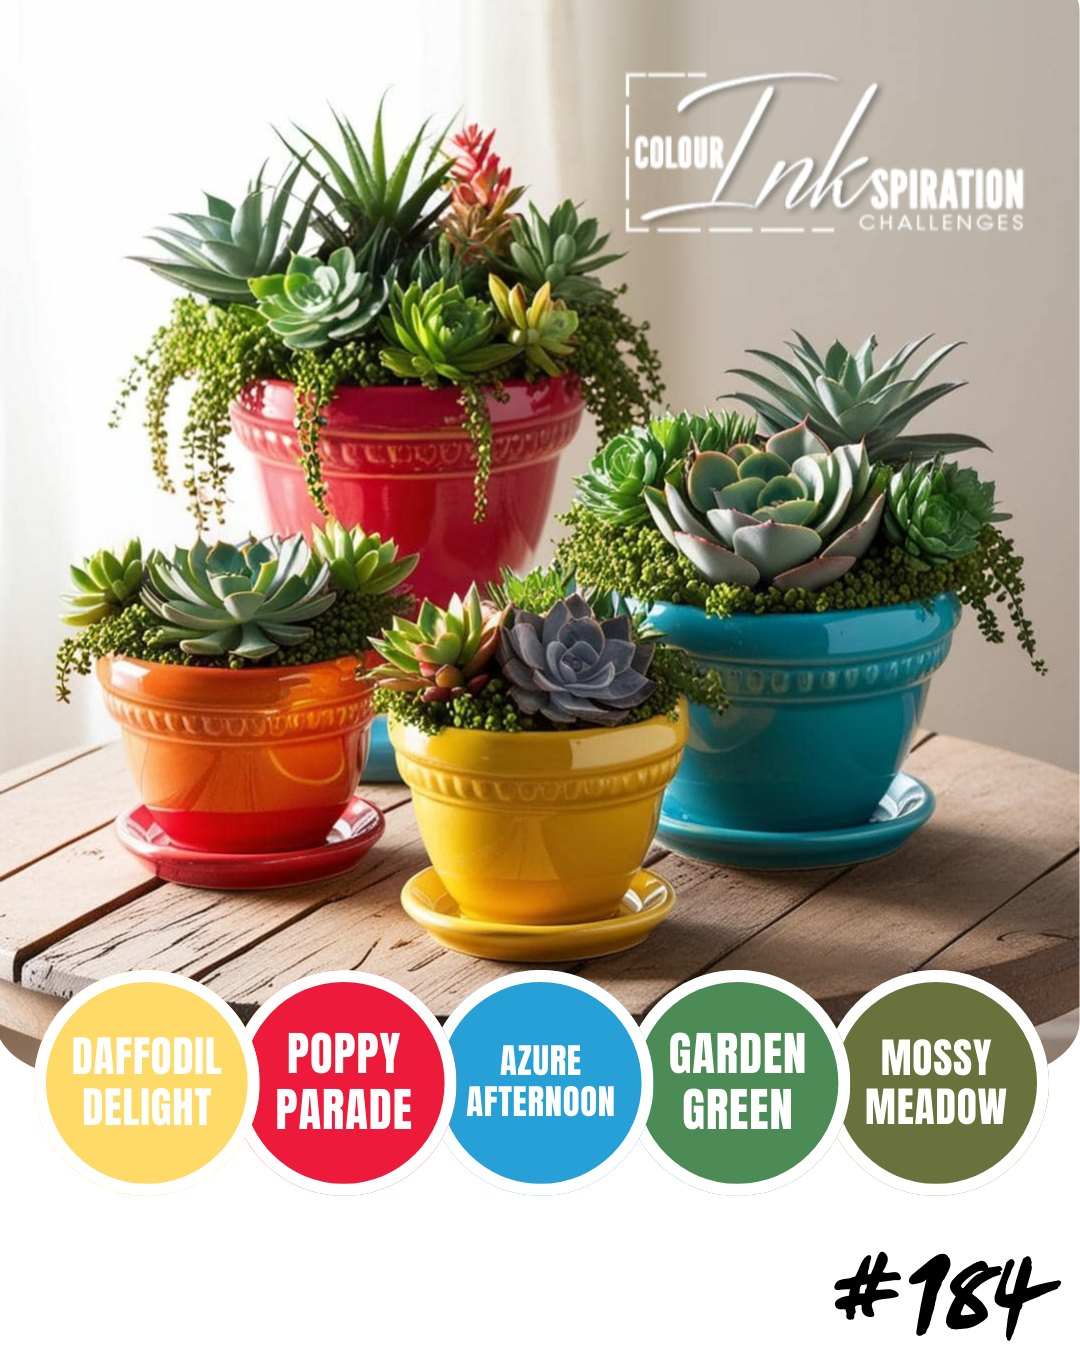
Welcome to COLOUR InkSPIRATION CHALLENGE #184.
Today’s picture which has inspired our colour palette was chosen by Colour INKspiration Crew Member, Alisa Tilsner.
As well as the chosen colour combination for #CI184 Daffodil Delight, Poppy Parade, Azure Afternoon. Garden Green and Mossy Meadow, you may also add Basic White, Very Vanilla, Crumb Cake, Basic Beige, Basic Black and metallics to your project. We also allow ‘Ivory’, ‘Bronze’ and ‘Natural Tones’ in the Stampin’ Blends. If you don’t have the colours in our palette, feel free to use the closest Stampin’ Up! (or any other brand) substitute – Boho Blue instead of Balmy Blue for example.
To get your creative ideas flowing, make sure you check out the Crew’s Project in the CI#183 Album – https://www.facebook.com/media/set/?set=oa.1003303625064294&type=3
Challenge Guidelines:
· Create a NEW project made specifically for this challenge.
· Use all of the challenge colours (or close substitutions) unless stated.
· Upload only ONE picture per entry straight to the discussion wall and NOT in an album.
We hope you can participate this round and look forward to seeing a variety of projects using the challenge colours. Happy stamping!

My youngest daughter recently told me that shw and a friend were teaching themselves to crochet.
For me, that brought back memories of Year 8 Home Economics and learning the same skill. I was totally useless at knitting but crochet was a better option.
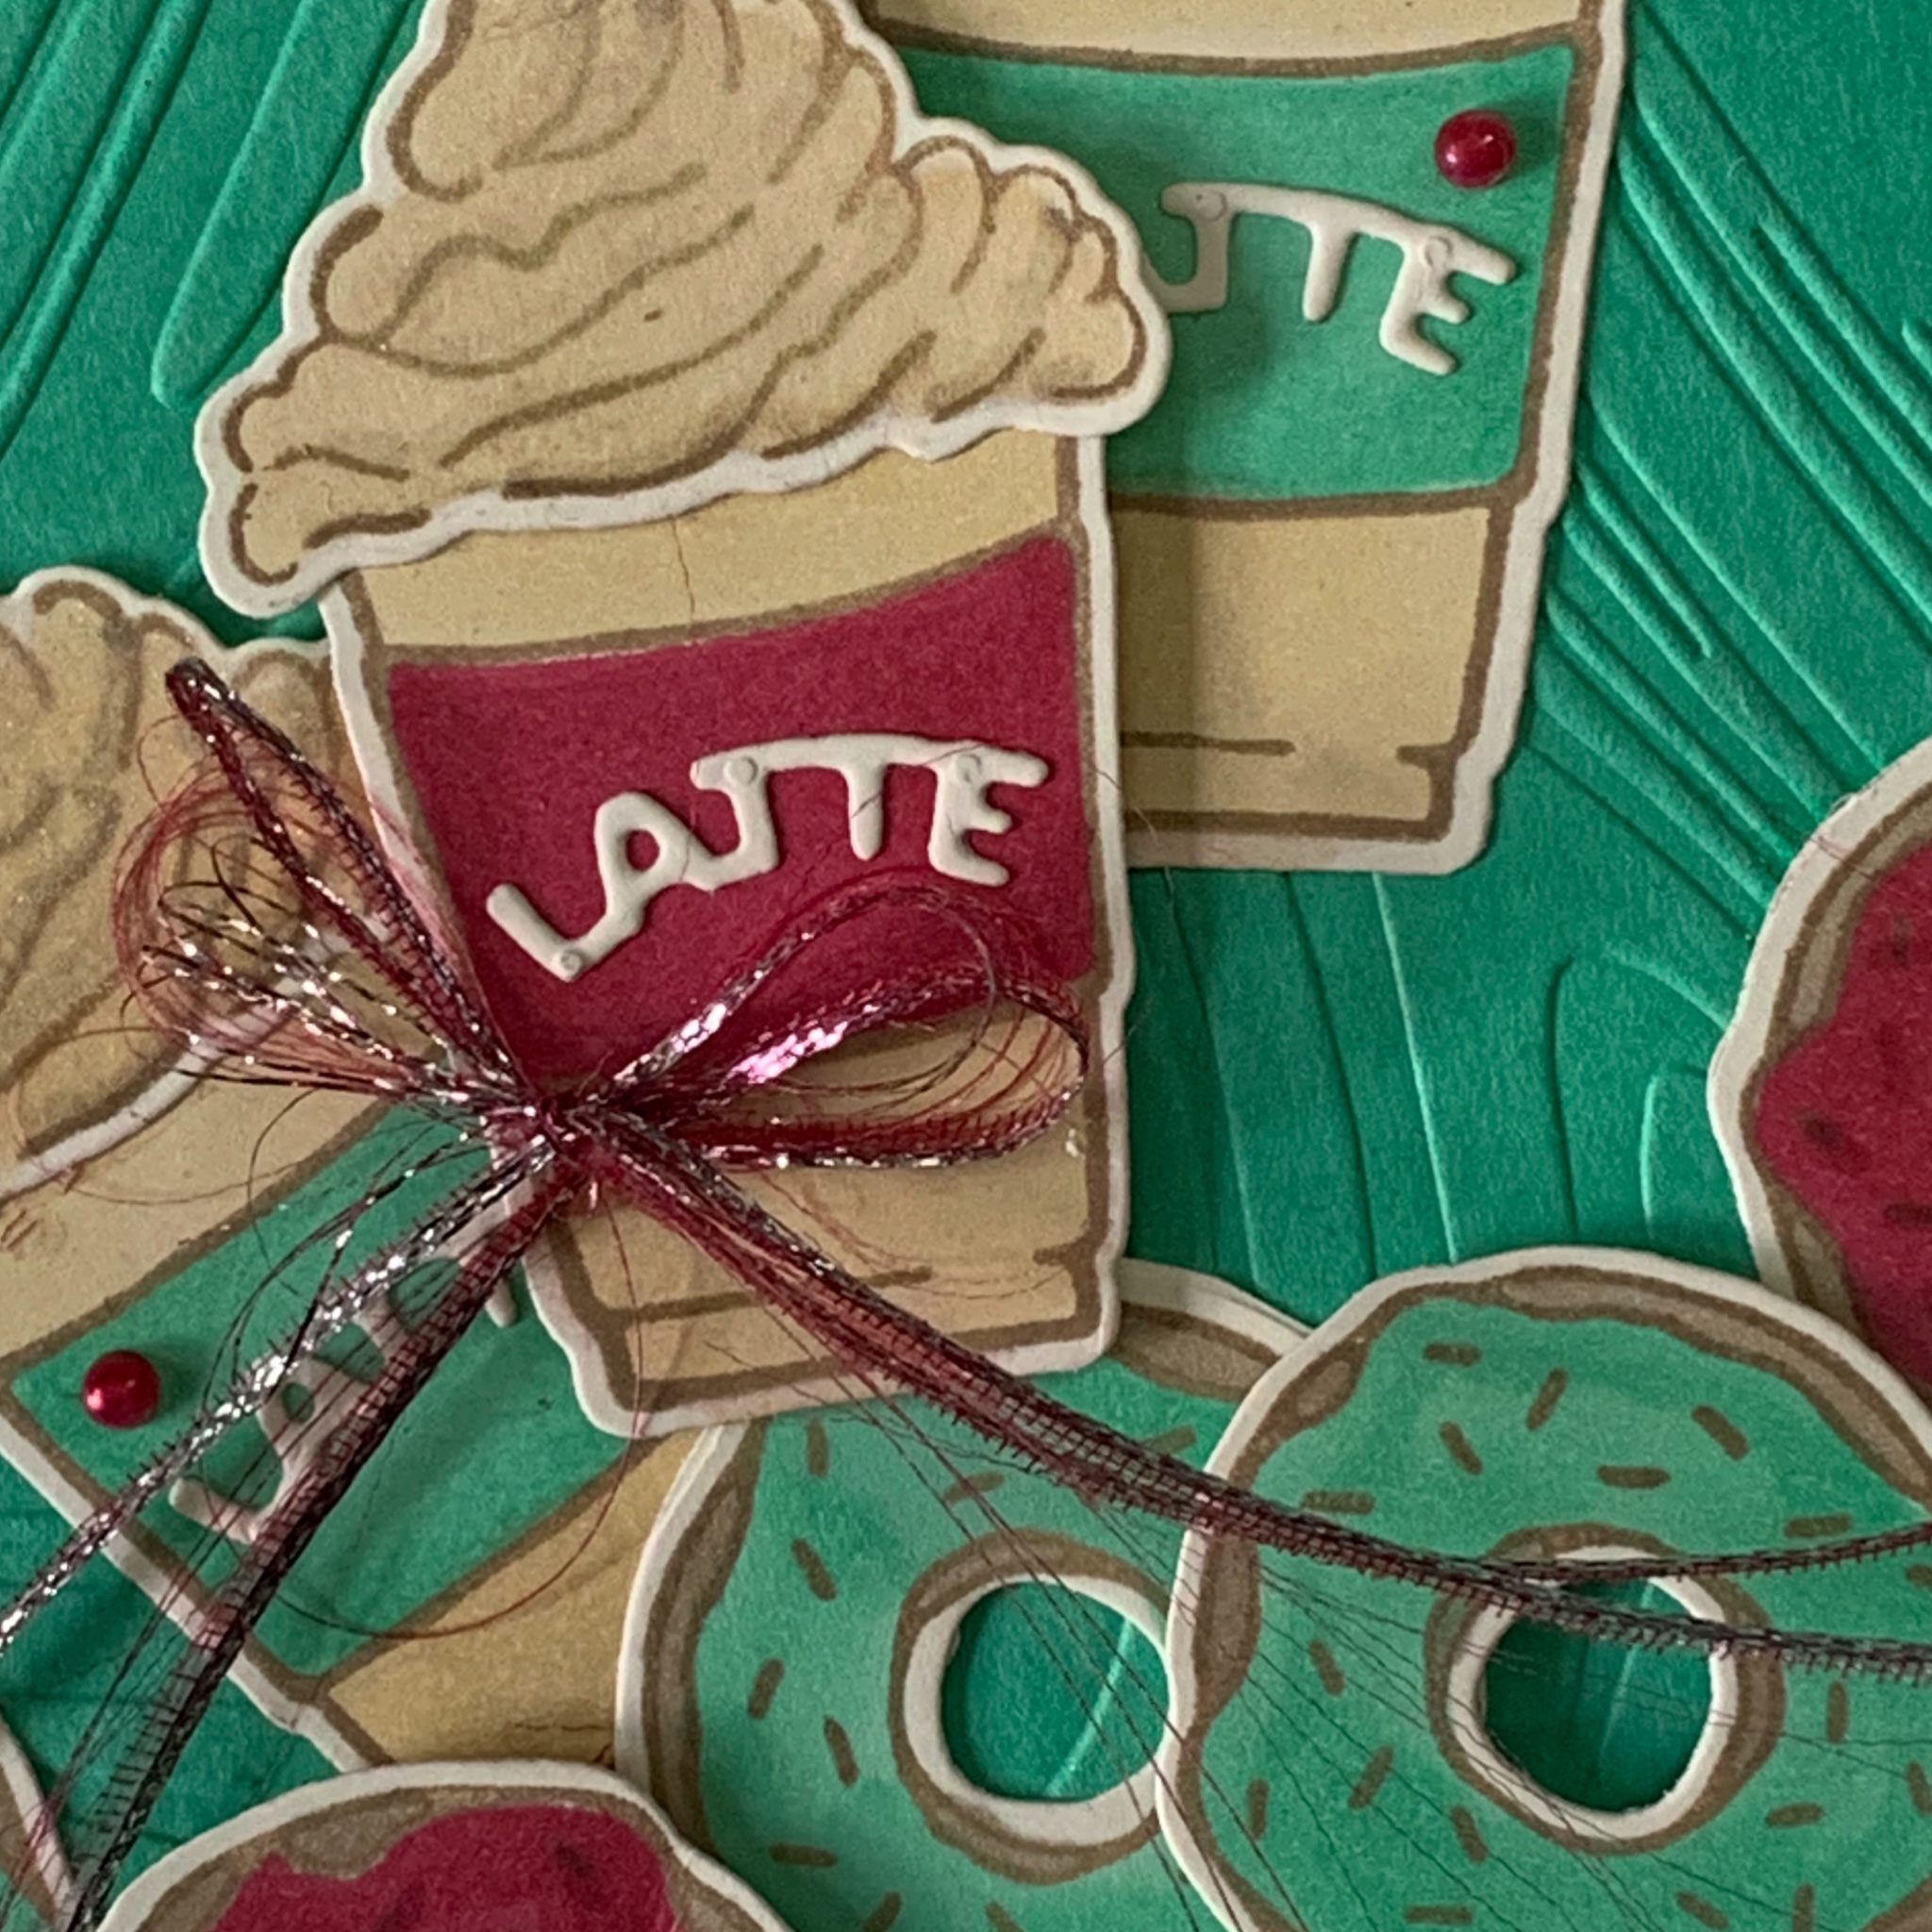
I knew that I wanted to use the Cute Crochet 3D Embossing Folder to make a card for her.

I used the CI#184 Colour INKspiration colours for this project – Azure Afternoon, Daffodil Delight, Garden Green, Mossy Meadow and Poppy Parade. I cut each of these colours into 1.5″x 1.5″ squares and adhered them to a piece of Basic White Card.
Then I ran this card throught the Stampin’ Cut & Emboss Machine using the Cute Crochet 3D Embossing Folder.
The greeting was created using the Mini Alphabet Die and Azure Afternoon card with Adhesive Sheet attached.
I used the Basic White Baker’s Twine and a small crochet hook to create a length of chain to tie a bow.
Finally, I added an individual embossed square to the card insert and envelope back.

If you live in Australia, you can order any of the products I used to make this card by going to my online store. Just click on any of the images below.

 |  |  |  | |
 |  |  |  |  |
 |  |  |  |  |
 |  |
 Cardstock")


")


")
")

 Sheer Ribbon")


