Posted on Leave a comment

WHAT TYPE OF CARD MAKER ARE YOU?

In recent years, I have seen and heard card makers and crafters described and categorised in many different ways.

For me, I don’t think it is about asking you “what type of card maker are you?” but “what type of card or project would you like to make?”.

Whether someone has never made a card before or they have made hundreds, they may want to make a simple card or project. Likewise, they might want to make a project that has all the bells and whistles.

This is why I prefer to describe the cards and projects I offer as “#simplestamping” or “basic”; “detailed” and “intricate/complex”. For each of these project categories I organise and guide crafters through the steps and techniques to achieve a successful project. For new cratfers this will involve more direct one-on-one instruction and for more experienced crafters this will involve guidance and support.

While I know my crafters are beginners, experienced or very experienced … have no, a few, lots or a craft room full of products … I like to offer them a “basic”, “detailed” or “intricate/complex” crafting experience.

These are three cards I created to demonstrate this. I chose the Simply Elegant Suite for these projects.

This is the “beginner” or “#simplestamping” card.

This card has a Very Vanilla card base with a piece of Simply Elegant 12″x 12″ Specialty Designer Series Paper added as a feature layer.

The sentiment, from the Elegantly Said Stamp Set, was stamped using Basic Gray ink onto a piece of Very Vanilla cardstock. It was trimmed back to a 1″ width and then had the banner end cut using the Banner Pick a Punch. This Very Vanilla strip was then attached to a piece of Basic Gray cardstock and the banner end was extended and cut using Paper Snips.

The sentiment layers had Stampin’ Dimensionals added to achieve added height to the card.

A length of Very Vanilla Baker’s Twine, from the Baker’s Twine Essentials Pack, was tied into a bow and added to the card front using a Mini Glue Dot.

A strip of the Designer Series Paper was adhered to the front of the envelope and inside the card.

The final touch was to add some silver Metallic Pearls to the card.

The detailed card has more design features.

The layout is similar but has some added features. The card base and DSP base layer are the same as the first card.

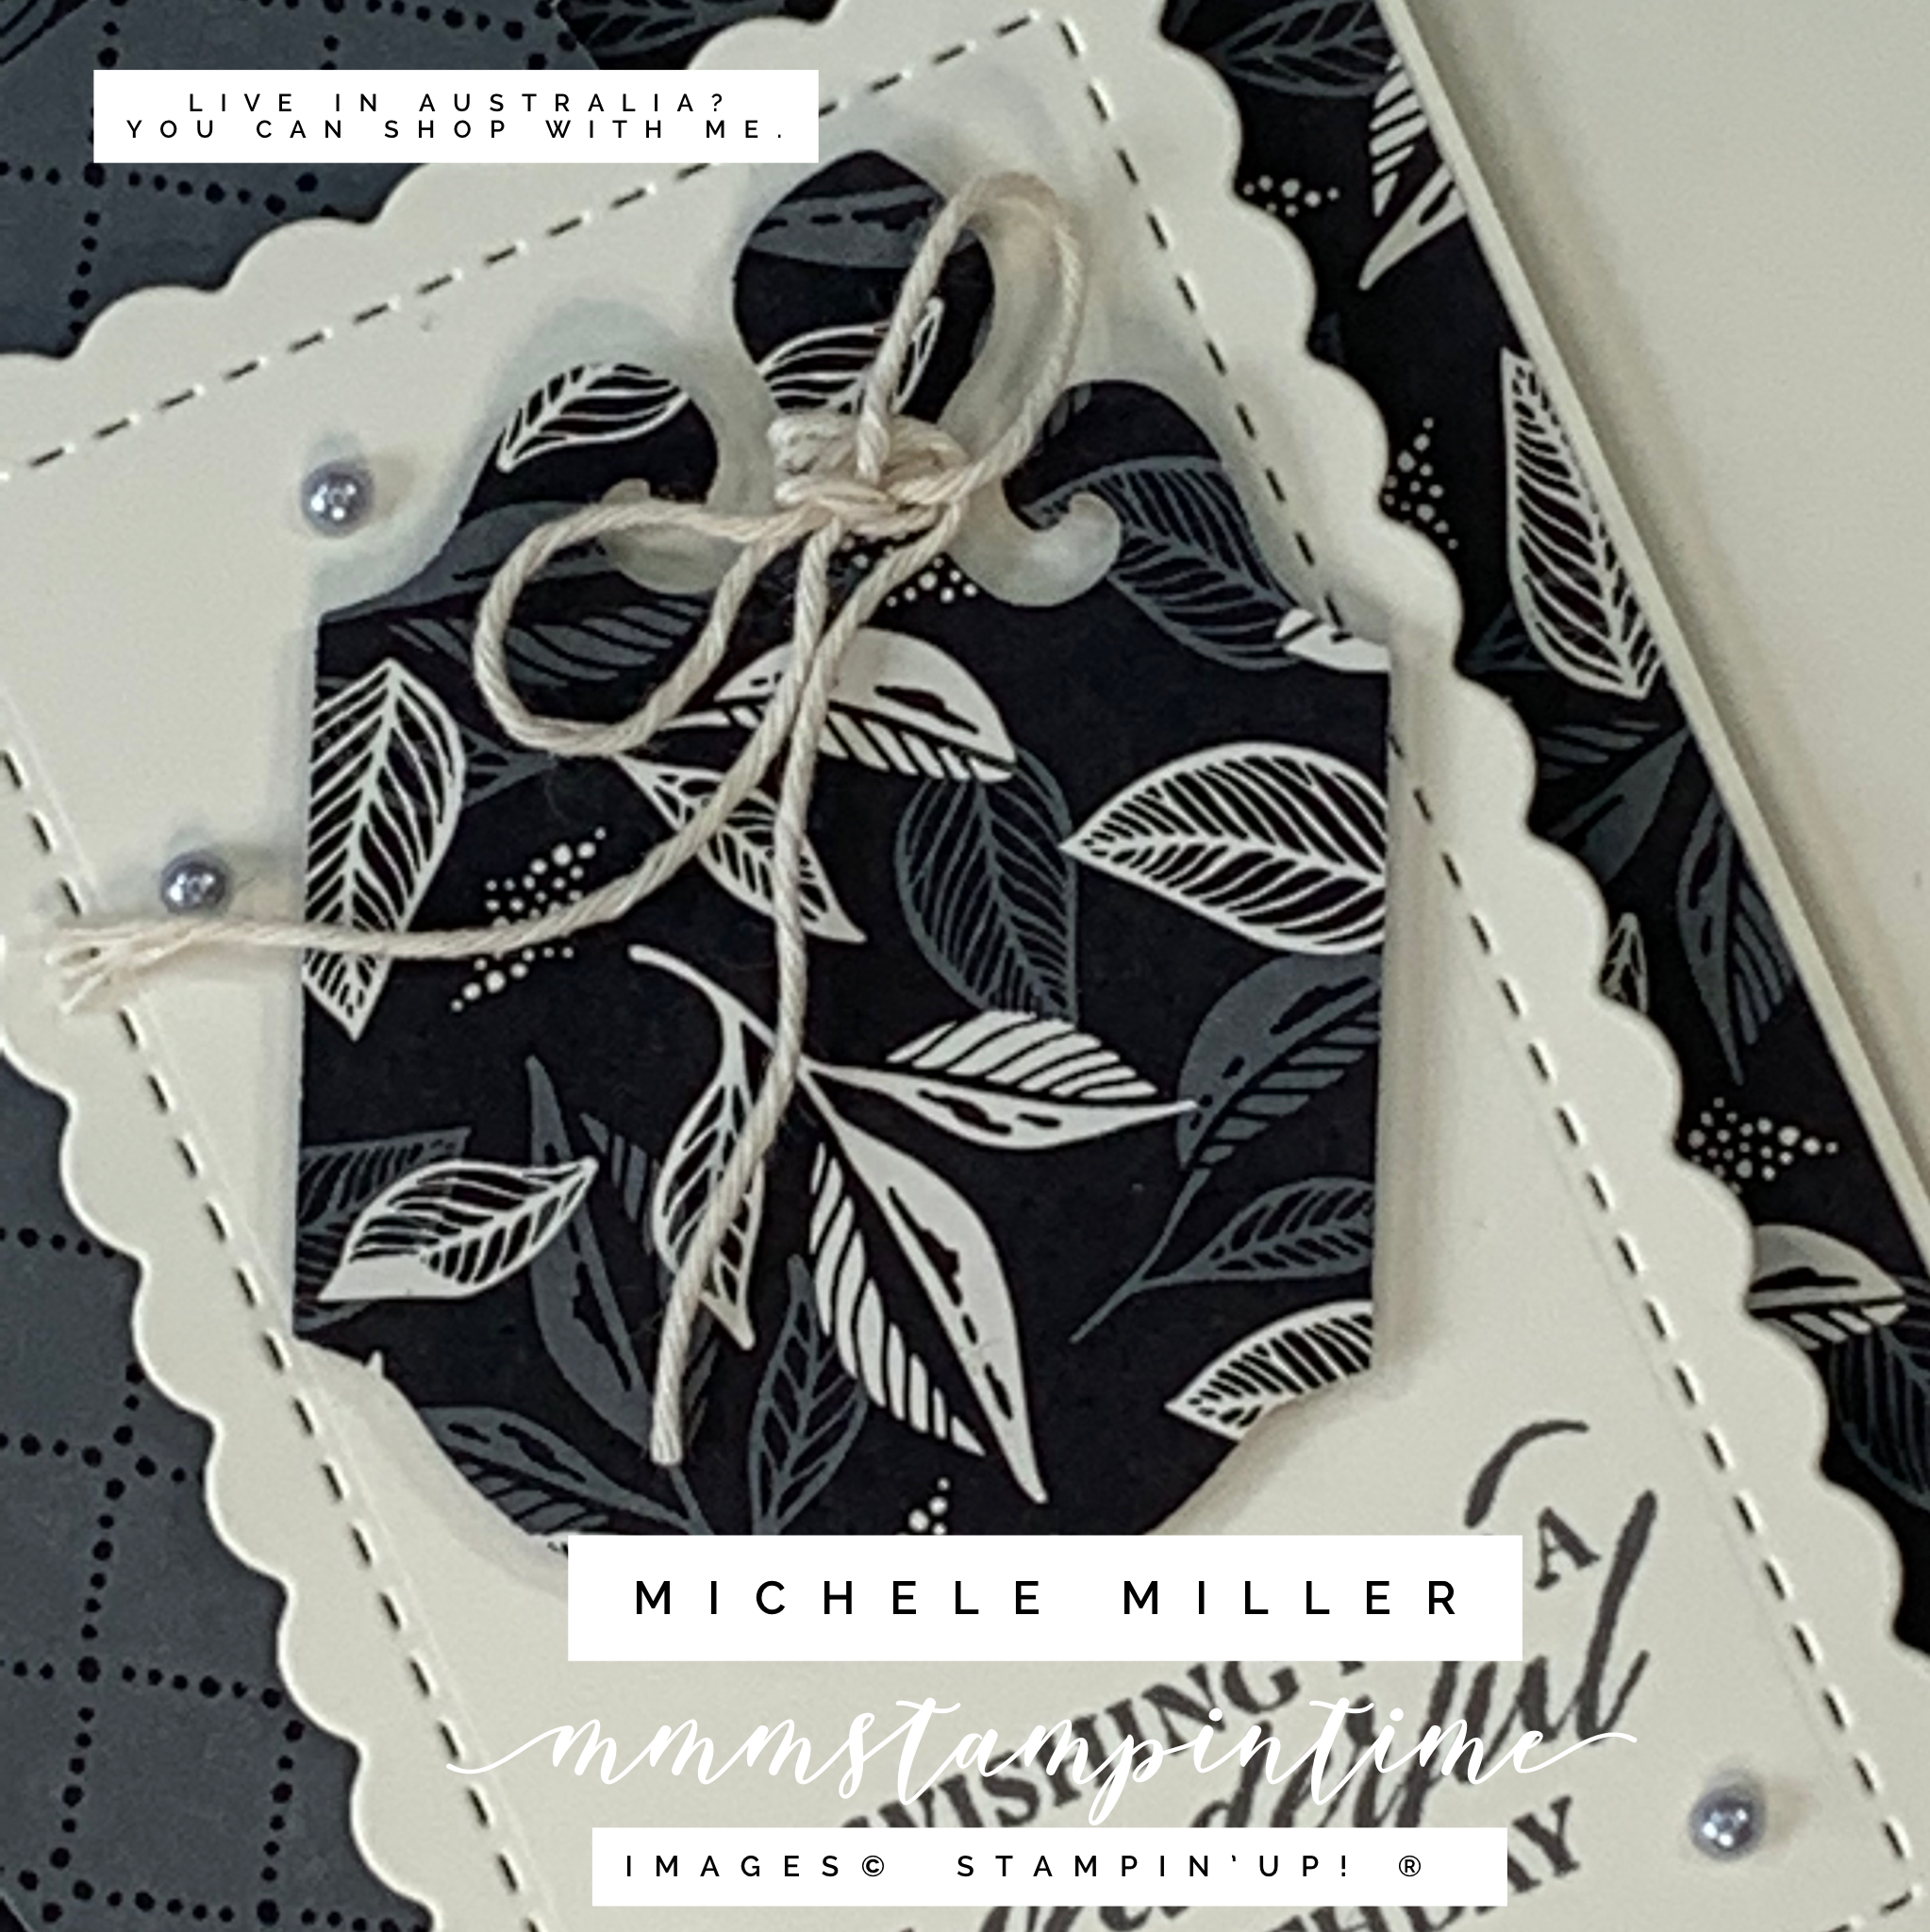
For this card, there are three more features – an additional Designer Series Paper panel and a die cut cardstock layer. The Very Vanilla layer was cut using one of the Scalloped Contours Dies.

The birthday greeting was stamped directly onto the die cut piece of Very Vanilla cardstock, just as it was for the first card.

For this card the twine was wrapped around the top of the punched shape and then tied into a bow.

Inside the card and on the front of the envelope are the same for the second card.

The third, and final card, takes the basic layout up another notch. The second, smaller piece of DSP was die cut this time.

The Very Vanilla Scalloped Contour Dies cut layer was embossed using one of the Meadow Moments Embossing Folders.

The birthday greeting was stamped onto Basic Gray cardstock and was then cut using one of the Stitched Rectangle Dies.

Some silver Simply Elegant Trim and Very Vanilla Baker’s Twine from the Essentials Pack was looped and secured behind the greeting panel. Then I added some Stampin’ Dimensionals to pop it up on the card front.

After adding some silver Metallic Pearls, I used my Clear Wink of Stella to pick up some Basic Gray ink and then coloured three of the floating leaves.

It has been an interesting project to make three cards using the same essential layout and products to create “#simplestamping” or “basic”; “detailed” and “intricate/complex” designs.

Which type of designs do you prefer to make? What would you like to see more of?

Until next time, happu stamping.

If you live in Australia, you can order any of the products I used to make this card by going to my online store. Just click on any of the images below.

Product List
Paper Snips
[103579]
$17.00
Posted on Leave a comment

HEY CHICK!

Hello and thank you for popping by to see today’s project. I hope you like it – please leave a comment to let me know what you think – I love hearing from you.

When I saw the HEY BIRTHDAY CHICK STAMP SET in the January to June Mini Catalogue, it reminded me of the HEY CHICK STAMP SET from a Sale-a-bration brochure a few years ago.

Then, I was so pleased to see that the HEY CHICK STAMP SET has been brought back AND that there are bundles for both stamp sets that have coordinating dies.

01.21_BUNDLE_HEY_CHICK_EN
01.21_BUNDLE_HEY_BIRTHDAY_CHICK_EN

For a recent Facebook Live I made a card with a simple pop up mechanism.

I wanted to have my chicks (chooks in Australia) fly the coop.

Because I wanted my first escaping chick to be the feature, on the front of the card, I chose to create a simple background for her. I cut a piece of Granny Apple Green card stock and carefully teared the hilly slope. I used some IN GOOD TATSE DSP, to cut the chicken coop, so that I had a rustic, wooden structure.

For each of the three birds I coloured, I used the same colours but in different sequences. They are kaleidascopes of colour.

I stamped the greeting onto a scrap of card stock and cut it using my CLASSIC LABEL PUNCH. To ensure that I could pop it up on dimensionals and have ‘her’ hold it in her wings, I stamped her onto a sticky note so that I could cut out a mask. Then I needed to use my Stamparatus to stamp the image onto a piece of Stamparatus Grid Paper. I was then able to place the greeting and position/adjust the mask. Once I was happy with the positioning, inked up the stamp and add her wingtips to the greeting. Then I added the matching colours using my Stampin’ Blends.

Open the card and see the surprise inside.

Making the pop up mechanism was quick and easy. This is the ‘sample’ card I made and learned lots about how to make it easier the next time around, including placing all the background elements – wire fencing and corn – before positioning the pop ups.

I felt so connected with the people who watch my Live. During this Live, my friend from the US (Fran Ward) shared her knowledge of corn. My placement of the corn cobs, in this first card, was not ‘accurate’. So I was able to put the cobs on the stalks more accurately on my Live card.

As you can see, these next two birds, are equally as colourful, as they fly away. They are flying above the picket fence, past the bags of cornmeal.

I forgot to include the envelope in my photo – it has a Granny Apple Green balloon on it.

I was so happy with my Facebook Live version of the card. I did want to move onto a second project but this Live had already gone for over an hour. Tomorrow’s post will be the project that I hoped to do during the Live.

Happy stamping.

If you live in Australia, you can order any of the products I used to make this card by going to my online store. Just click on any of the images below.

Product List
Chick Dies
[158199]
$56.00
Stamparatus
[148187]
$85.00
Paper Snips
[103579]
$17.00
Posted on Leave a comment

TIME TO SHAKE IT UP!

So, yesterday I used the JAR PUNCH to make a small gift box.

Today I’ve used it to make a Shaker Card, using the MASON JAR SHAKER DOMES!

For this card I have used products from three suites – FLOWERS FOR EVERY SUITE, FIELD OF FLOWERS BUNDLE and FOREVER GREENERY SUITE.

The vellum sitting behind the punched jar has been embossed using one of the GREENERY EMBOSSING FOLDERS.

Inside the jar dome are some FLOWERS FOR EVERY SEASON GEMS and some Bumblebee flowers made using the CONFETTI FLOWERS BORDER PUNCH.

I am lucky enough to have a JUST JADE CLASSIC STAMPIN’ PAD and I have used this to stamp the sentiments.

This trim is from the FLOWERS FOR EVERY SEASON RIBBON COMBO PACK – it is one of three different ribbons in the pack.

I’m looking forward to working on tomorrow’s project!

Thanks for popping by … happy stamping.

These are the products I have used to make this project. If you live in Australia, you can order any of them through me.

Product List
Jar Punch
[152703]
$31.00
Paper Snips
[103579]
$17.00