Posted on Leave a comment

IT’S TIME FOR SOME CHRISTMAS GIFT TAGS

Well, I was so caught up in my Coffee & Card class and making Christmas gift tags, I totally forgot to share a post with you yesterday.

I wanted to use the Sweet Stockings Suite to make Christmas gift tags and a coordinating gift box.

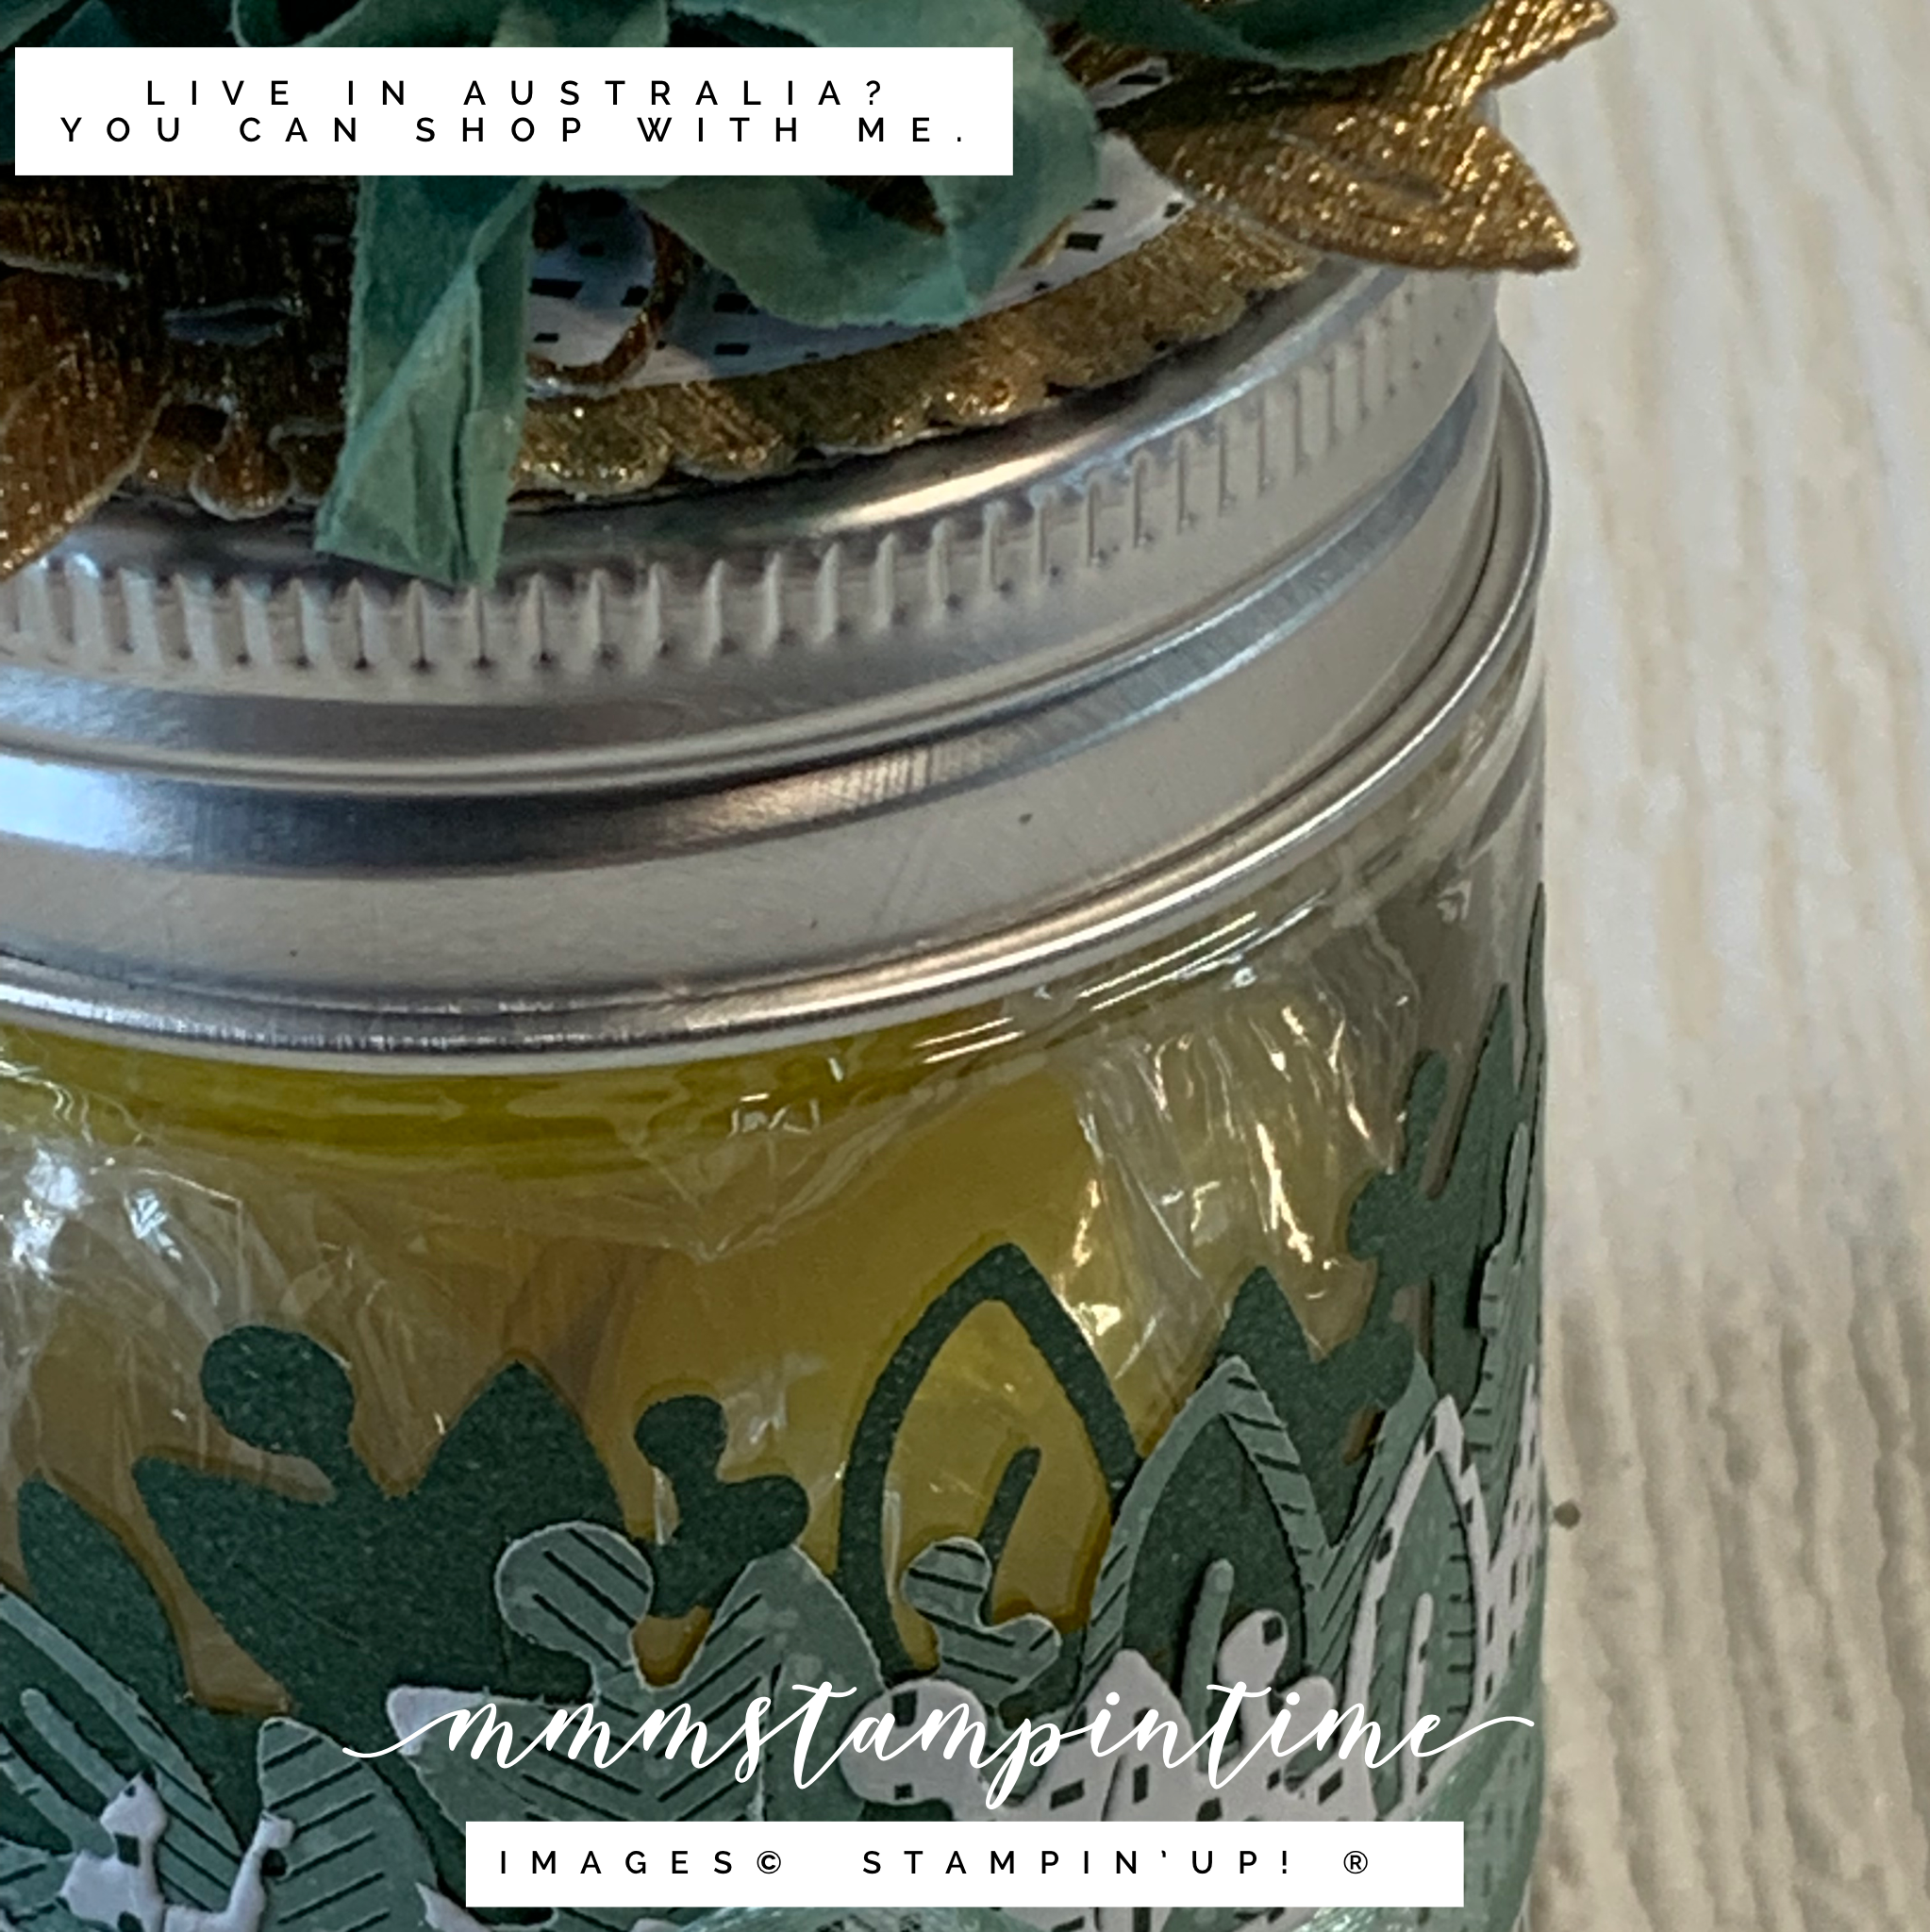
The gift box was inspired by Julie DiMatteo’s design for a reinforced gift box. I will be making this Thursday during my Facebook Live if you want to see how to make it.

The box base was made with a piece of Bumblebee card stock and the lid uses one of the designs from the Sweet Stockings 12″x 12″ Designer Series Paper.

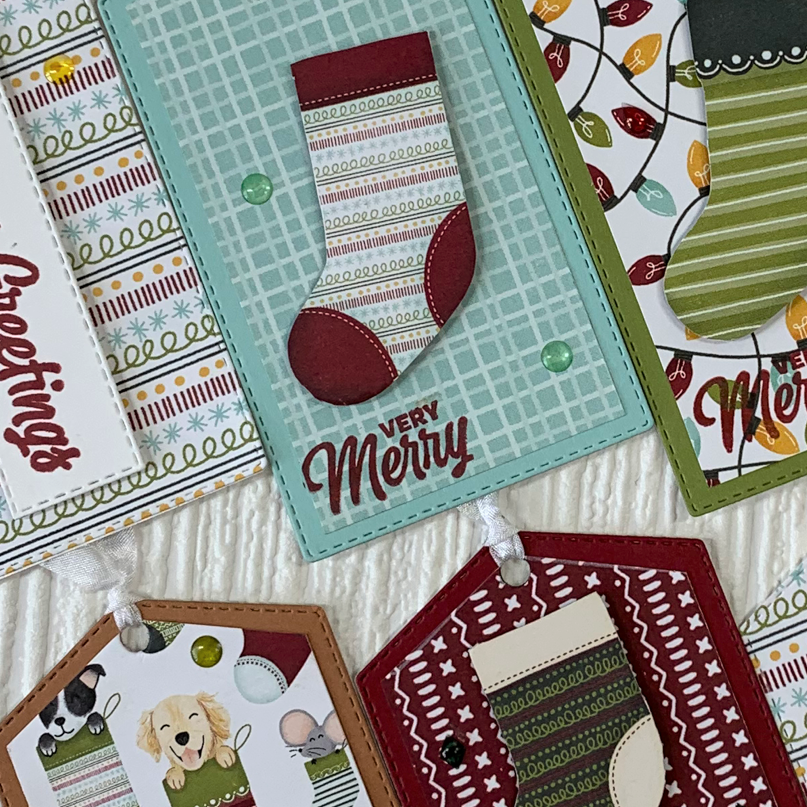
The tag, which I also used for all the gift tags in the box, was cut using the tag from the Stockings Dies.

I used the Sweet Little Stockings Stamp Set for the Christmas greeting and the gift boxes. The boxes were stamped onto the tag as well as some scrap card stock. These extra boxes were fussy cut and popped up using Stampin’ Dimensionals.

The diamond shaled silver Epoxy Essentials were coloured using the dark Evening Evergreen Stampin’ Blend and added to each of the boxes.

The star die, from the Stocking Dies, was used to cut three Evenng Evergreen stars. I added some of the black Cute Star Sequins to the centre of each star. Using half a Mini Stampin’ Dimensional, I added the stars to the top of the box.

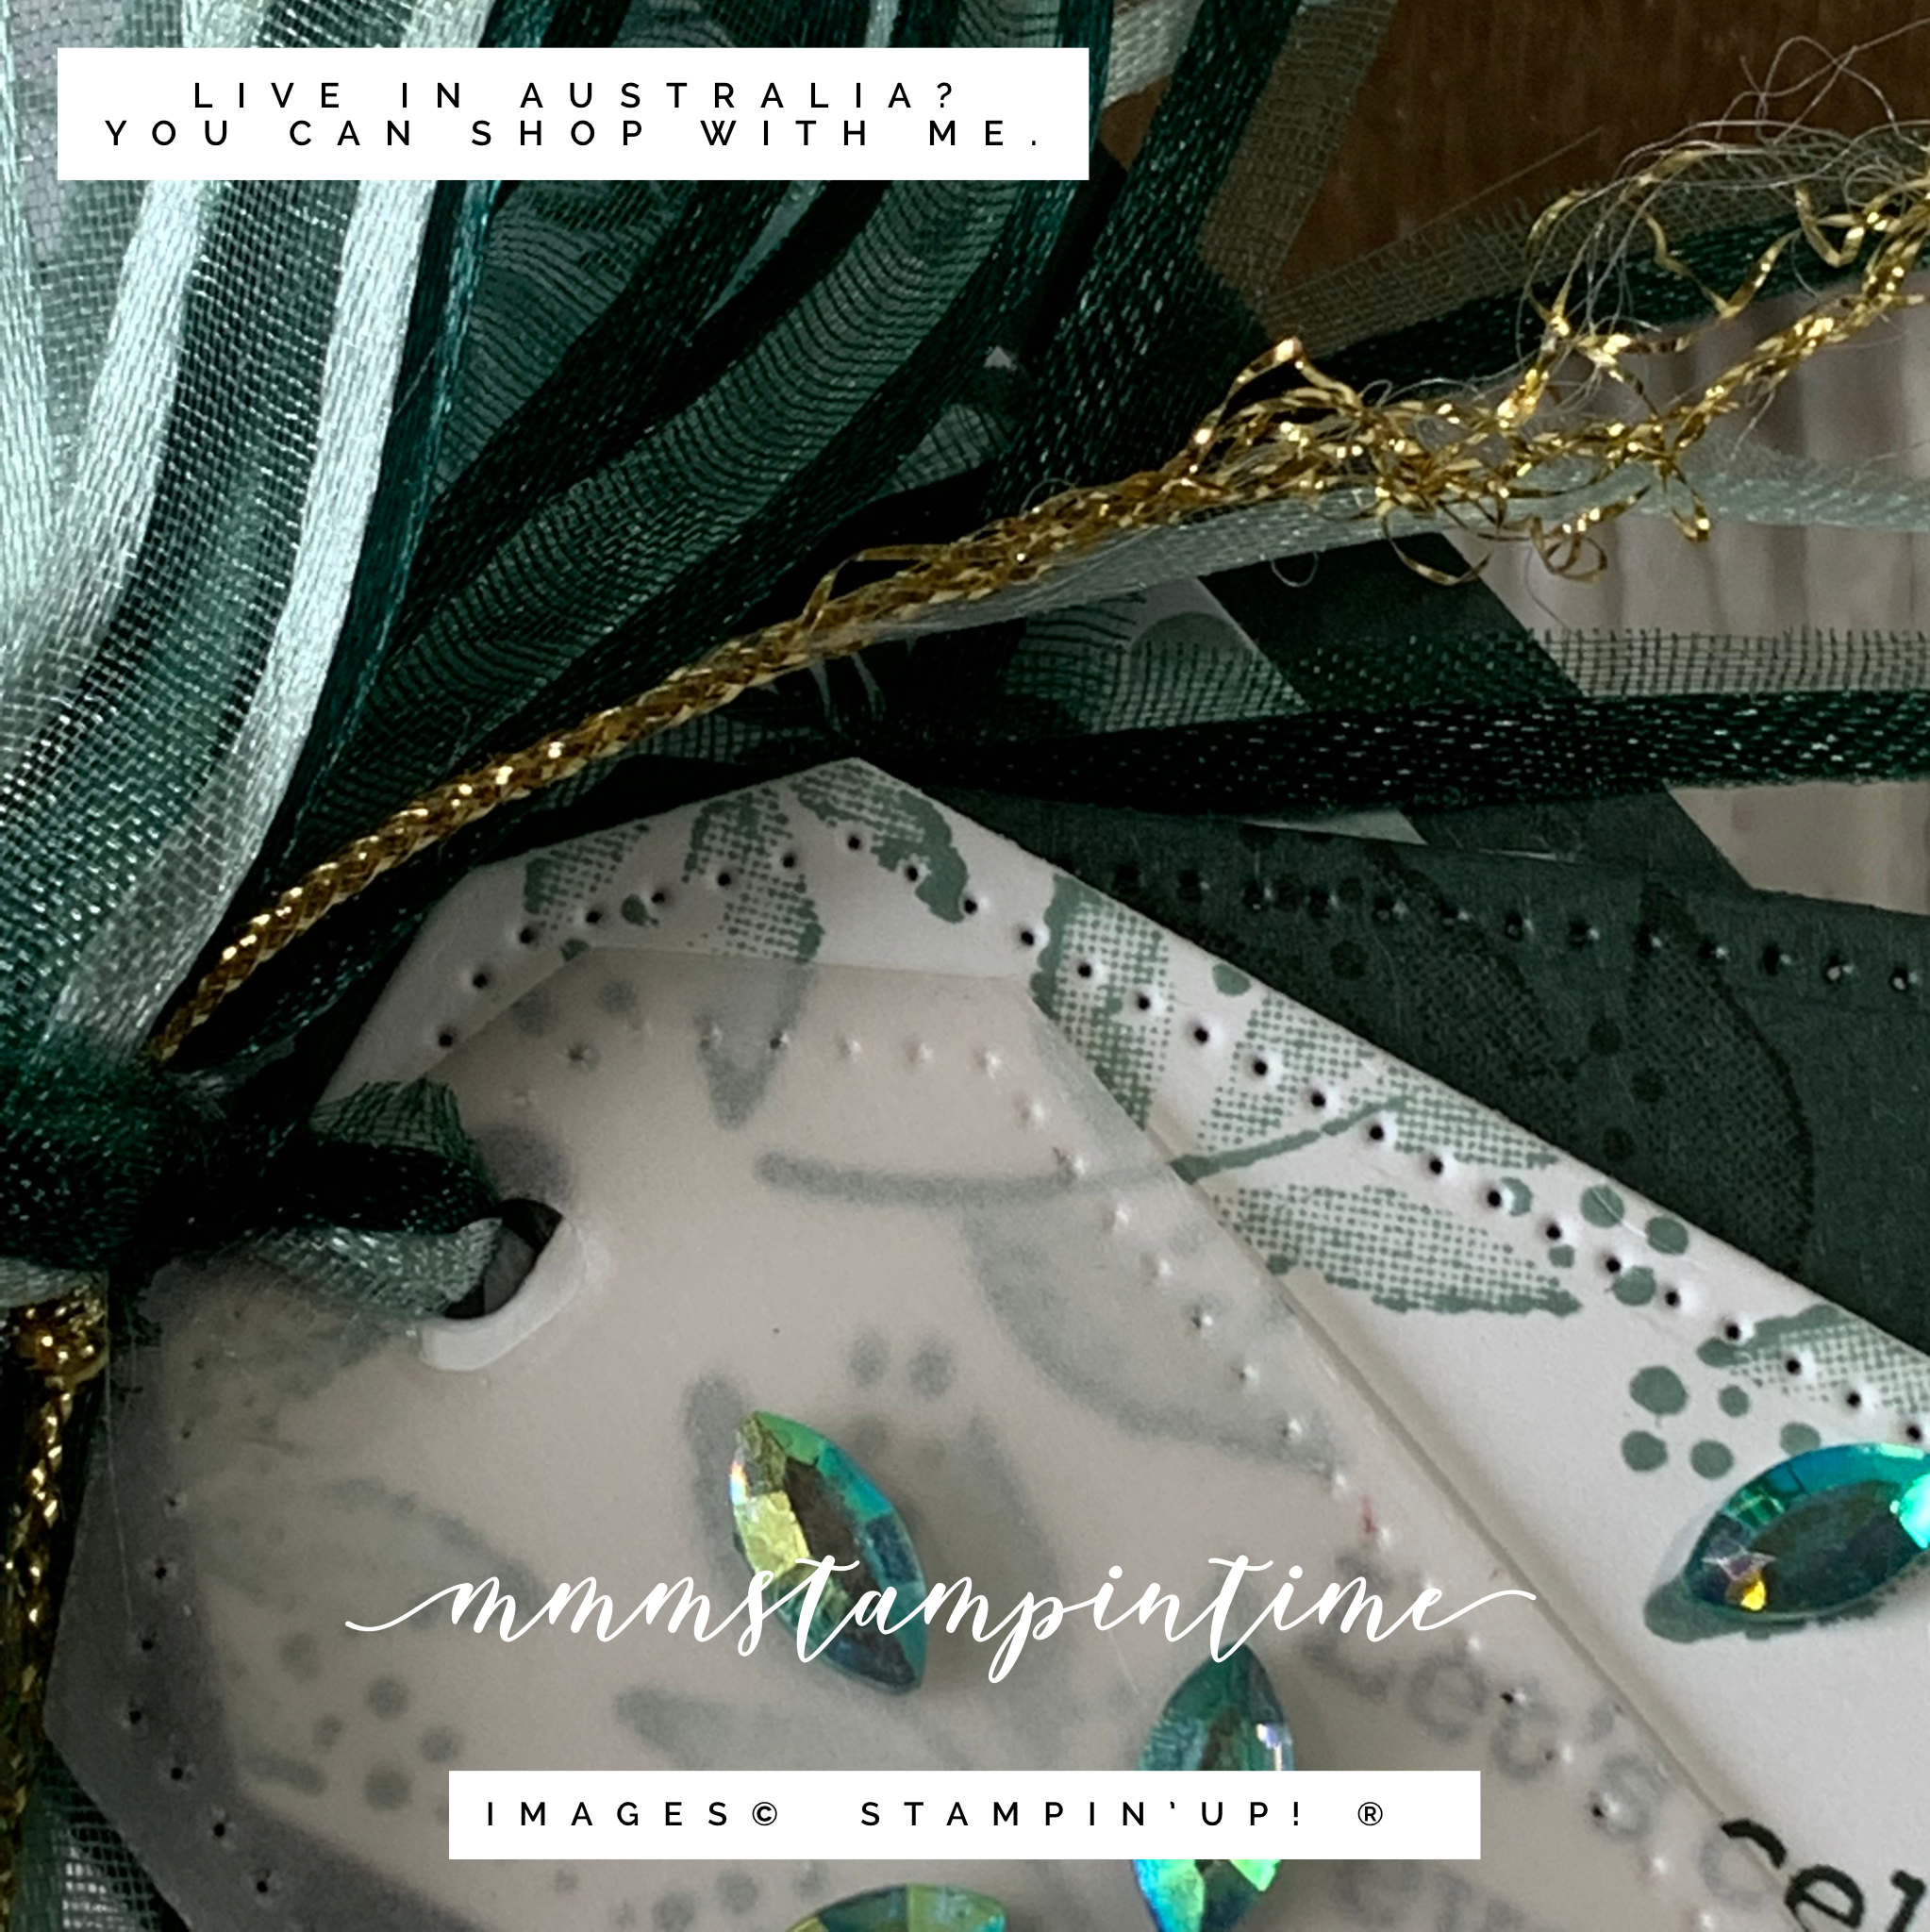
I punched a small hole at the top of the tag before threading some Bumblebee 2020 – 2022 In Colour Ribbon through the tag. The tag was then popped up with dimensionals and the ribbon wrapped and tied into a bow.

When the bow is untied the gift tags are revealed.

There are eight gift tags in total and they all have a Basic White backing with ‘to’ and ‘from’ stamped in coordinating colours.

I fussy cut each of the stockings that I chose from the DSP. The Whisper White Crinkled Seam Binding Ribbon was threaded through the top of each tag.

I used the Clear & Silver Epoxy Essentials to add some coloured shimmer to the tags.

I really like the colour combination in this suite and the playful images and ‘pawfect’ sentiments.

What is your favourite Christmas product in the July – December 2021 Mini Catalogue?

Until next time, happy stamping.

If you live in Australia, you can order any of the products I used to make this card by going to my online store. Just click on any of the images below.

Product List
Paper Snips
[103579]
$17.00
Posted on Leave a comment

A LITTLE JAR OF GOODIES

For today’s share I wanted to use the Mini Jam Jars and decorate it with the Ever Eden 12″x 12″ Specialty Designer Series Paper.

To do this I cut two strips of the DSP and one strip of Evening Evergreen Cotton Paper. These three strips were cut to different widths. Then I added Adhesive Sheets to the back of the paper.

I used the border die from the Eden Dies to cut each of the layers. After peeling away the adhesive sheet backing I layered the die cut pieces and then wrapped them around the jar.

The Soft Succulent Open Weave Ribbon was perfect to tie around the base of the jar.

For the lid of the jar I used the Layering Circles Dies to cut a scalloped circle in gold Metallic Specialty Paper and a slightly smaller circle in one of designs from the DSP.

I made the looped decoration for the lid by cutting a 12″ length of Soft Succulent Cotton Paper that is 3″ wide. Tear & Tape Adhesive was added to one of the 12″ sides of the paper. The paper was turned over and another length of Tear & Tape was attached to the opposite side.

Using a cutting blade and metal ruler the cotton paper was cut in quarter inch increments along the full 12″ length. When all the cuts were finished I removed the backing from one of the Tear & Tape strips. I folded the paper over and joined the two sides being careful not to pinch a crease into the loops.

The backing from the second strip of Tear & Tape and then rolled the length of loops to create the decoration. After teasing the loops open I attached the decoration to the jar lid.

Then I cut five of the leaves from the same gold paper and tucked them under the loops.

The jar is perfect for storing sweet treats.

This was a fun project to make and I was so pleased by how well the Adhesive Sheets secured the die cut layers to the jar.

Until next time, happy paper crafting.

If you live in Australia, you can order any of the products I used to make this card by going to my online store. Just click on any of the images below.

Because some of the products I have used to make this card are not yet available to customers, I am not able to show them at this time. As soon as product images go live, I will create this section.

Product List
Paper Snips
[103579]
$17.00
Posted on Leave a comment

A GOLDEN GIFT BOX

I decided that it was time to make a 3D project so today I have a gift box to share with you.

The Gold and Rose Gold Metallic 6″x 6″ Specialty Paper, in the Annual Catalogue, is stunning. I have teamed it with some of the Eden’s Garden Collection products.

The gift box measures 4″x 4″ and is 1″ deep.

I made the box first and then created the belly band by cutting a 2″ wide strip of Evening Evergreen card. Then I adhered a 1-1/2″ strip of paper from the Ever Eden Specialty Designer Series Paper. The band was wrapped around the box and I gently pinched it along each edge. I was then able to burnish that pinched crease to create four sharp corners for the belly band.

I created the bow by looping each of the four lengths of Open Weave Ribbon and held each loop in plce with a Mini Glue Dot (there are two Soft Succulent and two Evening Evergreen ribbons). The loops were then overlapped and tied tightly in the centre with a length of gold Simply Elegant Trim. Then I cut some lengths of the same ribbons in half lengthwise and tied them around the bow. Finally I unravelled the gold trim to create the individual filaments.

The sentiment, from the Eden’s Garden Stamp Set, was stamped onto a small piece of Basic White card stock using the Evening Evergreen ink. The leaves were stamped in Soft Succulent. Then I used one of the Tailor Made Tags Dies to cut the three tags that are attached to the top of the box. To keep the tags displayed this way I used Mini Glue Dots.

The last step was to add some Garden Gems to the tags. I love the marquise shaped gems!

Now I just need to find something gorgeous to pop inside the gift box. What would you put in the gift box?

Until next time, happy stamping and gift box making.

If you live in Australia, you can order any of the products I used to make this card by going to my online store. Just click on any of the images below.

Because some of the products I have used to make this card are not yet available to customers, I am not able to show them at this time. As soon as product images go live, I will create this section.

Product List
Paper Snips
[103579]
$17.00