Posted on Leave a comment

ANOTHER DAY, ANOTHER STAMP SET

This week I will be doing things a lttle differently. I will still be following my weekly schedule but instead of featuring one product bundle or suite, I will use a different stand alone stamp set. These are stamp sets that don’t have any coordinating products – punch, dies, Designer Series Paper or embellishments.

Yesterday and today, I will share projects that are both #simplestamping Saturday and Step It Up Sunday cards.

Today’s stamp set is Nuts & Bolts.

NUTS & BOLTS CLING STAMP SET

These little robots are so super cute.

This #simplestamping card uses Basic Gray and Crushed Curry Classic Stampin’ Pads and the Crushed Curry Stampin’ Write Marker.

These are the three stamps I have used for all of today’s note cards. The lines image is stamped on the envelope and inside the card.

For this card I used the Rectangular Postage Stamp Punch and Stampin’ Dimensionals.

Now a card for a casual stamper.

A casual stamper tends to have a few more tools in the craft collection.

This card also features the Pattern Party 12″x 12″ Designer Series Paper and uses the Layering Circles Dies.

Stepping the card up for an avid stamper, I have die cut the DSP to create a frame for the robot image. The DSP sits up on Stampin’ Dimensionals.

I wrapped a length of white twine from the Baker’s Twine Essentials Pack around the DSP and tied a small bow.

Another ink pad has been used and the ‘NUTS + BOLTS’ was cut out and popped up with dimensionals.

The Dark Granny Apple Green Stampin’ Blends pen was used to colour some round silver Silver & Clear Epoxy Essentials.

My last card is ideal for an Artfully Avid stamper. It features embossing, colouring and layers.

I used the stripes from the Stripes & Splatters 3D Embossing Folders for the background texture.

The Epoxy Essentials were with the Granny Apple Green Stampin’ Blends pen as well the the dark Misty Moonlight Stampin’ Blends pen.

Iused several Stampin’ Write Markers to create the patchwork colouring of this cute robot.

It was fun creating these five cards. I hope you like them. Which one is your favourite?

Tomorrow is Memories on Monday. I haven’t decided which stand alone stamp set I will use yet.

Until then, happy stamping.

If you live in Australia, you can order any of the products I used to make this card by going to my online store. Just click on any of the images below.

Product List
Crushed Curry Classic Stampin' Pad
Crushed Curry Classic Stampin’ Pad
[131173]
$11.50
Paper Snips
[103579]
$17.00
Posted on Leave a comment

SWITCHING THINGS UP THIS WEEK

This week I will be doing things a lttle differently. I will still be following my weekly schedule but instead of featuring one product bundle or suite, I will use a different stand alone stamp set. These are stamp sets that don’t have any coordinating products – punch, dies, Designer Series Paper or embellishments.

Today and tomorrow, I will share projects that are #simplestamping Saturday and Step It Up Sunday.

Today I have chosen the Mischievous Mice Stamp Set. It is one of two exclusive Host Stamp Sets from the 2022 January – June Mini Catalogue. To be able to order this set, you need to place an order, or host a workshop with orders, totalling a minimum of $250 (before postage). You then qualify for 10% Stampin’ Rewards and will earn $25 to spend. The Mischievous Mice Stamp Set is $22 ($37 value). These are Australian dollar prices.

MISCHIEVOUS MICE HOST CLING STAMP SET

This is such a cute stamp set.

Let’s start with a super #simplestamping card.

For this card I used a Basic White Notecard & Envelope, Memento Tuxedo Black ink, Basic Gray and Flirty Flamingo Water Colour Pencils, and a Blender Pen.

The balloon was stamped inside the card and on the front of the envelope.

For this card, I added some Flirty Flamingo cardstock to create layers. I stamped the mouse directly onto a layer of Basic White cardstock and then stamped the ballon on a scrap of Flirty Flamingo cardstock and fussy cut it. Then it was popped up using Stampin’ dimensionals.

For this card, I also used Pattern Party Designer Series Paper, Flirty Flamingo cardstock, black baker’s twine from the Baker’s Twine Essentials Pack, Flirty Flamingo and Smoky Slate Stampin’ Blends, and Silver & Clear Epoxy Essentials.

The balloon was stamped onto the Flirty Flamingo cardstock and it was fussy cut. I used Stampin’ Dimensionals to let the balloon float up from the card surface.

For this card, I used a different piece of DSP, the polka dot folder from the Checks & Dots Embossing Folder and some Matte Black Dots.

This is the last stepped up card today.

I have used another piece of the DSP, the Timeworn Type 3D Embossing Folder, white baker’s twine and Daffodil Delight Stampin’ Blends.

I stamped the birthday mouse and the cheese mouse and fussy cut both of them.

Well, that was fun! This is the cutest little stamp set.

Tomorrow, I am going to stay with cute stamp sets and use the Nuts & Bolts Stamp Set.

Until then, happy stamping.

If you live in Australia, you can order any of the products I used to make this card by going to my online store. Just click on any of the images below.

Product List
Paper Snips
[103579]
$17.00
Posted on Leave a comment

FUN FOLD FRIDAY IS BACK AGAIN

Today I have a Peekaboo Slider Card to share with you.

This is the first time I have made this fun fold card. I did some online research looking at Pinterest, Google images and YouTube. After seeing a couple of different styles, I opted for one that Lisa Curcio demonstrated in 2020. I adjusted her measurements to suit A4 cardstock.

Friday also means that this is the last project using the All Together Collections.

Lisa used a 2″ circle punch that is now retired so I swapped it for the Label Me Lovely Punch.

This card is made up of three separate pieces.

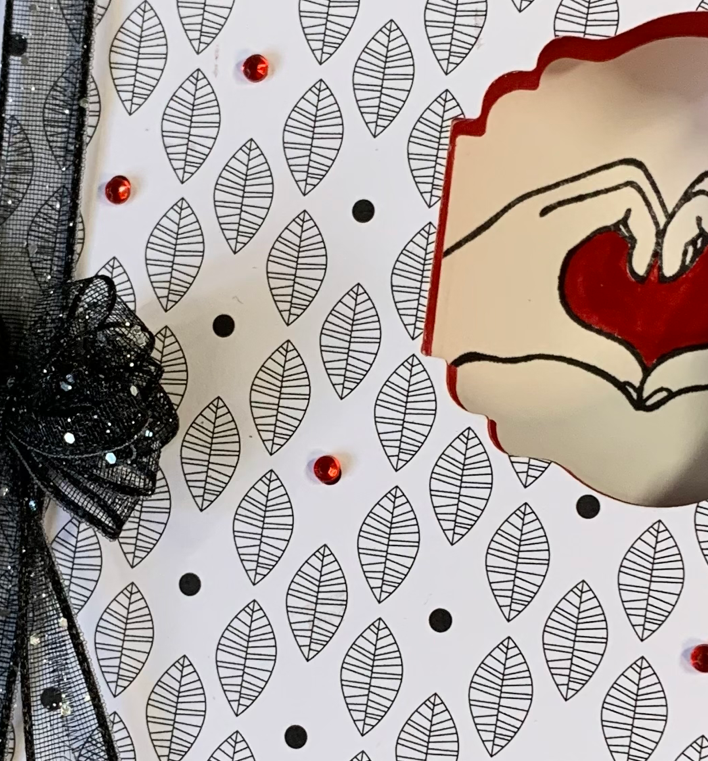
The first Real Red piece measures 8-1/8″x 4-1/8″ and is scored at 2-3/4″. It forms the front of the card and the slider piece that the sentiment is stamped on. A piece of All Together Designer Series Paper was adhered to the front before the top right hand corner was punched out.

The inside Real Red piece measures 8-1/4″x 4-1/8″ and is scored at 4-1/8″.

The back Basic White panel meaures 6″x 4-1/8″ and is scored at 5-3/4″.

The front and both sides of the inside panel are punched in the same place – so that you can see straight through them.

When you open the card, the 2-3/4″ Real Red section from the front panel slides across revealing a stamped sentiment. It was stamped on Basic White cardstock and punched out before being adhered directly in the space from the inside piece.

The inside Real Red piece had a piece of DSP adhered to the left hand half. I also attached a small panel of Basic White cardstock for a personal message to be written.

The leaf design on this DSP is my favourites from this collection. Lots of white space, beautifully shaped leaves, simple line drawing style and lots of black dots.

This view gives you an idea of how the three pieces of cardstock are connected. After all the DSP is adhered and the three identical spaces are punched out, this is how they are joined: the left hand side of the Real Red inside panel is glued along the right hand side front card panel, and then the 1/4″ scored area of the Basic White card back is adhered to the back of the right hand half of the Real Red card insert.

I have project on my list of new video tutorials to make. It should be easier to follow how to assemble the card by watching rather than the scant information above.

I used the Black Glittered Organdy Ribbon to create a #tammybow. A length of the same ribbon was wrapped around the card front and secured inside. The #tammybow was then attached using a Mini Glue Dot.

From tomorrow, I am going to vary my usual routine. I will still keep the daily project themes but will feature a stand alone stamp set from the 2022 January – June Mini Catalogue.

For #simplestamping Saturday and Step It Up Sunday, I will be featuring the Host Stamp Set Mischievous Mice.

Until then, happy stamping.

If you live in Australia, you can order any of the products I used to make this card by going to my online store. Just click on any of the images below.

Product List
Paper Snips
[103579]
$17.00